More Tanks

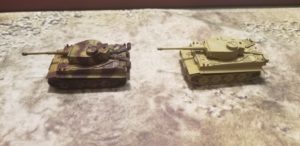
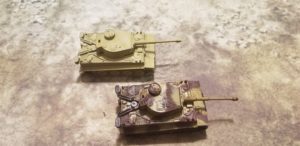
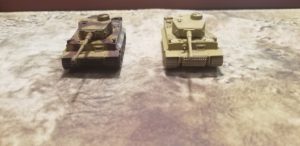
Working on my latest batch of Zvezda 1/100 (15mm) late-war German tanks.

After trying adhesive putty to delineate camouflage, using both brush and spray paint, I tried using a small sponge.

The sponge seemed to work best.  I used a couple of umber and black washes to gritty the tank up, and then a little bit of touch-up using a Q-tip.  I do enjoy tanks, because my lack of precision and technique can be superficially covered up by applying dirt, grime and weathering.

The result…. it “looks good on the table” (which is a miniatures equivalent of  “Bless His Heart”).

Here are some dynamic before and after shots taken in the usual crypt like lighting.


Destruction of Force Z – Wrap Up

My immediate interest in the game was triggered while reading The Royal Navy in Eastern Waters:  Linchpin of Victory, 1935-1942 by Andrew Boyd.  This is a very interesting and well researched examination of the events leading up to the Force Z debacle.  The author dispels many of the convenient myths surrounding the event.  Well worth the time and effort, especially if you can pick it up when on Kindle sale for $1.99 or so.

The game reminds me of In Magnificent Style, where you have to push your luck to the limit in order to achieve the intent of Force Z’s sortie.  I did this, especially when I reversed course and sailed towards the Japanese battleships, rather than “game” the system and eek out a minimal victory of just a few points.

To compound the British player’s problems, the chances of sinking the Japanese battleships is fairly low, and seemingly not worth the risk, despite the lucrative victory points.  Also, the odds of fighter cover actually materializing is relatively low, and anti-aircraft fire is fairly ineffective.  In this regard the game reflects the operational and tactical  factors leading to Force Z’s destruction.

The optional rules allow the British player some relief; limiting Japanese bomber availability on a per day basis, increasing the Repulse’s capability to avoid torpedoes, and including the carrier Indomitable to provide available and increased air cover.  I would consider a house rule making British surface attacks more effective and, perhaps, increasing the victory points awarded for bombarding the Japanese landing sites, since this was the mission of Force Z.

The rules are comprehensive and structured to guide the player.  This is good as there are simply too many charts and die rolls to remember.  This also enhances replayability because the player can just break out the game, dial up the rules, and start grinding through each turn’s eleven phases.  On the other hand, this grinding slows game play.  But, a typical game will probably not last too long if Japanese searches are effective.  In my instance, the British enjoyed ideal conditions (overcast weather, radio silence, and poor search rolls) and still had little success.

I like the random events and movement charts, and plan to use  variations  in other gaming situations.  The tactical display was fun because it reminded me of playing Midway back in (as it was called then) Junior High.

I’m now thinking about breaking out Avalanche Press’ Strike South and work through the scenario with more detail to reflect the different operational options historically explored by the British before 1942.  A comparison of the two systems will be interesting.

In summary, this is an engaging game providing excellent value and replayability.


Destruction of Force Z – Session Report

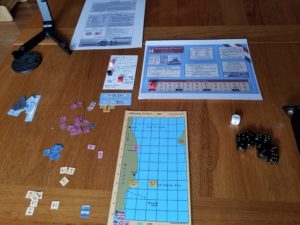
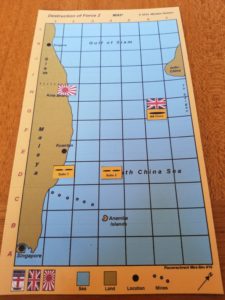
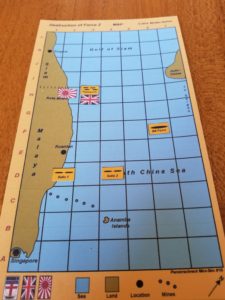
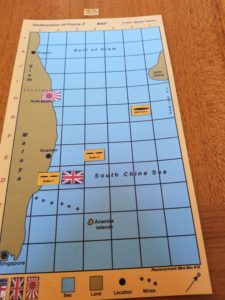
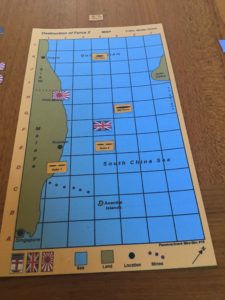
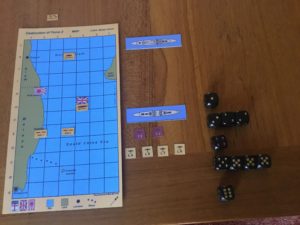
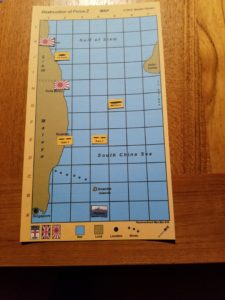
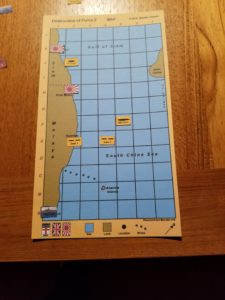
The game set up, along with the initial dispositions of both forces, is shown in the following photo.  The Japanese flag represents the amphibious landing at Kota Bharu.  Placement of the Japanese convoy, battleship and cruiser squadrons is determined during the Random Events Phase.  Force Z is represented by the British flag in Singapore.   The index card and colored blocks are used to keep track of weather and ship damage.

For the first three turns, Force Z moved east of the Anamba Islands,  then turning north towards the landing.  The Japanese were unable to locate Force Z, which was maintaining radio silence in the overcast weather, until it attacked the Japanese battleships (7 VPs) at night (Turn 4).  I couldn’t find anything specific in the rules, so I decided  Japanese surface units appearing during a turn couldn’t move, also.  Despite hitting the Japanese ships, no damage was inflicted.

After this inconclusive encounter, the British sailed at flank speed towards Kota Bharu to bombard the the landings.  The Japanese were still unable to locate Force Z, and could not prevent the destruction of  their offshore convoy which had appeared off Kota Bharu during the Random Events Phase (Turn 5).

After this success, the British steamed south towards Singapore, breaking radio silence to request RAF air cover (Turn 6).

At this point, the Force Z commander decided take advantage of darkness (Turn 7),  steaming north to again engage the  VP-rich Japanese battleships.  The Japanese cruisers entered the northern part of the map during the Random Events Phase.

Force Z moved into the Japanese square, forcing a surface engagement.  It was here that British luck ran out, as the Japanese search was a success, and no RAF fighter cover appeared to help fight off a massive level bomber and torpedo bomber attack.

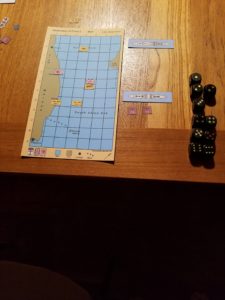
The following photo shows how I handled the “tactical” aspect of the game.

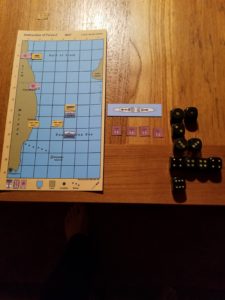
Both British ships were in the square, so each can be attacked by bombers.   D6 rolls determine the number of attackers and what ship(s) they attack.  The rolls indicated a mixed force of 12 torpedo and 25 level bombers, all of which  concentrated on the Prince of Wales.  The first attack was by the level bombers.  Each ship has a maximum of 10 d6 anti-aircraft rolls.  These rolls either eliminate attackers, or are indicate to hit modifiers.  Bombers need a modified roll of 10 to score a hit.  A further damage die roll is made for each hit.  The rolls are shown below.  I use the dice, rather than the tally sheet included with the game to record rolls, and then use the result to determine hits.  A die that “hits” is then placed above the “tactical display”, as a reminder of the rolls needed for determine damage.

The torpedo bombers were handled in a separate series of rolls.

The Prince of Wales somehow survived, taking five hits, two less than the number to sink. Five hits reduced its movement rate to one square per turn.  After this mayhem, a surface action occurred.  The Japanese battleships and Prince of Wales were unaffected, but the Repulse took one damage hit.

The Repulse was ordered back to Singapore, while the stricken Prince of Wales could only hope for a failed Japanese search, or the intervention of the RAF.  The ship was located and the RAF again failed to provide air cover.  The level bombers did not find the Prince of Wales, but the torpedo bombers did.   An attack by 27 aircraft sank the ship.

The Repulse continued south during the night (Turn 10), while the Japanese made another landing at Singora.

Repulse was able to return to Singapore before the Japanese Turn 11 Search Phase.  This ended the game.

The Japanese victory point total breakdown was:

  • +8 Points for sinking Prince of Wales
  • +1 Point for one hit on the Repulse
  • +1 Point for each Japanese landing
  •  -2 Points for the sunk convoy

The net is  9 Japanese victory points.  The historical total was 18 points.

Wrap-up in the next post.

Destruction of Force Z – Overview

Downloaded this  awhile ago over at Wargame Vault, based on reviews at Boardgame Geek.  It’s a Minden Games solitaire offering  originally published in Panzerschreck Magazine #16.

As is the case with most solitaire games, there are  lots of charts and wristage.  I skimmed the rules and decided to just start playing.  The rules are laid out in turn phase sequence, so I just set up the IPad beside the game and went at it.

Each turn consists of up to eleven phases.  These are:

  1. Weather – Roll 1d6 for either clear or overcast conditions.  Overcast is a +1 modifier for Japanese Search.
  2. Radio – British player can break radio silence.  In doing so loses a -2 drm during Japanese Search.  But, gains possibility of Air Cover to help attrit attackers.
  3. British Ship Movement – Can move up to 4 squares (cannot move diagonally) three times a game, or one-three squares.  Damage reduces movement.  During movement British ships can be attacked by minefields and/or submarines if in same hex.
  4. Random Events – Dictates appearance of Japanese transports, cruiser or battleship units.  Can also effect movement of Japanese submarines, shore landings or allow “shadowing” which is a -1 drm for Japanese Search.
  5. Japanese Ship Movements – Ships on map roll 2d6 for random one to two square movement.
  6. Japanese Search – Rolls 1d6 (3 or less) to sight British ship(s).
  7. British Air Cover – If Radio silence is broken, presence of air cover over British ships determined by die roll.  If present, roll 3d6 for number of fighters.
  8. Japanese Bomber – Includes both level bombers and torpedo bombers.  Roll 1d6 for contact.  If contact make separate 1d6 roll for number of level and torpedo bombers.
  9. Combat Phase – Roll 1d6 for individual attacks by Air Cover, then 1d6 Anti-Aircraft fire to eliminate/abort/or effect aim of bombers.  Then roll 1d6 for success by individual level bombers and torpedo bombers.
  10. Surface Battle – Takes place when opposing force ships in same square.  Roll 2d6 for hits and then 2d6 for effect(s).
  11. Bombardment – British in same hex can shell Japanese landing sites, automatically gaining victory points.

There are 18 different situations where wristage and charts are involved,  in addition to  Air Cover attacks, Anti-Aircraft, and Bombing attacks handled on an individual aircraft basis.

Having Second Front air phase flashbacks and may need this to get through a session.

W1815 – First Impression*

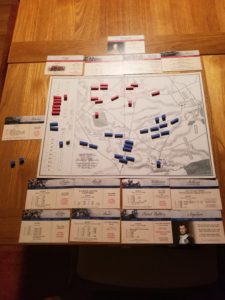
Woke up very early this morning.  After a round of depressing internet reading, I decided to get W1815 (The W is for Waterloo) up and running.   I was having problems comprehending the rules, so it seemed to be one of those cases where the only way to learn the game was to fumble and stumble through a session.

And fumble and stumble I did…….but I had some help.

W1815 has a real following over at Boardgamegeek.  The comments and reviews are positive and I  liked the Kriegsspiel/Table Battles blocks, quick-play and period topographic map.  So, I pre-ordered the 2nd Printing.  Forgot all about it, until I received an email in January that it was shipping.

The “help” was significant card errata.  Cards drive the game, so these errors changed the game. Still, I had fun playing, unaware at first that there might be problems.  But, the game played wasn’t the game as designed.

I hope to receive the replacement cards in the mail sometime soon.   Until then, I’ll make do with these.

* Is it “impression” or “impressions”?  Re-reading this I think it should be “impression”, because I really limit any opinion about the game to a product of deep thinking of the deepest type “fun”.

Serbia The Defiant – Pt. 2

Finished up with the August turns; all seven of them.  That makes for a long month! Scenario extends into December, but I want to move onto something else, and stalemate is imminent.

The A-H forces have made progress in the south (unlike their historical counterparts), and are threatening to envelope the Serbians.  Nothing subtle about the A-H advance.  Just kept pounding away, but there are supply problems looming.  Unsupplied units attack at half strength, and both sides have problems mustering overpowering attacks.

The northern A-H advance has stalled at the Kolubara River.  Serbian defenses will exact a -2 DRM because all A-H units must attack across the river.

Neither side will have much in the way of reinforcements, so the prospects of a breakthrough are fairly low.

Enjoyed this one  It’s a good learning scenario with a variety of terrain and low counter density.

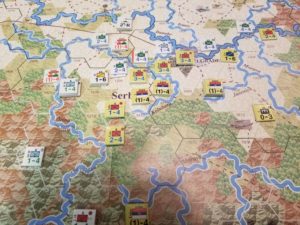
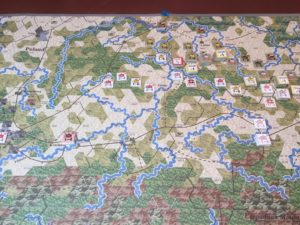
Here’s a photo of the situation at the end of September.

I’ve convinced Tim to play this during our next get-together.  The “Transylvania Gambit” scenario looks fun.  It has Greeks, Germans, Romanians, Bulgarians, A-H and Serbians!

Time To Go To Work

Finished up all the scenarios in Advanced Squad Leader Starter Kit (ASLSK) #2 – Guns.   On to ASLSK #3 – Tanks.

Not even Jay Richardson’s fantastic tutorial could soften the impact of my first reading of the AFV rules and charts.  Brain just shut down.

Well, it will be a long process, and I’ll no doubt avoid armor scenarios, or at least those with several vehicles.  But, it has to be done.  Must learn.  Need to find a way so that it doesn’t seem like work.

Serbia The Defiant

Started a new SPW module and scenario this week.  It’s the August-December 1914 scenario covering the initial fighting between Austro-Hungarian (A-H) forces and Serbia.  One BGG commentary summed it up; “weak units, bad terrain”.

Still, with a low counter density and few special scenario rules (except for the A-H  2nd Army which must re-deploy to attack the Russians), it is a quick and enjoyable play.

Once again, the rules mandate aggressive A-H moves during the first two turns.  The results so far have been relatively bloodless.  The terrain is very rough, with the only clear terrain found near Belgrade to the north of the map sheet.  However, the (universally criticized) historical deployment has the main A-H effort attacking through the mountains in the west, and river networks in the northwest.    This terrain provides excellent defensive opportunities for the outnumbered Serbs.

In this game, A-H forces are concentrating on the northwest sector of the Serbian defenses, and simply tying down Serbian and Montenegran units in the western mountains.

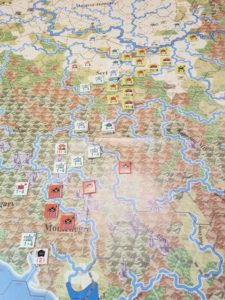
Here’s the situation after two turns, at the beginning of the August 5th turn.  Most of the units lying north and west of the Danube are with the 2nd Army, shortly to be recalled to the west to fight the Russians.  Montenagran units have a cranberry (?) color.

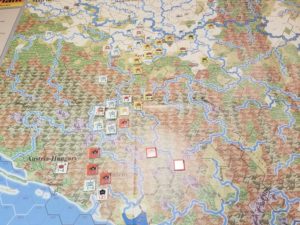
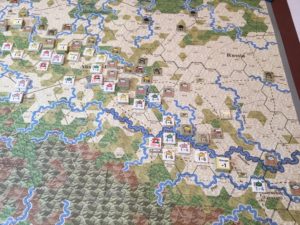
And, here’s a closeup of the northwest area, where A-H forces have been able to cross the Drina River.


Galacia – The Forgotten Cauldron – Scenario Finish

Finished up the other night.  It was a marginal Austro-Hungarian victory, based on casualties only.  No objectives were taken, but  the issue remained in doubt.  While losing on “points”, the Russians certainly had the upper hand when it came to capturing objectives.

In the East, the A-H  2nd Army is in danger of being rolled up along its right flank by the Russian 8th Army advancing towards its objective of Stanislav. The very strong Russian corps is obscured by the -1 strength marker for the top of the four, 4-4 units.

To the west, the A-H 3rd and 4th Armies are locked in combat with the Russian 3rd and 5th Armies.   Here, the Russian units are adjacent to their objective of Lemberg.

To the West, the A-H 4th Army is standing fast to the North of Fortress Przemyl, but its neighboring 1st Army is under extreme pressure, with little in the way of a Russian 3rd Army sweep towards its objective of Krakow.

A good game.  I already have “Serbia The Defiant” on the table and will start play this weekend.

Nordic Saga – Part II

An even later post to complete the account started in an already late post.

The game followed the standard Europa sequence, with the Axis phase first during the September I turn. Tim made some adjustments to his defenses, especially in the vicinity of Narvik. Regardless, the Allied landings went smoothly, with German air accounting for only one transport lost as well as one landing craft. Unfortunately, the lost transport contained the Headquarters for the 78th Division. In Europa, without a supporting headquarters, a regimental/brigade sized unit fights at one-half strength. The engineer unit was able to land at the port of Andennes, but would not be able to start work on the airfield next turn.  By turn’s end, this was the situation.
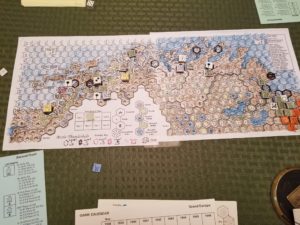
The September II turn went badly for the Allies. The weather turned, with stormy seas and mud creating rains. In this weather, beach landings are prohibited, ground movement is slowed, and engineering tasks take twice the time. This effected the Allied airfield construction and efforts to land reinforcements and supplies. Worse, the Germans were able to take advantage of the withdrawal of several Allied naval units from Narvik and overrun the leaderless and unsupported 78th Division.  No photographic record remains of this debacle.

The weather remained muddy, but with stormy seas continuing  The German units continued to pressure the Allies, but did not attack due to low odds.  The Allies were able to evacuate the remaining Narvik survivors, despite Axis bombing attacks.  The British were able to attack and destroy a German Penal Battalion at Bardufoss, but that was the limit of Allied successes.  The situation looked very grim for the Allies at the end of turn.
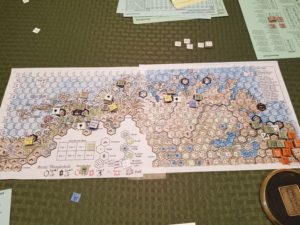
Things got worse with the weather roll at the beginning of the Oct II turn:  Snow.  Sea conditions became marginally better, with rough conditions.  Allied air units landed at the new Andennes airfield, but ground forces were unable to make any real progress against the German defenses.
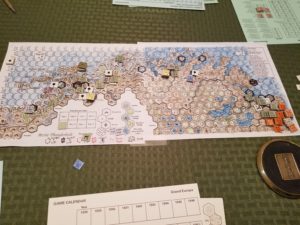
The Nov I weather roll for snow and stormy seas effectively ended the game, as the Allies were now unable to resupply their forces over beaches and movement was severely restricted.

This was a painful experience.  The Europa naval rules are tortuous, especially when coastal defenses, danger zones and minefields are involved.  The game becomes a slog, and because of this, no longer is a “game”, but a simulation.

The  simulation makes it clear obvious why Operation Jupiter never happened.  The dependence on good weather beginning in October is enough to make the entire proposition marginal at best.  Add into this demands for naval resources that require the withdrawal of units that provide significant naval gunfire support, as well as critical landing craft for troop buildup and resupply, add to the “options of difficulties”.

Churchill wanted to do it and Hitler thought he would do it.  Reason prevailed on the Allied side, but significant resources were still poured into Norway’s defenses.  Was this irrational, or did Hitler’s fixation prove to be a deterrent?

I hope Tim will post up with his thoughts.  But here, briefly, is what we discussed right after I threw in the towel.
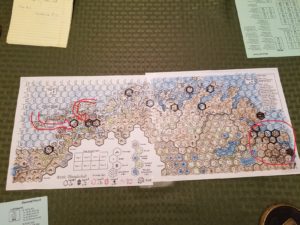
I have circled the northern part of the map to represent the positions of Soviet troops.  They are too few, the German positions to well fortified, to do anything more than tie down assets that could be used against the landings to the south.

The Narvik landings could have taken place to the west, with the forces crossing the narrow straits.  This would slower, but might allow a greater buildup of troops using minor ports.  Again, with time of the essence, I chose a more direct approach.

Me, I’m just glad the game, and these posts, are done.  OOFTA!