Category Archives: Naval

Prolonged Absence

Yes, another one.  Function of lassitude (February) as well as South American cruise (March).

The cruise started in Valparaiso, Chile, then along the coast of Chile, around Cape Horn, ending in Buenos Aires.  It was a lot of fun.  The only exception was the badly executed tour of the Falkland battlefields.

The itinerary included cruising the fiords of Patagonia as well as the Beagle Channel and Straits of Magellan.

Our on-land adventures left me with the impression that there is no love lost between Argentina and Chile.

This got me thinking about the South American naval rivalries/races of the late 19th and early 20th century.

Right after returning home, I dug out my copy of Avalanche Press’ “Cone of Fire” module for their Great War At Sea series.  A quick glance at the scenario booklet seemed to indicate there were no scenarios covering a turn-of-the-twentieth century hypothetical encounter.

So, I consulted some sources I have here at home, as well as searching on-line.  Lots of information to process.  This article provided  a helpful summary.  This article provides a wider perspective.

I decided to build a scenario using “Operation Soberania” as a guide.  This is the 1978 Argentinian plan to occupy contested islands in Patagonia.  Same operational situation, just later in the 20th century.

Of course, after all of this,  a second reading of the booklet revealed specific scenarios including  force compositions.  My excuse for missing these is the scenarios are not presented in chronological sequence.  Weak.

Still, the “unnecessary” research was time well spent.  I have a better overall knowledge of the topic.

I’m tempted to link the naval action with  ground combat on the contested islands using the old “Rifle and Sabre” rules for late 19th century.  Counters represent 100+/- soldiers and artillery batteries. Might be fun.

Well, as always,  the trick is to get it on the table.

SOPAC – Finished

Yes, wrapped up…….with an unanticipated and very abrupt ending.

As usual, it was as function of (another) rules/scenario comprehension (or lack of) gaffe.

I forgot that in this scenario, neither side is affected by “Interservice Rivalry”.  This status has a significant impact on gameplay as these rivalries preclude activating both Army and Naval units in the same turn/offensive.  In SOPAC, the bulk of the respective naval forces are located in the New Hebrides and Solomons, while army units are in New Guinea/Australia.

Given card draws, the relatively weak strength of US naval forces during the first few turns, and this apparent operational limitation, the Allies had focused on New Guinea, with positive results.

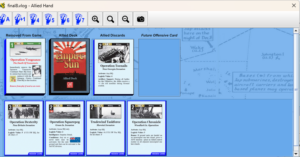
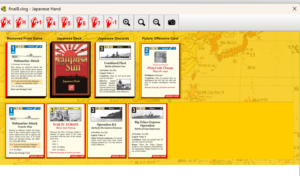
Here are the card draws for Turn 5.  Note that starting with Turn 5, the Allies have the first card play.  The Japanese can override that by playing a Future Offensives Card – which they do have (that might have been a good play…dunno).

The Japanese Navy started the action off by activating their Solomon air assets for another pounding of Henderson Field.  The Allies refused to react with their carriers, so the only opposition was two Marine air units (in EOTS any units in the Battle Hex have to participate in combat, but  do not have to be activated to do so – which is a bonus because more “outside”  units can be activated to participate).

The preceding paragraph only tells part of the story.  The initial Allied response  was to react.  Not a good idea.  The Japanese had roughly 60 attack factors, with the Allies only able to muster 40.  The would have probably been a big BLAMMO, with crippling comparative losses for the Allies.  I love the “Undo” icon.

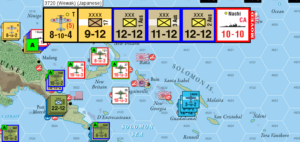
Meanwhile, the Allies continued their aggressive attacks in New Guinea, destroying the understrength corps that had arrived in New Guinea during the Replacement Phase of Turn 5.  Note the participating Japanese naval unit.  Another rules gaffe.  While I now recognized  interservice rivalries were not in effect, I forgot naval gunfire support applied only to the offensives player, not the reaction (defensive) side (if the offensive player has the only naval unit in the Battle Hex during ground combat, he/she enjoys a +2 combat die roll modifier).

The ensuing combat destroyed the 9-12 Japanese Army unit, ending any effective ground resistance (there still is a weak Japanese Naval Infantry unit just off the photo to the west (left)).

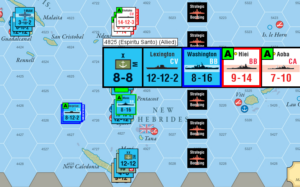
The Japanese response was to launch an all-out attack on the Allied naval units in the New Hebrides.  The Allies had no choice but to  react.

The VASSAL die-bot rolled high for the Allies and low for the Japanese.  The Japanese sailed back to Truk without the  Yamato and with damaged surface units.

Again, the preceding paragraph is just part of the story.  I initially used the Allied Central Pacific Headquarters to activate naval units.  This HQ can add three units to the activation force, but……..and this is important……it can only activate units in the New Hebrides.  This meant the The Wasp, now situated in New Guinea as part of the dispersion of naval assets to prevent catastrophic loss early in the game, could not join the reaction force.  Neither could the Army’s long-range bomber units.

However, Genius Boy had forgotten that the Halsey Card had been put in play earlier in the game.  Halsey’s South Pacific HQ can also add three units to the reaction force, and is not limited to the New Hebrides.  Add the Wasp and Army air, and the Allies strength was increased by 16.  Significant.

I shut the game down for the night, and returned to it the next day.  Mulling the options there seemed to be no way the Japanese could win.  The Allies now controlled three additional ports, and any Japanese counteroffensive would have to wait until they received replacements (a 9-12 reduced corp) for Turn 6.  While theoretically feasible, this attack would face strong ground units and a significantly reinforced US fleet.

Now it’s on to the Burma Scenario.

SOPAC – It’s Never Over Until…….

“Finally Finished”‘?  No……

Was reviewing the rules last night while preparing for my new session.  I was feeling pretty good about myself.  And then I discovered two more rules gaffes.

  1.  You can’t play a Future Offensives Card as your last play of the turn.  Both sides did this for the decisive Turn 6 .  Might have made a difference.  I’m not going to do a post mortem to find out.
  2. The elimination of a US division or brigade in an attack negatively affects Political Will.  Again, no post mortem, but I’m pretty sure at least one was wiped out.  I do remember an Australian Corps was destroyed, but their elimination does not affect Political Will.

Sigh……..

SOPAC So Far – Reboot

Made it through the first turn of the SOPAC scenario (which is Turn 3 of the campaign game).

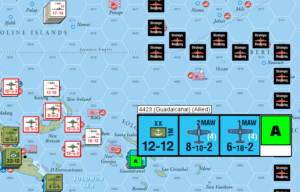
I’m pretty good with the Offensives Phase of the Sequence of Play.  Did have a major revelation, though.  Apparently any movement of a unit is considered an Offensive, and the destination is declared a Battle Hex.  So, my movement of two air units to a different base in Australia (see map screenshot below) results in that destination being declared a Battle Hex, with the possibility of the opponent making a Reaction Move if opposing units are within range.

Will have to do some research over at Boardgamegeek to confirm/deny this interpretation.

In any event, the Allies have landed at Guadalcanal, reinforced the initial landing, as well as moving units to New Guinea in preparation for an offensive out of Port Moresby.  The Japanese attempt to defeat the initial Guadalcanal landings with air and naval forces out of Rabaul was turned back with losses on both sides.

Any Japanese efforts during this initial turn are limited as the bulk of the Combined Fleet is in home waters, and not available until the following turn.  The Allies will also receive significant naval reinforcements during Turn 4.  Should be interesting.

Here’s a Vassal screen shot for the end of Turn 3.  The Area of Operations (AO) is outlined in the bottom right corner.

SOPAC – So Far

As threatened, I’ve plunged into  VASSAL to play Empire Of The Sun’s (EOTS) “South Pacific” scenario.

Turned out to be double learning curve.  First curve is working with VASSAL.  Have  made a couple of half-hearted attempts in the past, without any sustained or focused play.  As to the scenario, I was surprised how quickly I’d forgotten the rules since my last play with Tim back in July.

In retrospect, I should have read that post.  Repeated a couple mistakes I had noted.

This is a great learning scenario that allows you to focus on card draw mechanics, activation, movement and both air/naval, as well as ground battle phases in just one area of the map.  While the scenario allows for play (and the significant rules overhead involved) in the  China/Burma theaters, those regions are not critical for achieving victory.

VASSAL’s Log function is handy for “What the Hell have I done” references as it  records everything you do.  It also documents but  your “back button” adventures when the player decides to “un-do” a previous decision.  Vacillation can be amusing.

You can quickly change sides, which makes solitaire play a breeze.

I also like the screen shot option, which I intend to use for this blog as soon as I reset my first game.

More later…Game One of the World Series is starting……

At Sea

Had a nice visit with Tim the other weekend.  We set up the South Pacific scenario for Empire Of The Sun.  This scenario is included in the latest edition, and also published separately in C3i Magazine.

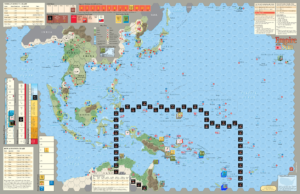
We played the Plan Orange variant, also published in C3i, a few months ago.  Plan Orange posits an early 1930’s conflict and focuses on surface combat, with very limited air assets.  It’s a great way to “lean into” the system and did whet our appetite for more.  Good marketing.  There’s also a Burma variant, which just doesn’t appeal to me (as one BGG Comment contributor put it “just play the 1943 scenario on the big map” .

The South Pacific scenario has its own small map,  relatively low counter density and limited scope.  It’s perfect for a fun weekend and our proclivity for multiple resets.

And reset we did.  Were able to get three “games” in, none played to conclusion, due to rules and/or strategy miscues.  It’s always a learning experience.  In fact, our we did our first attempt “by the numbers” reading through each step using the Play Aids.

There are plenty of reviews out there, so I’ll focus on my personal lessons learned (that I can remember).

  1.  Read And Understand The Damn Cards:  Lots of information to digest and implement.
  2. Airfields Are Really Important:  Should be obvious, especially if one has read about the Bismarks Campaign.  They are focal points for operations, and extremely valuable for staging air assets to a Battle Hex.  Fundamental but sometimes forgotten.
  3. Understand The Sequence Of Assigning “Hits”:  Escort your carriers with plenty of surface vessels as they will absorb most, if not all, of the damage inflicted.
  4. Remember You Can Attrit Ground Units With Only Air Power:  You can’t kill them, but air attacks (CV or Land-Based) can flip them to the reduced side.  A possible strategy before an amphibious assault.
  5. Be Cool With the Air Naval Combat  Results Table:  Shown at the upper right hand corner of the link.  This is my least favorite part of the game.  So….you meticulously craft your offensive, are mindful of terrain etc and have the odds you want, but then have to roll on this bastard.  Roll a “One” and Blammo!, now at 50 percent strength. Ugh!!!
  6. Remember Inter-service Rivalries:  A big part of the game.  Both sides can rarely use both naval and army assets in the same offensive.

Back to Item 5.  I think I understand the rationale.  Take Midway (please).  Only a fraction of the US naval air even found the Japanese fleet.  And, when they did, the attacks were uncoordinated.  So, a reduction in combat effectiveness due to the unforeseen is not unreasonable at all.

Tim and I were so fired-up we’ve decided to play on Vassal.  I’ve started that process and……it’s a process.

Change Of Pace

Took a long time to recognize the benefits of Kindle.  Light-weight, portable and saves a lot of shelf space, especially when there is no shelf space left.

There are countless really good, cheap,  military books out at Amazon.    Boardgame Geek’s  Daily Kindle Deal is a great resource that identifies on-sale titles.  It makes dropping cash way too easy.   I’ve set a limit of $2.99 for a book, but that has to be a really good one, with most of my purchases at $1.99.

Which brings me to the point of this post…..

A few years ago I started seriously reading about naval warfare.  At first, it was historical, but now I am equally interested in current naval affairs.  The genesis of that interest must have been my cruise experiences arriving in ports and seeing warships berthed there.

One of the leaders in both historical and current naval affairs  is Seaforth Publishing.  Many of their titles have been available on Kindle for pennies on the dollar.  Yes, the format may not be that great as the books are illustration heavy, but the scope of their titles is fantastic.  Print copies are available from time-to-time at a significant discount, also.

Another great source is Naval Institute Press.  The books are spendy, so it’s an annual resource for me.   They have a Holiday Season sale in December where many of their titles are fifty (50) percent off, with free shipping!

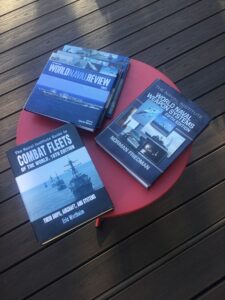
Here’s a quick picture of my modern naval purchases.

Destruction of Force Z – Wrap Up

My immediate interest in the game was triggered while reading The Royal Navy in Eastern Waters:  Linchpin of Victory, 1935-1942 by Andrew Boyd.  This is a very interesting and well researched examination of the events leading up to the Force Z debacle.  The author dispels many of the convenient myths surrounding the event.  Well worth the time and effort, especially if you can pick it up when on Kindle sale for $1.99 or so.

The game reminds me of In Magnificent Style, where you have to push your luck to the limit in order to achieve the intent of Force Z’s sortie.  I did this, especially when I reversed course and sailed towards the Japanese battleships, rather than “game” the system and eek out a minimal victory of just a few points.

To compound the British player’s problems, the chances of sinking the Japanese battleships is fairly low, and seemingly not worth the risk, despite the lucrative victory points.  Also, the odds of fighter cover actually materializing is relatively low, and anti-aircraft fire is fairly ineffective.  In this regard the game reflects the operational and tactical  factors leading to Force Z’s destruction.

The optional rules allow the British player some relief; limiting Japanese bomber availability on a per day basis, increasing the Repulse’s capability to avoid torpedoes, and including the carrier Indomitable to provide available and increased air cover.  I would consider a house rule making British surface attacks more effective and, perhaps, increasing the victory points awarded for bombarding the Japanese landing sites, since this was the mission of Force Z.

The rules are comprehensive and structured to guide the player.  This is good as there are simply too many charts and die rolls to remember.  This also enhances replayability because the player can just break out the game, dial up the rules, and start grinding through each turn’s eleven phases.  On the other hand, this grinding slows game play.  But, a typical game will probably not last too long if Japanese searches are effective.  In my instance, the British enjoyed ideal conditions (overcast weather, radio silence, and poor search rolls) and still had little success.

I like the random events and movement charts, and plan to use  variations  in other gaming situations.  The tactical display was fun because it reminded me of playing Midway back in (as it was called then) Junior High.

I’m now thinking about breaking out Avalanche Press’ Strike South and work through the scenario with more detail to reflect the different operational options historically explored by the British before 1942.  A comparison of the two systems will be interesting.

In summary, this is an engaging game providing excellent value and replayability.


Destruction of Force Z – Session Report

The game set up, along with the initial dispositions of both forces, is shown in the following photo.  The Japanese flag represents the amphibious landing at Kota Bharu.  Placement of the Japanese convoy, battleship and cruiser squadrons is determined during the Random Events Phase.  Force Z is represented by the British flag in Singapore.   The index card and colored blocks are used to keep track of weather and ship damage.
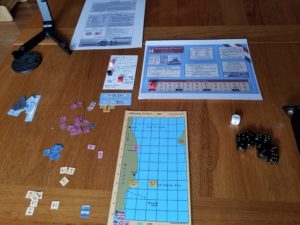
For the first three turns, Force Z moved east of the Anamba Islands,  then turning north towards the landing.  The Japanese were unable to locate Force Z, which was maintaining radio silence in the overcast weather, until it attacked the Japanese battleships (7 VPs) at night (Turn 4).  I couldn’t find anything specific in the rules, so I decided  Japanese surface units appearing during a turn couldn’t move, also.  Despite hitting the Japanese ships, no damage was inflicted.
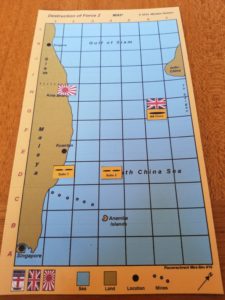
After this inconclusive encounter, the British sailed at flank speed towards Kota Bharu to bombard the the landings.  The Japanese were still unable to locate Force Z, and could not prevent the destruction of  their offshore convoy which had appeared off Kota Bharu during the Random Events Phase (Turn 5).
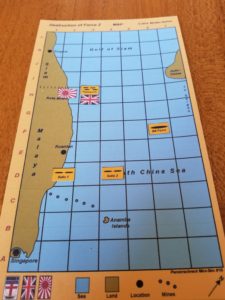
After this success, the British steamed south towards Singapore, breaking radio silence to request RAF air cover (Turn 6).
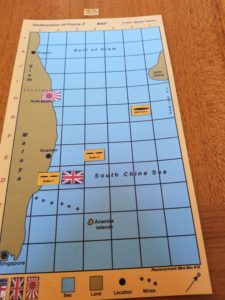
At this point, the Force Z commander decided take advantage of darkness (Turn 7),  steaming north to again engage the  VP-rich Japanese battleships.  The Japanese cruisers entered the northern part of the map during the Random Events Phase.
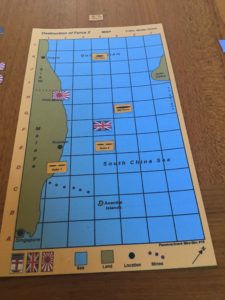
Force Z moved into the Japanese square, forcing a surface engagement.  It was here that British luck ran out, as the Japanese search was a success, and no RAF fighter cover appeared to help fight off a massive level bomber and torpedo bomber attack.

The following photo shows how I handled the “tactical” aspect of the game.

Both British ships were in the square, so each can be attacked by bombers.   D6 rolls determine the number of attackers and what ship(s) they attack.  The rolls indicated a mixed force of 12 torpedo and 25 level bombers, all of which  concentrated on the Prince of Wales.  The first attack was by the level bombers.  Each ship has a maximum of 10 d6 anti-aircraft rolls.  These rolls either eliminate attackers, or are indicate to hit modifiers.  Bombers need a modified roll of 10 to score a hit.  A further damage die roll is made for each hit.  The rolls are shown below.  I use the dice, rather than the tally sheet included with the game to record rolls, and then use the result to determine hits.  A die that “hits” is then placed above the “tactical display”, as a reminder of the rolls needed for determine damage.
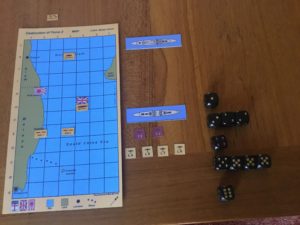
The torpedo bombers were handled in a separate series of rolls.
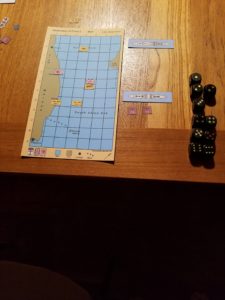
The Prince of Wales somehow survived, taking five hits, two less than the number to sink. Five hits reduced its movement rate to one square per turn.  After this mayhem, a surface action occurred.  The Japanese battleships and Prince of Wales were unaffected, but the Repulse took one damage hit.

The Repulse was ordered back to Singapore, while the stricken Prince of Wales could only hope for a failed Japanese search, or the intervention of the RAF.  The ship was located and the RAF again failed to provide air cover.  The level bombers did not find the Prince of Wales, but the torpedo bombers did.   An attack by 27 aircraft sank the ship.
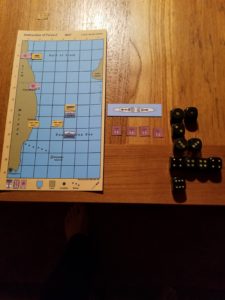
The Repulse continued south during the night (Turn 10), while the Japanese made another landing at Singora.
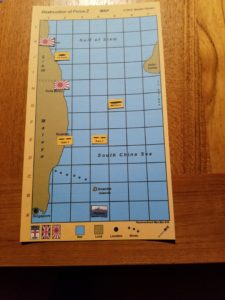
Repulse was able to return to Singapore before the Japanese Turn 11 Search Phase.  This ended the game.
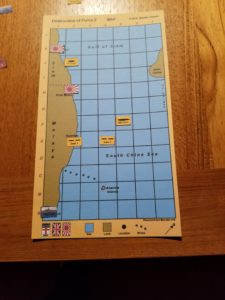
The Japanese victory point total breakdown was:

  • +8 Points for sinking Prince of Wales
  • +1 Point for one hit on the Repulse
  • +1 Point for each Japanese landing
  •  -2 Points for the sunk convoy

The net is  9 Japanese victory points.  The historical total was 18 points.

Wrap-up in the next post.
Destruction of Force Z – Overview

Downloaded this  awhile ago over at Wargame Vault, based on reviews at Boardgame Geek.  It’s a Minden Games solitaire offering  originally published in Panzerschreck Magazine #16.

As is the case with most solitaire games, there are  lots of charts and wristage.  I skimmed the rules and decided to just start playing.  The rules are laid out in turn phase sequence, so I just set up the IPad beside the game and went at it.

Each turn consists of up to eleven phases.  These are:

  1. Weather – Roll 1d6 for either clear or overcast conditions.  Overcast is a +1 modifier for Japanese Search.
  2. Radio – British player can break radio silence.  In doing so loses a -2 drm during Japanese Search.  But, gains possibility of Air Cover to help attrit attackers.
  3. British Ship Movement – Can move up to 4 squares (cannot move diagonally) three times a game, or one-three squares.  Damage reduces movement.  During movement British ships can be attacked by minefields and/or submarines if in same hex.
  4. Random Events – Dictates appearance of Japanese transports, cruiser or battleship units.  Can also effect movement of Japanese submarines, shore landings or allow “shadowing” which is a -1 drm for Japanese Search.
  5. Japanese Ship Movements – Ships on map roll 2d6 for random one to two square movement.
  6. Japanese Search – Rolls 1d6 (3 or less) to sight British ship(s).
  7. British Air Cover – If Radio silence is broken, presence of air cover over British ships determined by die roll.  If present, roll 3d6 for number of fighters.
  8. Japanese Bomber – Includes both level bombers and torpedo bombers.  Roll 1d6 for contact.  If contact make separate 1d6 roll for number of level and torpedo bombers.
  9. Combat Phase – Roll 1d6 for individual attacks by Air Cover, then 1d6 Anti-Aircraft fire to eliminate/abort/or effect aim of bombers.  Then roll 1d6 for success by individual level bombers and torpedo bombers.
  10. Surface Battle – Takes place when opposing force ships in same square.  Roll 2d6 for hits and then 2d6 for effect(s).
  11. Bombardment – British in same hex can shell Japanese landing sites, automatically gaining victory points.

There are 18 different situations where wristage and charts are involved,  in addition to  Air Cover attacks, Anti-Aircraft, and Bombing attacks handled on an individual aircraft basis.

Having Second Front air phase flashbacks and may need this to get through a session.