Category Archives: World War II

Painful. But It Must Be Done! Fall of France Through May I Turn

I’ve bitched about my Fall of France (FoF) game with Tim, but I am now compelled to report it.

As usual with this site, the graphics will be less than ideal, a condition due in equal parts to my ambivalence towards pushing the boundaries of computer literacy and reliving a wargaming hell.

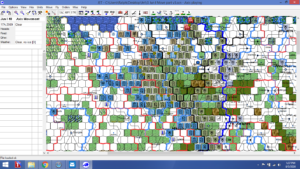
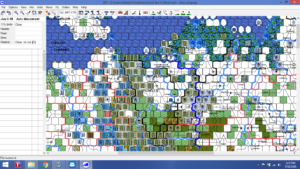
I was able to figure out how to get screenshots on my ancient Dell Windows 8 machine.  However, the screen shots of the JET board are just that; a shot of what is on the screen.  The JET mapboard takes up more than the screen, so the graphic evidence of this debacle will be from north of Frankfurt.  That’s  OK, because that it is where most of the carnage occured and is continuing to occur. We are now in the Allies Jun II turn, and things are looking very grim for the Allies.  But….. we must start at the beginning.

The Germans have  extremely powerful air and ground units.  The screenshots show only the top unit in the hex.  But, below that scary surface, lies even more panzer divisions, supported by motorized units, lots of motorized flak and artillery.

One revelation was how tough the German infantry stacks were.  Three 8-8 infantry, paired with artillery represents a lot of combat power.

Allied units are solid, but lack  mobility, flak and supporting units.I shudder when I think about the German’s powerful ground attack air assets used to support these armored and infantry forces.

Then, there are the historically based operational rules.  They create a difficult framework for the Allies to work within.

The Germans start off with an invasion turn, which includes all normal Europa turn phases except the exploitation phase.

The Allies do have a reaction phase. However, this is scripted because most northern French units and those of the BEF must enter Belgium  to occupy the Dyle River Line, setting up the historical “Sickle Cut”.

While Dutch and Belgian units can move during this Allied reaction phase, they cannot enter enemy zones of control.

With the Allies sucked into Belgium, the Germans start the regular  May I  turn.During the Allied player May I turn,  no unit in an enemy ZOC (Zone of Control) can move, and all British or French units have their movement factors halved.

The Allies are further hampered by the inability of their combat / motorized units to attack a full-strength or move using full movement during their exploitation phase until the beginning of the June I turn.   This reflects a lack of mechanized doctrine.

To make things even worse, during the May I turn any French  non-mech/motorized unit has to retreat two hexes rather than one if it has fought  an attacking German force with at least one panzer division.

One other note about the graphics.  As I mentioned, JET is a real marvel.  However, it cannot do several things within the rules as written Europa framework.  The result is that you have to tweak things, and the file you forward may have a heading (found in the upper left hand corner of the screen) that isn’t quite accurate.  An example:  You cannot fly CAP (Combat Air Patrol) during the Initial Phase.  You have to cheat, and “fool” the machine by forwarding to your Movement Phase, where it is allowed.  So, on the files shown, the heading on the screen may show “German Movement Phase”, when in fact the file really reflects the Allied Initial Phase.  Confused….good…..misery needs company…..and  the weight of Tim’s advance has had me in a daze since early May.

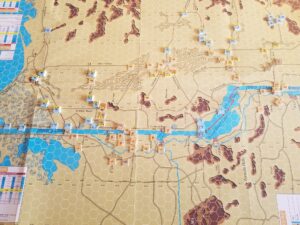
Allied Setup
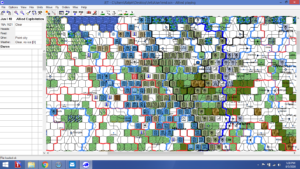
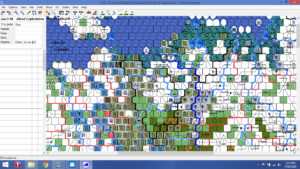
Allied Exploit – Move To The Dyle Line
You can see the German penetration through the Ardennes.  Now, the Allies must avoid being enveloped.  Will post up later with more carnage….after I do a better job of figuring out the screen shot sequence.

Always The Last To Know?

The good news is that this isn’t another relationship situation.  The bad news is that it looks like the Tanks! franchise has been discontinued.    No posts in quite a while and no merchandise in the store.

While I use the less expensive Zvezda models, I did enjoy checking out the site for scenarios and information.  I guess I will go over to Flames of War for news updates.

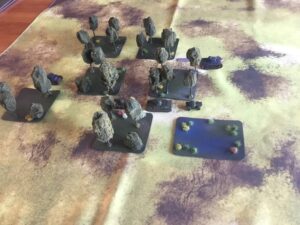
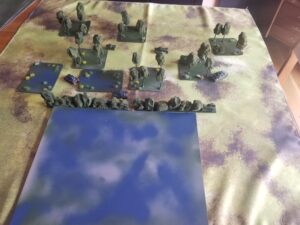
Meanwhile, I continue to build up my late war Germans in anticipation of creating some urban combat scenarios.  Here’s the latest additions.  One more traunch of kits to finish up for a representative set of both German and Soviet AFVs.


More Tanks

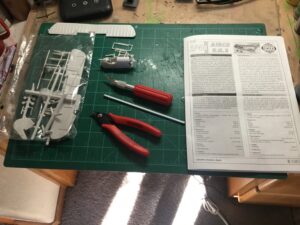
Working on my latest batch of Zvezda 1/100 (15mm) late-war German tanks.

After trying adhesive putty to delineate camouflage, using both brush and spray paint, I tried using a small sponge.

The sponge seemed to work best.  I used a couple of umber and black washes to gritty the tank up, and then a little bit of touch-up using a Q-tip.  I do enjoy tanks, because my lack of precision and technique can be superficially covered up by applying dirt, grime and weathering.

The result…. it “looks good on the table” (which is a miniatures equivalent of  “Bless His Heart”).

Here are some dynamic before and after shots taken in the usual crypt like lighting.


Destruction of Force Z – Wrap Up

My immediate interest in the game was triggered while reading The Royal Navy in Eastern Waters:  Linchpin of Victory, 1935-1942 by Andrew Boyd.  This is a very interesting and well researched examination of the events leading up to the Force Z debacle.  The author dispels many of the convenient myths surrounding the event.  Well worth the time and effort, especially if you can pick it up when on Kindle sale for $1.99 or so.

The game reminds me of In Magnificent Style, where you have to push your luck to the limit in order to achieve the intent of Force Z’s sortie.  I did this, especially when I reversed course and sailed towards the Japanese battleships, rather than “game” the system and eek out a minimal victory of just a few points.

To compound the British player’s problems, the chances of sinking the Japanese battleships is fairly low, and seemingly not worth the risk, despite the lucrative victory points.  Also, the odds of fighter cover actually materializing is relatively low, and anti-aircraft fire is fairly ineffective.  In this regard the game reflects the operational and tactical  factors leading to Force Z’s destruction.

The optional rules allow the British player some relief; limiting Japanese bomber availability on a per day basis, increasing the Repulse’s capability to avoid torpedoes, and including the carrier Indomitable to provide available and increased air cover.  I would consider a house rule making British surface attacks more effective and, perhaps, increasing the victory points awarded for bombarding the Japanese landing sites, since this was the mission of Force Z.

The rules are comprehensive and structured to guide the player.  This is good as there are simply too many charts and die rolls to remember.  This also enhances replayability because the player can just break out the game, dial up the rules, and start grinding through each turn’s eleven phases.  On the other hand, this grinding slows game play.  But, a typical game will probably not last too long if Japanese searches are effective.  In my instance, the British enjoyed ideal conditions (overcast weather, radio silence, and poor search rolls) and still had little success.

I like the random events and movement charts, and plan to use  variations  in other gaming situations.  The tactical display was fun because it reminded me of playing Midway back in (as it was called then) Junior High.

I’m now thinking about breaking out Avalanche Press’ Strike South and work through the scenario with more detail to reflect the different operational options historically explored by the British before 1942.  A comparison of the two systems will be interesting.

In summary, this is an engaging game providing excellent value and replayability.


Destruction of Force Z – Session Report

The game set up, along with the initial dispositions of both forces, is shown in the following photo.  The Japanese flag represents the amphibious landing at Kota Bharu.  Placement of the Japanese convoy, battleship and cruiser squadrons is determined during the Random Events Phase.  Force Z is represented by the British flag in Singapore.   The index card and colored blocks are used to keep track of weather and ship damage.

For the first three turns, Force Z moved east of the Anamba Islands,  then turning north towards the landing.  The Japanese were unable to locate Force Z, which was maintaining radio silence in the overcast weather, until it attacked the Japanese battleships (7 VPs) at night (Turn 4).  I couldn’t find anything specific in the rules, so I decided  Japanese surface units appearing during a turn couldn’t move, also.  Despite hitting the Japanese ships, no damage was inflicted.

After this inconclusive encounter, the British sailed at flank speed towards Kota Bharu to bombard the the landings.  The Japanese were still unable to locate Force Z, and could not prevent the destruction of  their offshore convoy which had appeared off Kota Bharu during the Random Events Phase (Turn 5).

After this success, the British steamed south towards Singapore, breaking radio silence to request RAF air cover (Turn 6).

At this point, the Force Z commander decided take advantage of darkness (Turn 7),  steaming north to again engage the  VP-rich Japanese battleships.  The Japanese cruisers entered the northern part of the map during the Random Events Phase.

Force Z moved into the Japanese square, forcing a surface engagement.  It was here that British luck ran out, as the Japanese search was a success, and no RAF fighter cover appeared to help fight off a massive level bomber and torpedo bomber attack.

The following photo shows how I handled the “tactical” aspect of the game.

Both British ships were in the square, so each can be attacked by bombers.   D6 rolls determine the number of attackers and what ship(s) they attack.  The rolls indicated a mixed force of 12 torpedo and 25 level bombers, all of which  concentrated on the Prince of Wales.  The first attack was by the level bombers.  Each ship has a maximum of 10 d6 anti-aircraft rolls.  These rolls either eliminate attackers, or are indicate to hit modifiers.  Bombers need a modified roll of 10 to score a hit.  A further damage die roll is made for each hit.  The rolls are shown below.  I use the dice, rather than the tally sheet included with the game to record rolls, and then use the result to determine hits.  A die that “hits” is then placed above the “tactical display”, as a reminder of the rolls needed for determine damage.

The torpedo bombers were handled in a separate series of rolls.

The Prince of Wales somehow survived, taking five hits, two less than the number to sink. Five hits reduced its movement rate to one square per turn.  After this mayhem, a surface action occurred.  The Japanese battleships and Prince of Wales were unaffected, but the Repulse took one damage hit.

The Repulse was ordered back to Singapore, while the stricken Prince of Wales could only hope for a failed Japanese search, or the intervention of the RAF.  The ship was located and the RAF again failed to provide air cover.  The level bombers did not find the Prince of Wales, but the torpedo bombers did.   An attack by 27 aircraft sank the ship.

The Repulse continued south during the night (Turn 10), while the Japanese made another landing at Singora.

Repulse was able to return to Singapore before the Japanese Turn 11 Search Phase.  This ended the game.

The Japanese victory point total breakdown was:

  • +8 Points for sinking Prince of Wales
  • +1 Point for one hit on the Repulse
  • +1 Point for each Japanese landing
  •  -2 Points for the sunk convoy

The net is  9 Japanese victory points.  The historical total was 18 points.

Wrap-up in the next post.

Destruction of Force Z – Overview

Downloaded this  awhile ago over at Wargame Vault, based on reviews at Boardgame Geek.  It’s a Minden Games solitaire offering  originally published in Panzerschreck Magazine #16.

As is the case with most solitaire games, there are  lots of charts and wristage.  I skimmed the rules and decided to just start playing.  The rules are laid out in turn phase sequence, so I just set up the IPad beside the game and went at it.

Each turn consists of up to eleven phases.  These are:

  1. Weather – Roll 1d6 for either clear or overcast conditions.  Overcast is a +1 modifier for Japanese Search.
  2. Radio – British player can break radio silence.  In doing so loses a -2 drm during Japanese Search.  But, gains possibility of Air Cover to help attrit attackers.
  3. British Ship Movement – Can move up to 4 squares (cannot move diagonally) three times a game, or one-three squares.  Damage reduces movement.  During movement British ships can be attacked by minefields and/or submarines if in same hex.
  4. Random Events – Dictates appearance of Japanese transports, cruiser or battleship units.  Can also effect movement of Japanese submarines, shore landings or allow “shadowing” which is a -1 drm for Japanese Search.
  5. Japanese Ship Movements – Ships on map roll 2d6 for random one to two square movement.
  6. Japanese Search – Rolls 1d6 (3 or less) to sight British ship(s).
  7. British Air Cover – If Radio silence is broken, presence of air cover over British ships determined by die roll.  If present, roll 3d6 for number of fighters.
  8. Japanese Bomber – Includes both level bombers and torpedo bombers.  Roll 1d6 for contact.  If contact make separate 1d6 roll for number of level and torpedo bombers.
  9. Combat Phase – Roll 1d6 for individual attacks by Air Cover, then 1d6 Anti-Aircraft fire to eliminate/abort/or effect aim of bombers.  Then roll 1d6 for success by individual level bombers and torpedo bombers.
  10. Surface Battle – Takes place when opposing force ships in same square.  Roll 2d6 for hits and then 2d6 for effect(s).
  11. Bombardment – British in same hex can shell Japanese landing sites, automatically gaining victory points.

There are 18 different situations where wristage and charts are involved,  in addition to  Air Cover attacks, Anti-Aircraft, and Bombing attacks handled on an individual aircraft basis.

Having Second Front air phase flashbacks and may need this to get through a session.

Time To Go To Work

Finished up all the scenarios in Advanced Squad Leader Starter Kit (ASLSK) #2 – Guns.   On to ASLSK #3 – Tanks.

Not even Jay Richardson’s fantastic tutorial could soften the impact of my first reading of the AFV rules and charts.  Brain just shut down.

Well, it will be a long process, and I’ll no doubt avoid armor scenarios, or at least those with several vehicles.  But, it has to be done.  Must learn.  Need to find a way so that it doesn’t seem like work.

Nordic Saga – Part II

An even later post to complete the account started in an already late post.

The game followed the standard Europa sequence, with the Axis phase first during the September I turn. Tim made some adjustments to his defenses, especially in the vicinity of Narvik. Regardless, the Allied landings went smoothly, with German air accounting for only one transport lost as well as one landing craft. Unfortunately, the lost transport contained the Headquarters for the 78th Division. In Europa, without a supporting headquarters, a regimental/brigade sized unit fights at one-half strength. The engineer unit was able to land at the port of Andennes, but would not be able to start work on the airfield next turn.  By turn’s end, this was the situation.

The September II turn went badly for the Allies. The weather turned, with stormy seas and mud creating rains. In this weather, beach landings are prohibited, ground movement is slowed, and engineering tasks take twice the time. This effected the Allied airfield construction and efforts to land reinforcements and supplies. Worse, the Germans were able to take advantage of the withdrawal of several Allied naval units from Narvik and overrun the leaderless and unsupported 78th Division.  No photographic record remains of this debacle.

The weather remained muddy, but with stormy seas continuing  The German units continued to pressure the Allies, but did not attack due to low odds.  The Allies were able to evacuate the remaining Narvik survivors, despite Axis bombing attacks.  The British were able to attack and destroy a German Penal Battalion at Bardufoss, but that was the limit of Allied successes.  The situation looked very grim for the Allies at the end of turn.

Things got worse with the weather roll at the beginning of the Oct II turn:  Snow.  Sea conditions became marginally better, with rough conditions.  Allied air units landed at the new Andennes airfield, but ground forces were unable to make any real progress against the German defenses.

The Nov I weather roll for snow and stormy seas effectively ended the game, as the Allies were now unable to resupply their forces over beaches and movement was severely restricted.

This was a painful experience.  The Europa naval rules are tortuous, especially when coastal defenses, danger zones and minefields are involved.  The game becomes a slog, and because of this, no longer is a “game”, but a simulation.

The  simulation makes it clear obvious why Operation Jupiter never happened.  The dependence on good weather beginning in October is enough to make the entire proposition marginal at best.  Add into this demands for naval resources that require the withdrawal of units that provide significant naval gunfire support, as well as critical landing craft for troop buildup and resupply, add to the “options of difficulties”.

Churchill wanted to do it and Hitler thought he would do it.  Reason prevailed on the Allied side, but significant resources were still poured into Norway’s defenses.  Was this irrational, or did Hitler’s fixation prove to be a deterrent?

I hope Tim will post up with his thoughts.  But here, briefly, is what we discussed right after I threw in the towel.

I have circled the northern part of the map to represent the positions of Soviet troops.  They are too few, the German positions to well fortified, to do anything more than tie down assets that could be used against the landings to the south.

The Narvik landings could have taken place to the west, with the forces crossing the narrow straits.  This would slower, but might allow a greater buildup of troops using minor ports.  Again, with time of the essence, I chose a more direct approach.

Me, I’m just glad the game, and these posts, are done.  OOFTA!

Quite The Beating – Part 2


Oh my!  Things really start falling apart during the German 4th Turn.  A Hitler Directive has forced a German stop order along the Northern Don, but the gap east of the Black Sea can’t be plugged.  Note that the Black Sea is now the Dead Sea (upper left corner), filled with Soviet casualties.

The best I can do is try to firm up the shoulder, and hope the units along the southern Don, adjacent to the Black Sea can hold.

No luck.  Tim’s too good to mess this opportunity up, and the Soviet defenses are rolled up from the east.  Meanwhile, his infantry units advance in the center.

Not much I can do at this point.   By the end of Turn 5,  my reinforcements are too far east to have any impact.

By the end of the German 6th turn, the Soviet defenses have collapsed, and the Caucasus is wide open for exploitation.

We called the game at this point.  Quite The Beating!!!

But…..a rematch has been scheduled for the Spring.

Quite The Beating – Part 1

Tim drove over to “The Dry Side” for another game of Drive on Stalingrad.  Our first try was over 2 years ago.  This time, he had the Germans and I the Soviets.  Things did not go well for the Soviets.  Here’s a link to a quick overview of the game at BGG.

The Soviets must cover their designated initial front with units or their zones of control (ZOCs).  For the most part, the units are drawn at random, with strengths revealed only at first combat. As you can see, things are a little thin on the ground.  North is to the readers right.

During Turn 1, Tim started clearing out Soviets in the north, while waiting to begin his attacks in the South.  The Soviets received reinforcements.  Again, most of these have unknown combat strength.  They must be placed in either cities or at rail hexes along the north map edge.  Soviet rail capacity is 10 units, with infantry and headquarters counting as one, with armor counting as three.  Soviet headquarters provide supply within a hex radius printed on the counter (2-5).  Unsupplied units move/attack/defend at half strength.

By the end of his Turn 2, Tim has advanced toward the Don River in the north, and is beginning to attack in the south.  Units can leave Zones of Control only by combat.  The exception is when the Soviet player declares a strategic withdrawal.  This costs victory points.  I am willing to pay the points to get the majority of my units moving back to the east and south.  However, delaying units can be effective and some are left behind to defend at half strength.

For my part, there is a general withdrawal with some units remaining behind to delay.  I also begin constituting a reserve in the vicinity of Stalingrad.  This reserve is comprised of several units which hopefully can mount an effective counterattack.

Tim continues his advance during Turn 3, but his infantry divisions are still being delayed by Soviet resistance.  He does a very good job of using his ability to overrun units not only in the movement phase, but also in a subsequent mechanized movement phase.

While the Soviets  build a “shoulder” to the northeast of the German’s southern advance, and move additional armored units toward the Black Sea from Stalingrad, there is a dangerous gap just east of the Black Sea.  This will be my undoing…….