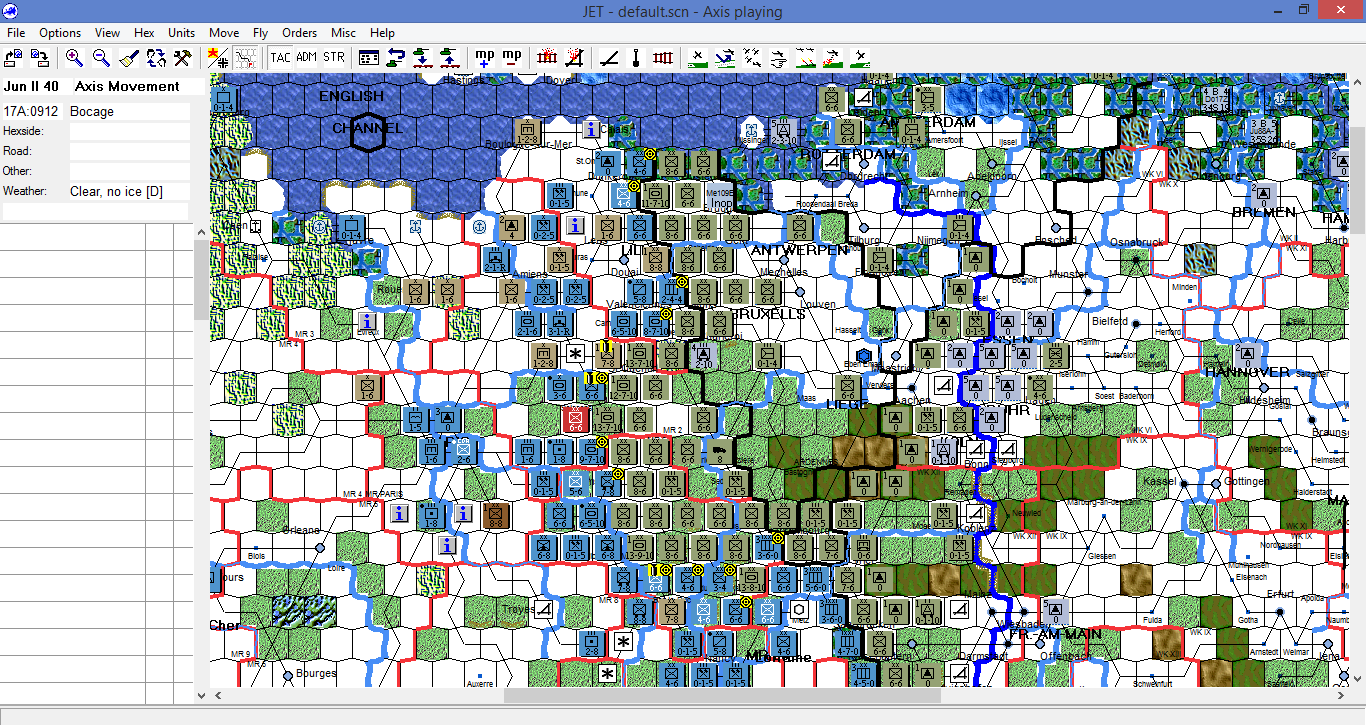
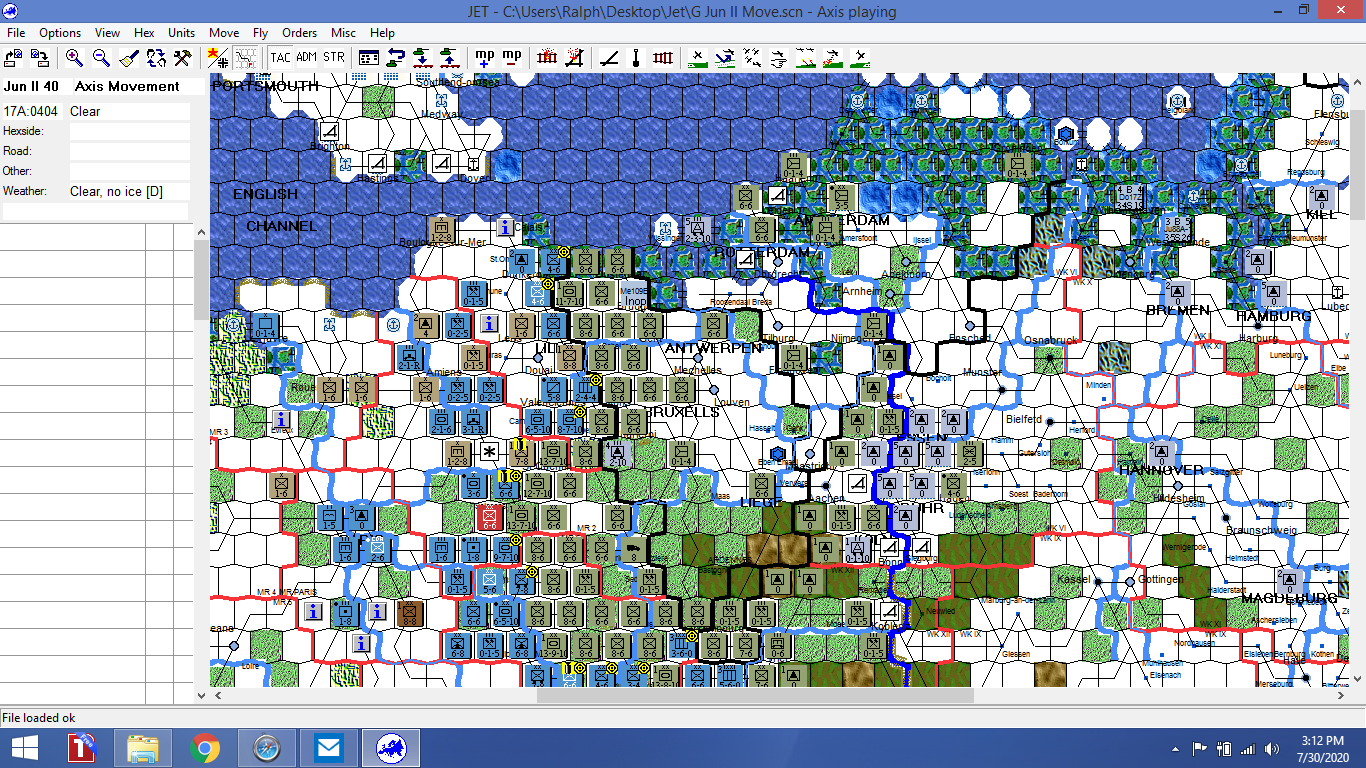
Our Fall of France game ended during the recent posting hiatus. Here’s a screen shot of situation when I conceded. Ugly.
Tim did a great job of applying unrelenting pressure on a broad front. He might argue this pressure was too dispersed, but, in the end, his operational approach worked. Yes, I held out longer than my historical counterpart(s), but the end result was still the same; a French defeat.
This broad, sustained pressure precluded any concentration for a decisive counterattack, given the Allies’ slender armor and tactical air resources. Every unit was needed to plug the recurring holes in a shallow defensive line. The combination of tactical air, armor and strong infantry divisions capable of absorbing punishment was just too great.
A strategic withdrawal in the south would have been an option. But, a passive surrender of French territory would be politically unthinkable, even though not a real game consideration in terms of victory points lost.
On second thought, maybe the end result wasn’t “the same”. The British Army is still on the Continent. No Dunkirk, no evacuation to fight another day. With this outcome, the entire course of the war changes. Negotiated settlement? An interesting “what if” that has started a soft and gentle Siren’s Call to start up a session of A World At War or Blitz.
Now is a good time to replace those entryway lights…………
Finally have the WRG 6th edition armies discussed some time ago on the table. As usual, the process was not smooth.
I’ m older than when I first started playing this system, but not wiser when it comes to matching up figures and economically compiling an army list. Always was problem. Neat listings very quickly rendered illegible with cross outs and scribbled notes. Thought I had these things worked out when I ordered the new figures. But, once based and consolidated into an army list using the finished painted figures, the results were less than optimal. Workable, not not approaching optimal.
Of course, I had the immediate wargamer reaction that the solution was buying more figures, expanding what I had. But, that was madness given cost and shipment time. Also, the thought of another larger scale painting project just makes me cringe. So, instead of that, it was back to rebasing and finagling the unit mix.
Fortunately, I came up with a very satisfactory mix for each army, minimal figure wastage (only 4 painted figures not used) and a workable 1,200 or so point total for each side. Just right for a game with each side commanded by a single general.
In between sessions of rebasing figures – which for me always includes the nerve wracking prospect of an Xacto knife blade snapping and flying into my eye – gluing and re-flocking, I found time to really dig into the rules.
When you Google up “WRG 6th Edition Rules” the narratives are not positive. There is some feeble recognition that this rule set was once state of the art but the emphasis is on complexity and the availability of newer rules. However, I find the procedural nature and author Phil Barker’s mannered and arcane presentation (with critical elements of information sometimes taking the form of a single buried sentence) oddly soothing. These rules whisper “Take your time, there’s no hurry, this action doesn’t have to be ‘fast and furious’”.
My first walk through lasted 3 turns on a terrain-less surface. Lessons were learned, some figures rebased (again), lists reorganized and I re-set, again without terrain. I ginned up army rosters to keep track of orders, casualties, and other miscellany.
Now, three turns into my second game, I’m impressed on how smoothly the system plays. Especially when there are no Rules Lawyers to deal with – and in my distant memory this system was notorious for attracting/creating them.
Sure, the checklists of reasons to test Reaction, and those for Shooting and Combat modifiers are lengthy, but not so onerous that a quick glance through takes care of any adjustments that need to be made.
All in all, I’m glad to playing WRG 6th again. No need to find a “better hole”. For Now.
This is/was my first home board game after the re-organization and re-direction of collection. The upshot of all that summertime thrashing was to establish a focus on several series of games, rather than any number of one-offs. The emphasis now is on play, not reading a new set of rules, stumbling through a couple of plays, and then moving on to something else. Sure, there are several magazine and specific games that I want to and will play, but this new emphasis increases time spent moving counters.
These GBACW games are part of the first series as published by SPI and others, before the revamping rolled out by GMT. The new rules seemed far more involved, without a commensurate increase in enjoyment.
So, the decision was made to fill out my collection, and start in on the cycle, using the last iteration of the SPI rules but ignoring, for now, options and artillery overshoot (ugh). I relied not only on that set of rules, but also the wonderful GBACW resources developed and published by Russell Gifford over at Boardgamegeek.
Just like Hollywood, my sequel unfolded much like its predecessor. The Confederates used their cavalry to pin the Union 2nd Brigade, while their three infantry brigades with attached artillery attempted to skirt the Union positions either to flank them and attack, or exit the map. If successful, either of these approaches would result in a decisive Confederate victory.
This flanking maneuver soon became a fire fight that degenerated into a nobody is moving an inch brawl.
I enjoy the chaos of this game system. Probably the real Loki of the system is the Ammunition Depletion rule. If a firing unit roles a “1”, it must check for ammunition depletion. If that subsequent roll is a “1” or “2”, the unit cannot fire during either the defensive or offensive fire phase until resupplied. In Kernstown, the Confederates cannot be resupplied.
Here’s an example of the fun.
With four turns left, the Union has five units ready to vaporized Brigadier Fulkerson and the remnants of his brigade, and then fall on the exposed Confederate flank. What happened? Three of the five offensive fire rolls were “1”, with each of the succeeding rolls being either a “1” or “2”. No “Blammo!!!”***
Despite the general mutual slaughter, the Confederates were able to grab critical Victory Points (VIPs) through Federal sloppiness in dealing with exiting cavalry units, and the Union garnered VIPs by maintaining morale and holding their initial positions. The result was a draw.
I’m looking forward to playing Volume II, Pea Ridge!
*** The Word Tim B (Friend and Wargaming Opponent Extraordinaire) blurts out when an an enemy stack or unit is eliminated. Adorable.
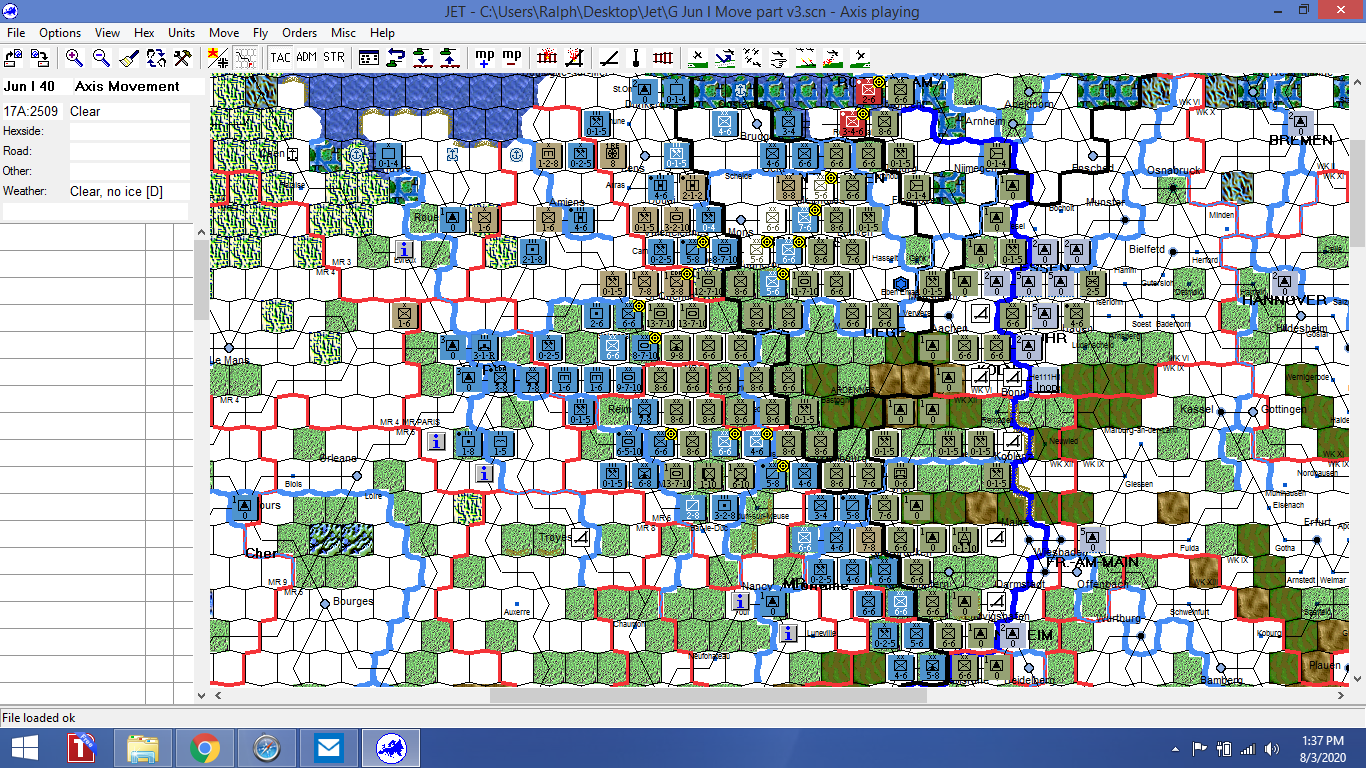
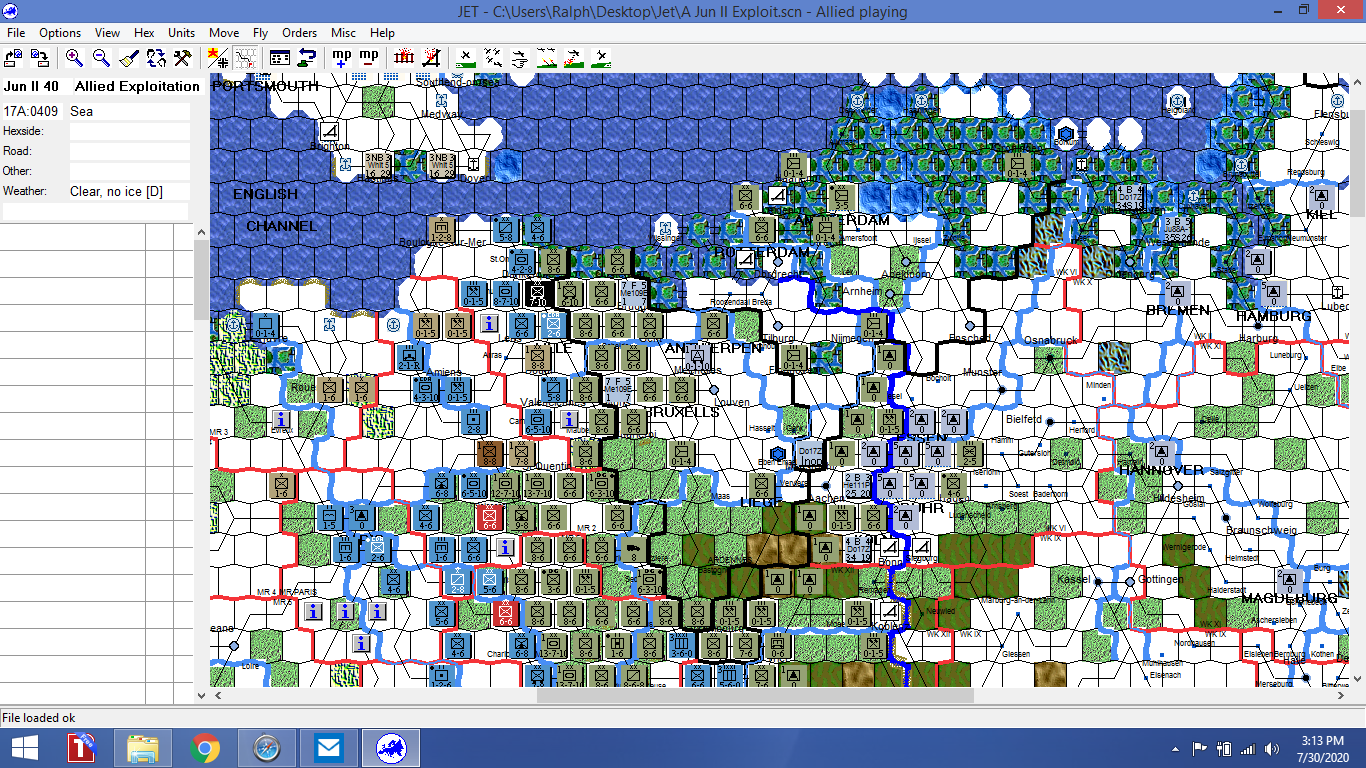
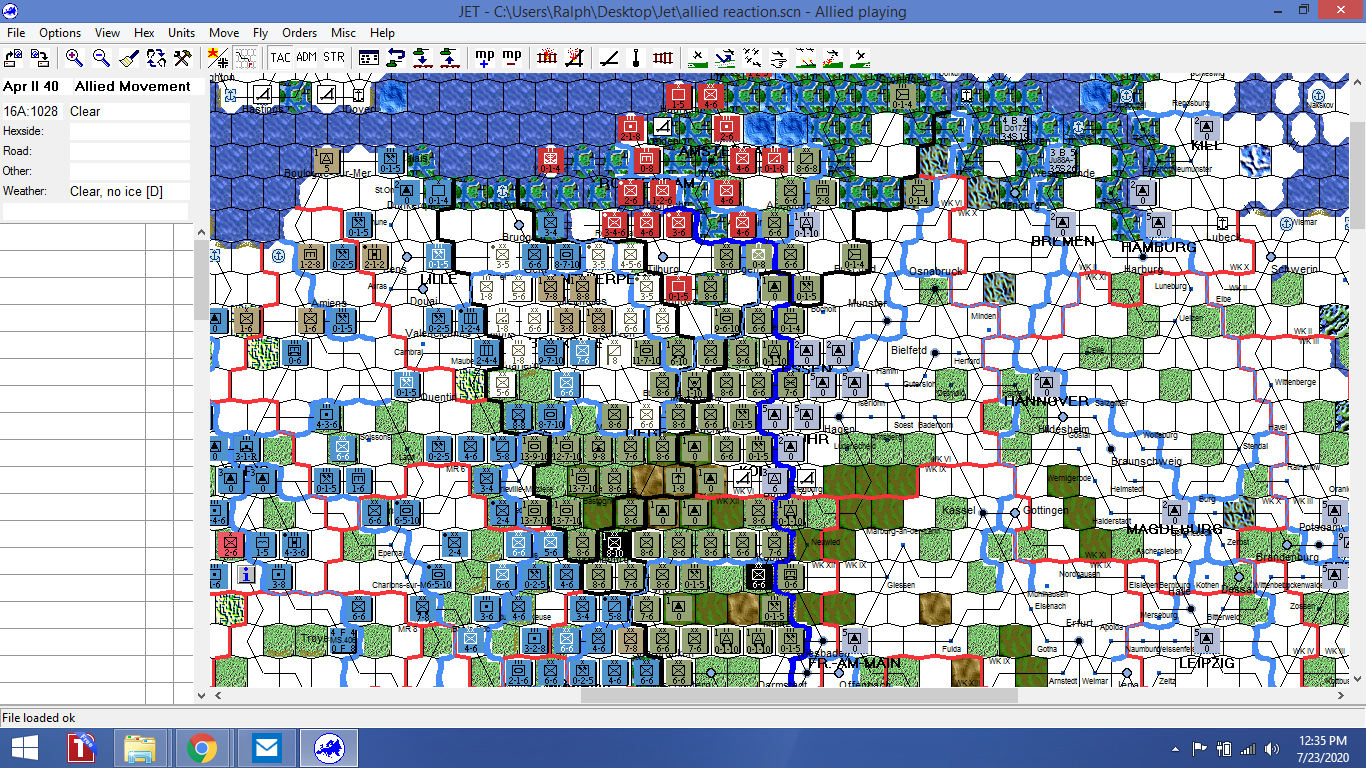
German armor sweeps past the weak ad-hoc French defenses and advances towards the Marne. Also, the German commander turns loose “Ants” to disrupt the Allied rear areas. To the north, German forces grind up the Dutch and Belgians, advancing to the Dyle Line.
The Allies rush armored/mechanized units to contain the Ardennes penetration, while withdrawing from the Dyle line, using Belgian forces in support. The Dutch attempt to consolidate their defense in order to tie down German forces for as long as possible.
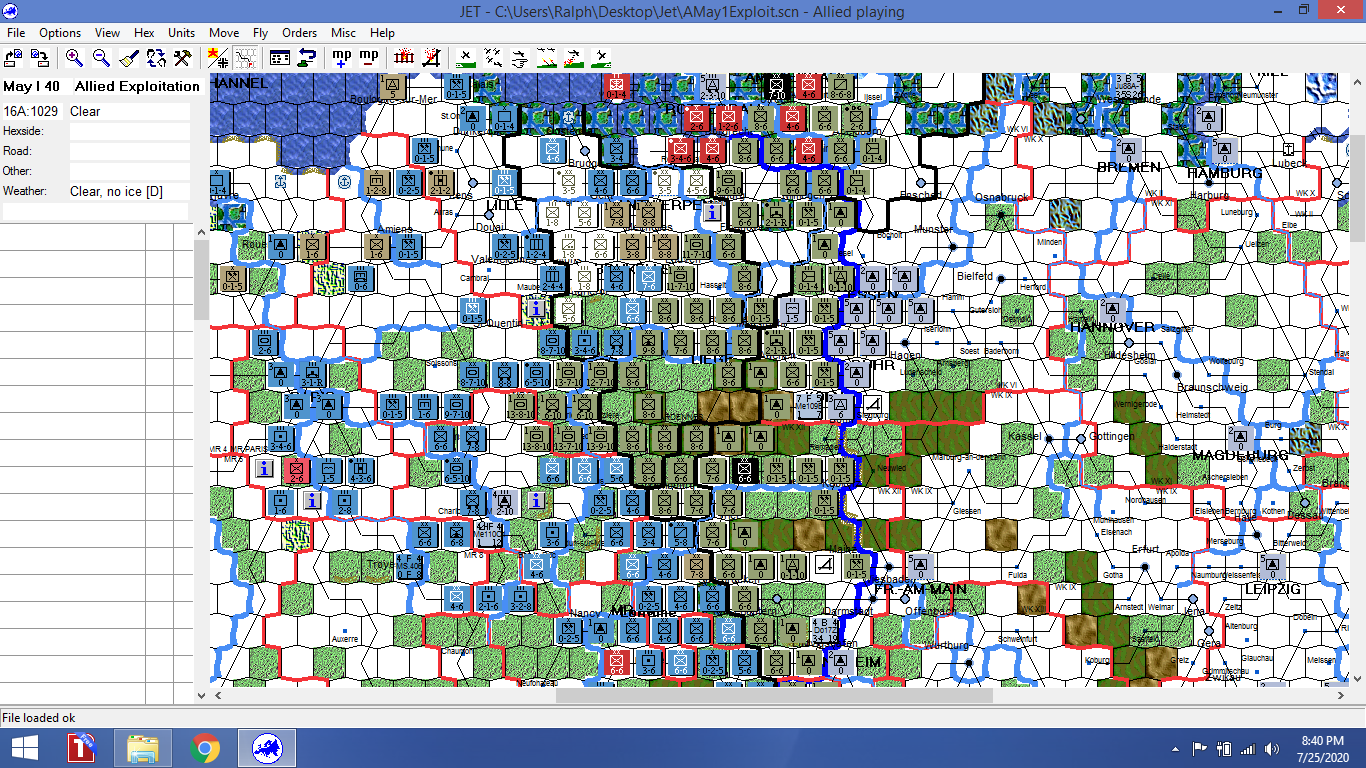
I’ve bitched about my Fall of France (FoF) game with Tim, but I am now compelled to report it.
As usual with this site, the graphics will be less than ideal, a condition due in equal parts to my ambivalence towards pushing the boundaries of computer literacy and reliving a wargaming hell.
I was able to figure out how to get screenshots on my ancient Dell Windows 8 machine. However, the screen shots of the JET board are just that; a shot of what is on the screen. The JET mapboard takes up more than the screen, so the graphic evidence of this debacle will be from north of Frankfurt. That’s OK, because that it is where most of the carnage occured and is continuing to occur. We are now in the Allies Jun II turn, and things are looking very grim for the Allies. But….. we must start at the beginning.
The Germans have extremely powerful air and ground units. The screenshots show only the top unit in the hex. But, below that scary surface, lies even more panzer divisions, supported by motorized units, lots of motorized flak and artillery.
One revelation was how tough the German infantry stacks were. Three 8-8 infantry, paired with artillery represents a lot of combat power.
Allied units are solid, but lack mobility, flak and supporting units.I shudder when I think about the German’s powerful ground attack air assets used to support these armored and infantry forces.
Then, there are the historically based operational rules. They create a difficult framework for the Allies to work within.
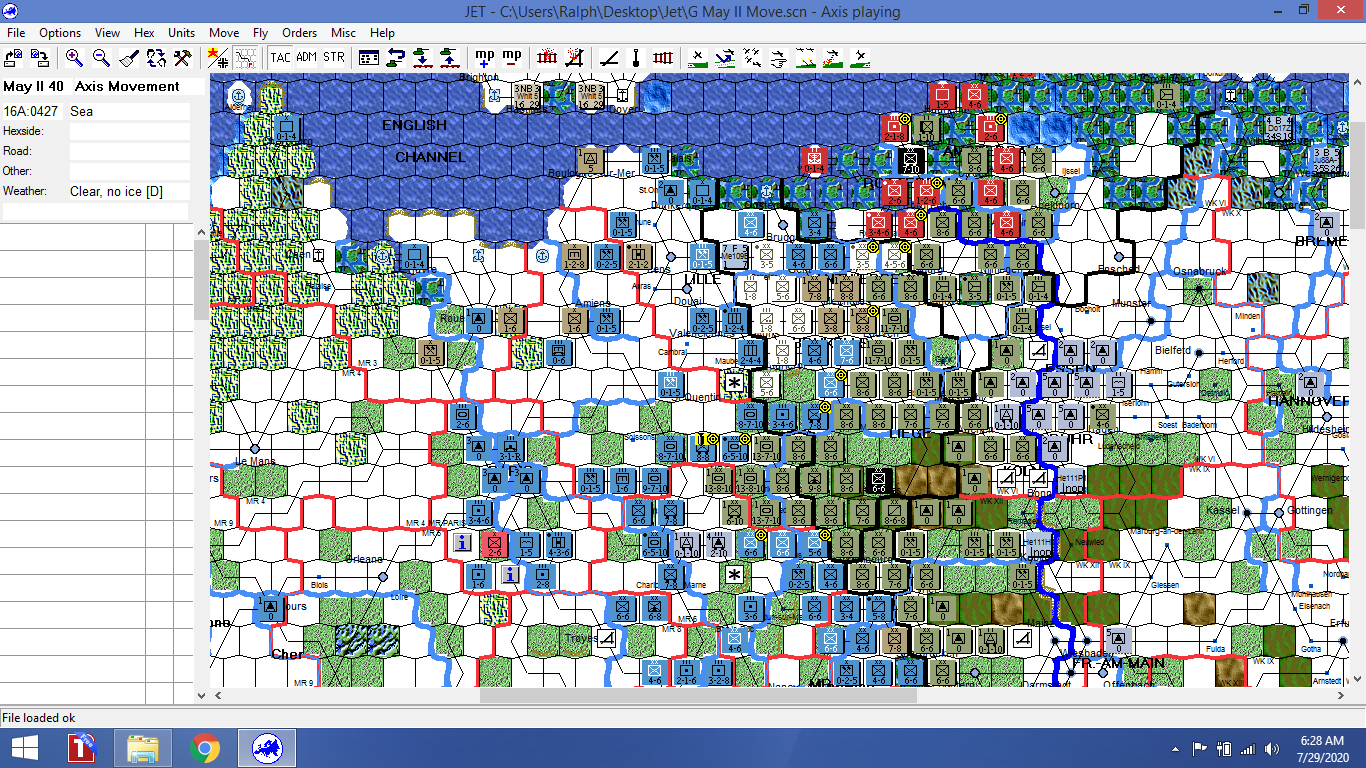
The Germans start off with an invasion turn, which includes all normal Europa turn phases except the exploitation phase.
The Allies do have a reaction phase. However, this is scripted because most northern French units and those of the BEF must enter Belgium to occupy the Dyle River Line, setting up the historical “Sickle Cut”.
While Dutch and Belgian units can move during this Allied reaction phase, they cannot enter enemy zones of control.
With the Allies sucked into Belgium, the Germans start the regular May I turn.During the Allied player May I turn, no unit in an enemy ZOC (Zone of Control) can move, and all British or French units have their movement factors halved.
The Allies are further hampered by the inability of their combat / motorized units to attack a full-strength or move using full movement during their exploitation phase until the beginning of the June I turn. This reflects a lack of mechanized doctrine.
To make things even worse, during the May I turn any French non-mech/motorized unit has to retreat two hexes rather than one if it has fought an attacking German force with at least one panzer division.
One other note about the graphics. As I mentioned, JET is a real marvel. However, it cannot do several things within the rules as written Europa framework. The result is that you have to tweak things, and the file you forward may have a heading (found in the upper left hand corner of the screen) that isn’t quite accurate. An example: You cannot fly CAP (Combat Air Patrol) during the Initial Phase. You have to cheat, and “fool” the machine by forwarding to your Movement Phase, where it is allowed. So, on the files shown, the heading on the screen may show “German Movement Phase”, when in fact the file really reflects the Allied Initial Phase. Confused….good…..misery needs company…..and the weight of Tim’s advance has had me in a daze since early May.
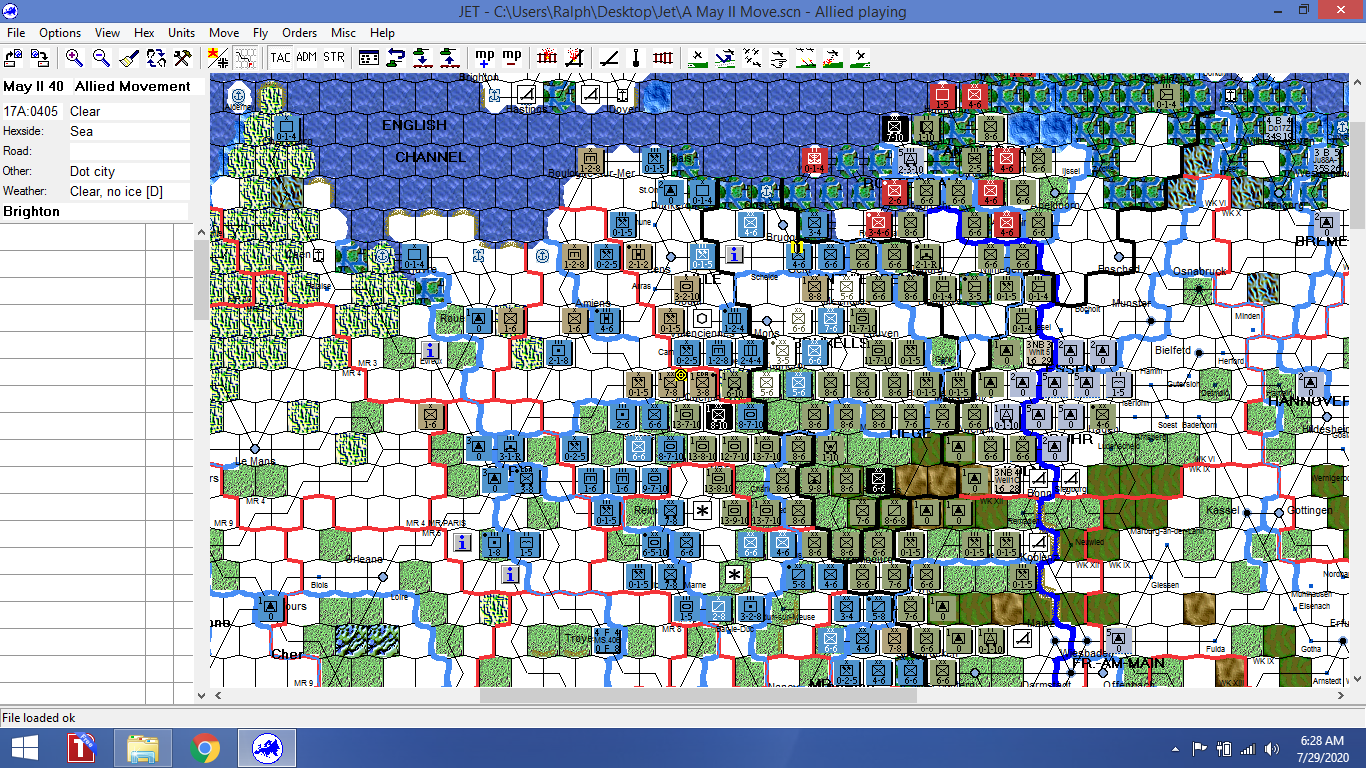
Allied Setup
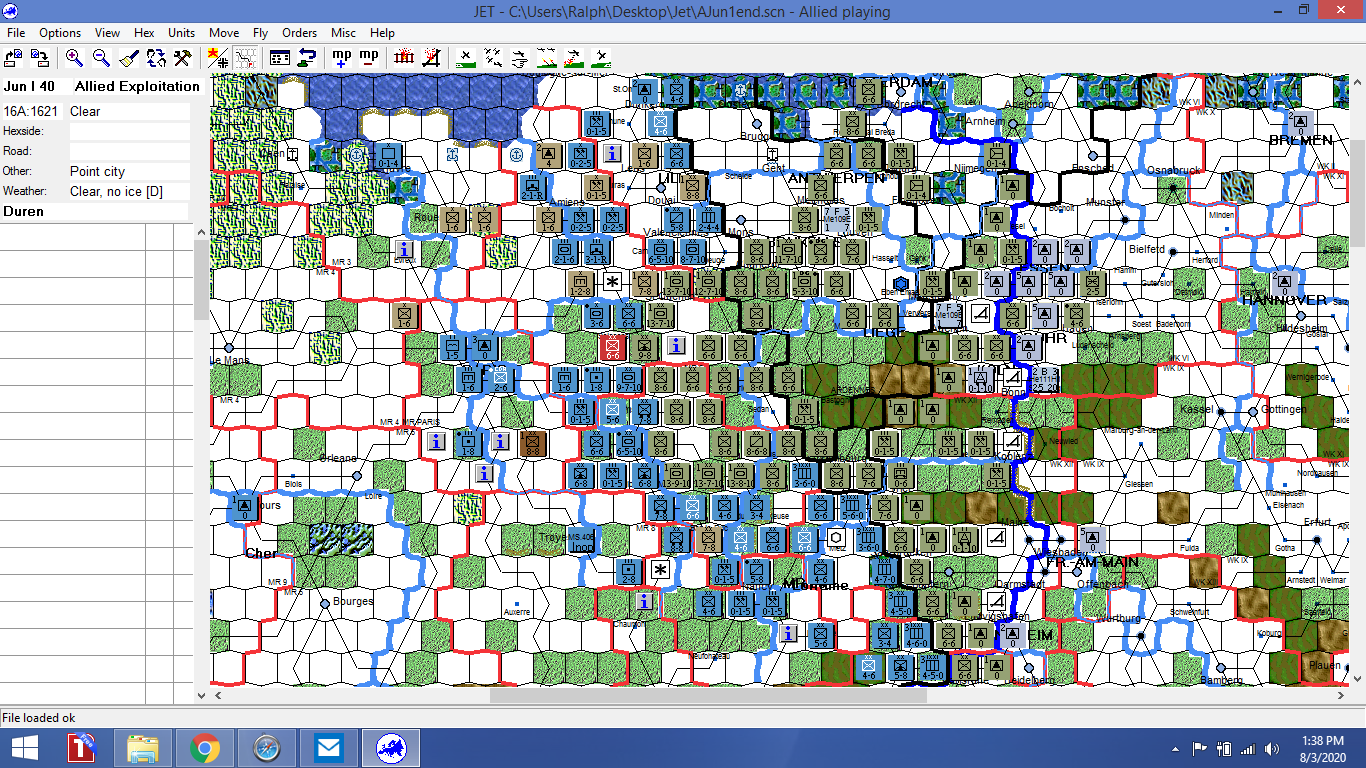
Allied Exploit – Move To The Dyle Line
You can see the German penetration through the Ardennes. Now, the Allies must avoid being enveloped. Will post up later with more carnage….after I do a better job of figuring out the screen shot sequence.
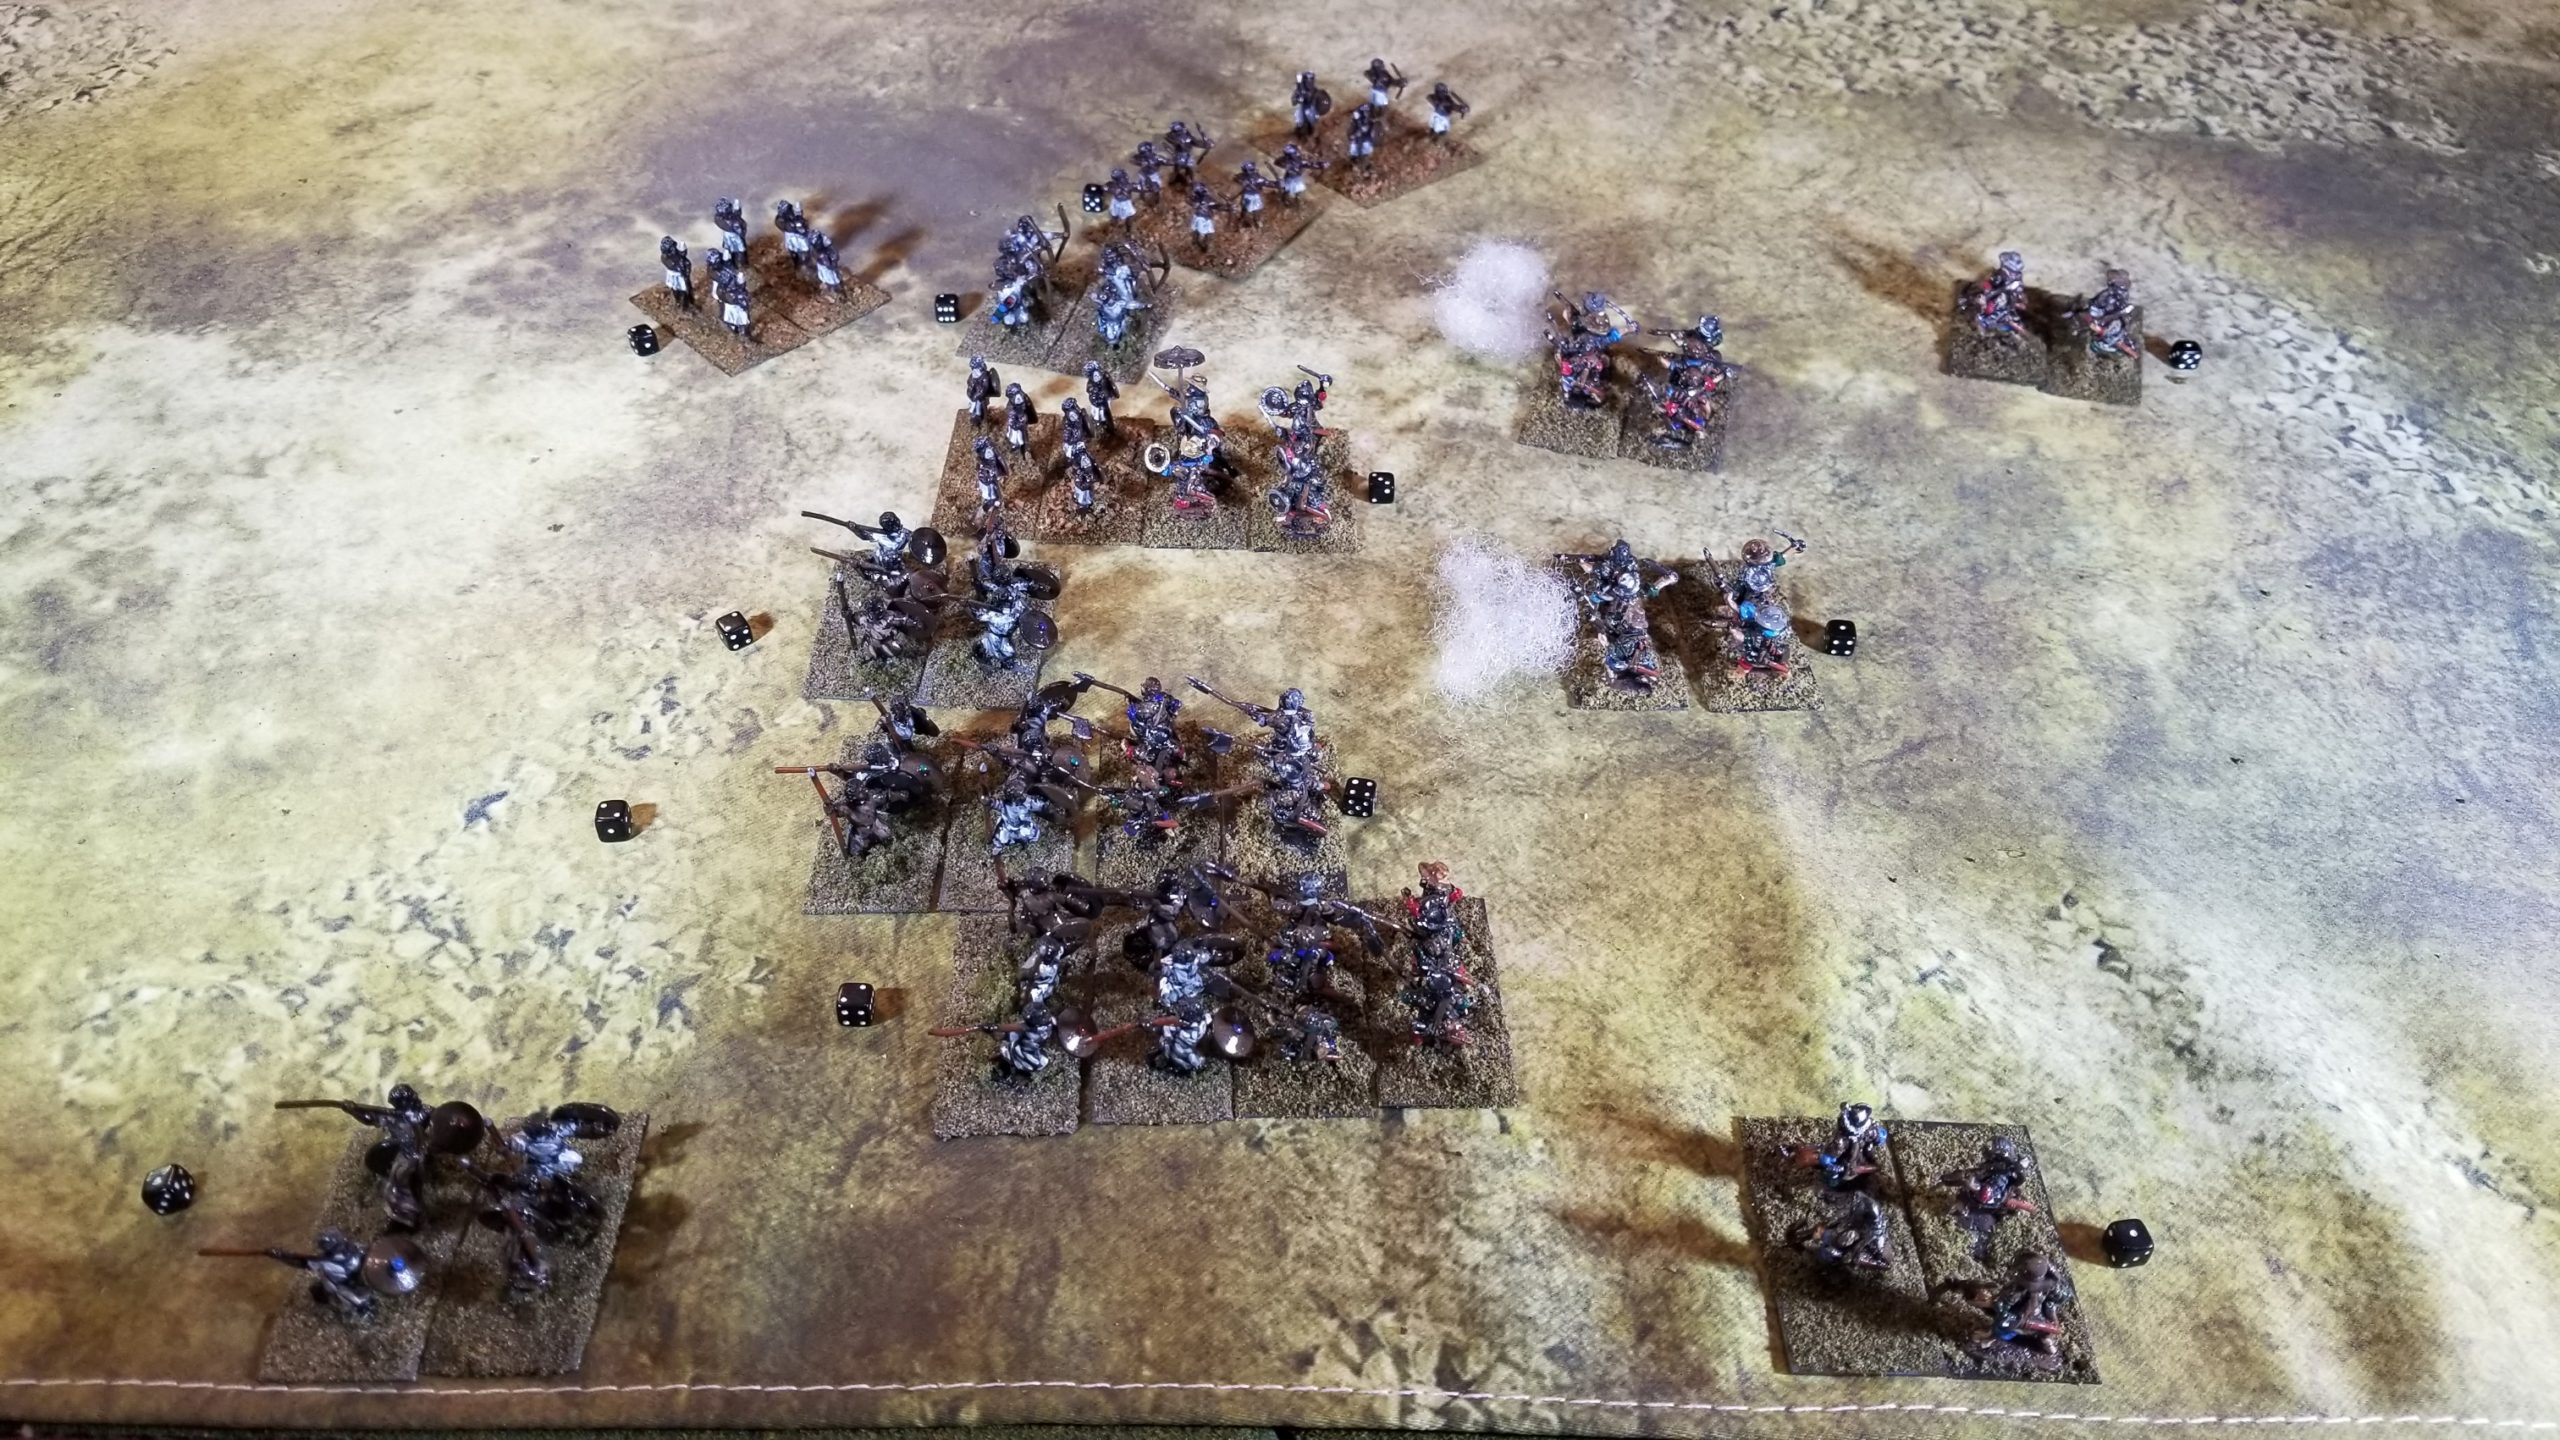
The short story is the Kattegoans routed Lord Renaldo’s Portuguese in a hard fought battle.
At the end, few of either side’s companies (units) were capable of movement to contact since their Resolve had dropped to one, as both leaders were either involved in melee or too far away to effectively rally the affected companies. With low Resolve, a company cannot enter into melee, but can still shoot.
This problem was mitigated by my failure to role for Impetuous Actions for those units outside of command radius. However, I can partially rationalize this oversight because each company kept to their original plan. An exception was the Kattegoan leader taking his company on a wide envelopment. While in the short term this placed him out of touch with his companies, the end result was to flank and scatter (rout) Lord Renaldo’s company, putting an end to the battle.
I can’t rationalize my failure to use a leader’s +2 die roll modification in all but the last round of melee. This had a significant effect on the Portuguese, as Renaldo’s company was in a melee marked by a series of Inconclusive Draws (no effect on either side) for almost the entire battle.
Only the dogged Pikemen and a lone Crossbow company remained cohesive enough to cover the Portuguese withdrawal to Ekene, where they will remain for some time after this failure and accompanying loss of prestige. While Lord Renaldo will remain in command for the time being, that may change after word of the debacle reaches Lisbon.
Oumar, the Kattegoan leader, proved to be a somewhat unorthodox commander, leaving his companies to flank the Portuguese force. While aided by my rules omission, this tactic proved decisive. He is now considered an Experienced Lord ( proven leader)and will now receive a +1 die roll modification for Initiative.
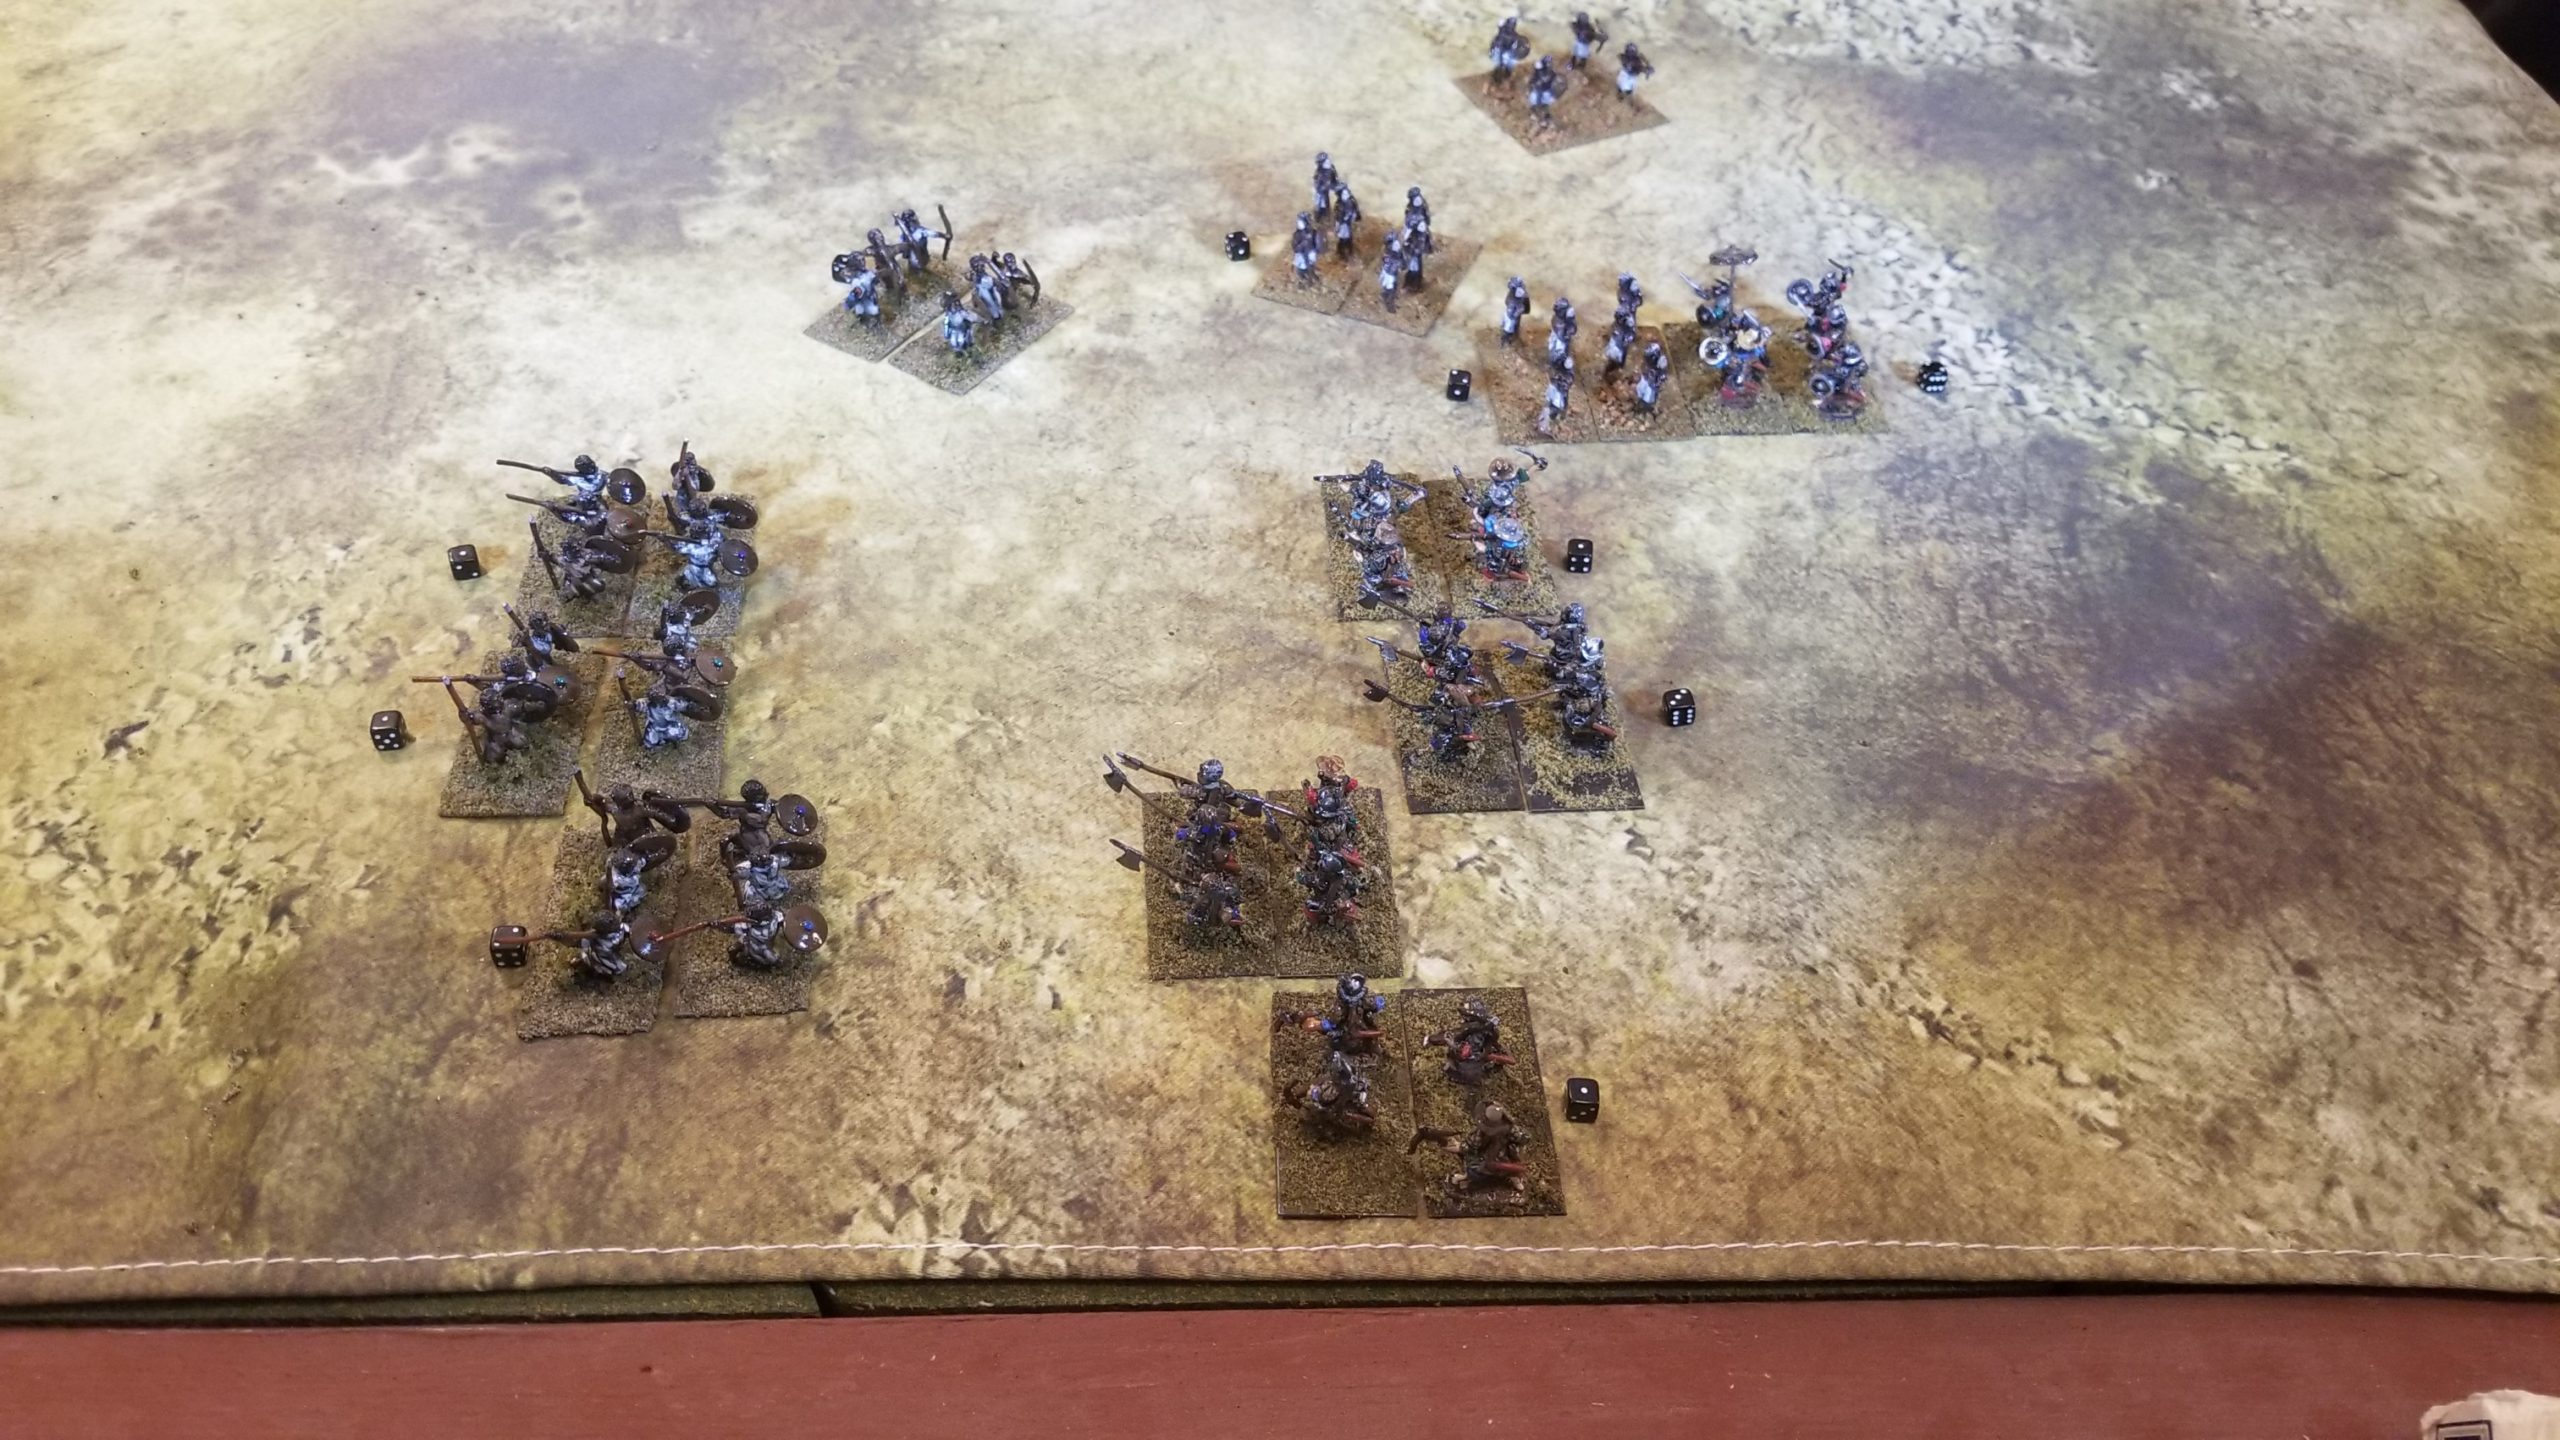
Here’s a series of poor battle narrative photographs. I also need to figure out how to change the font/size for the captions.
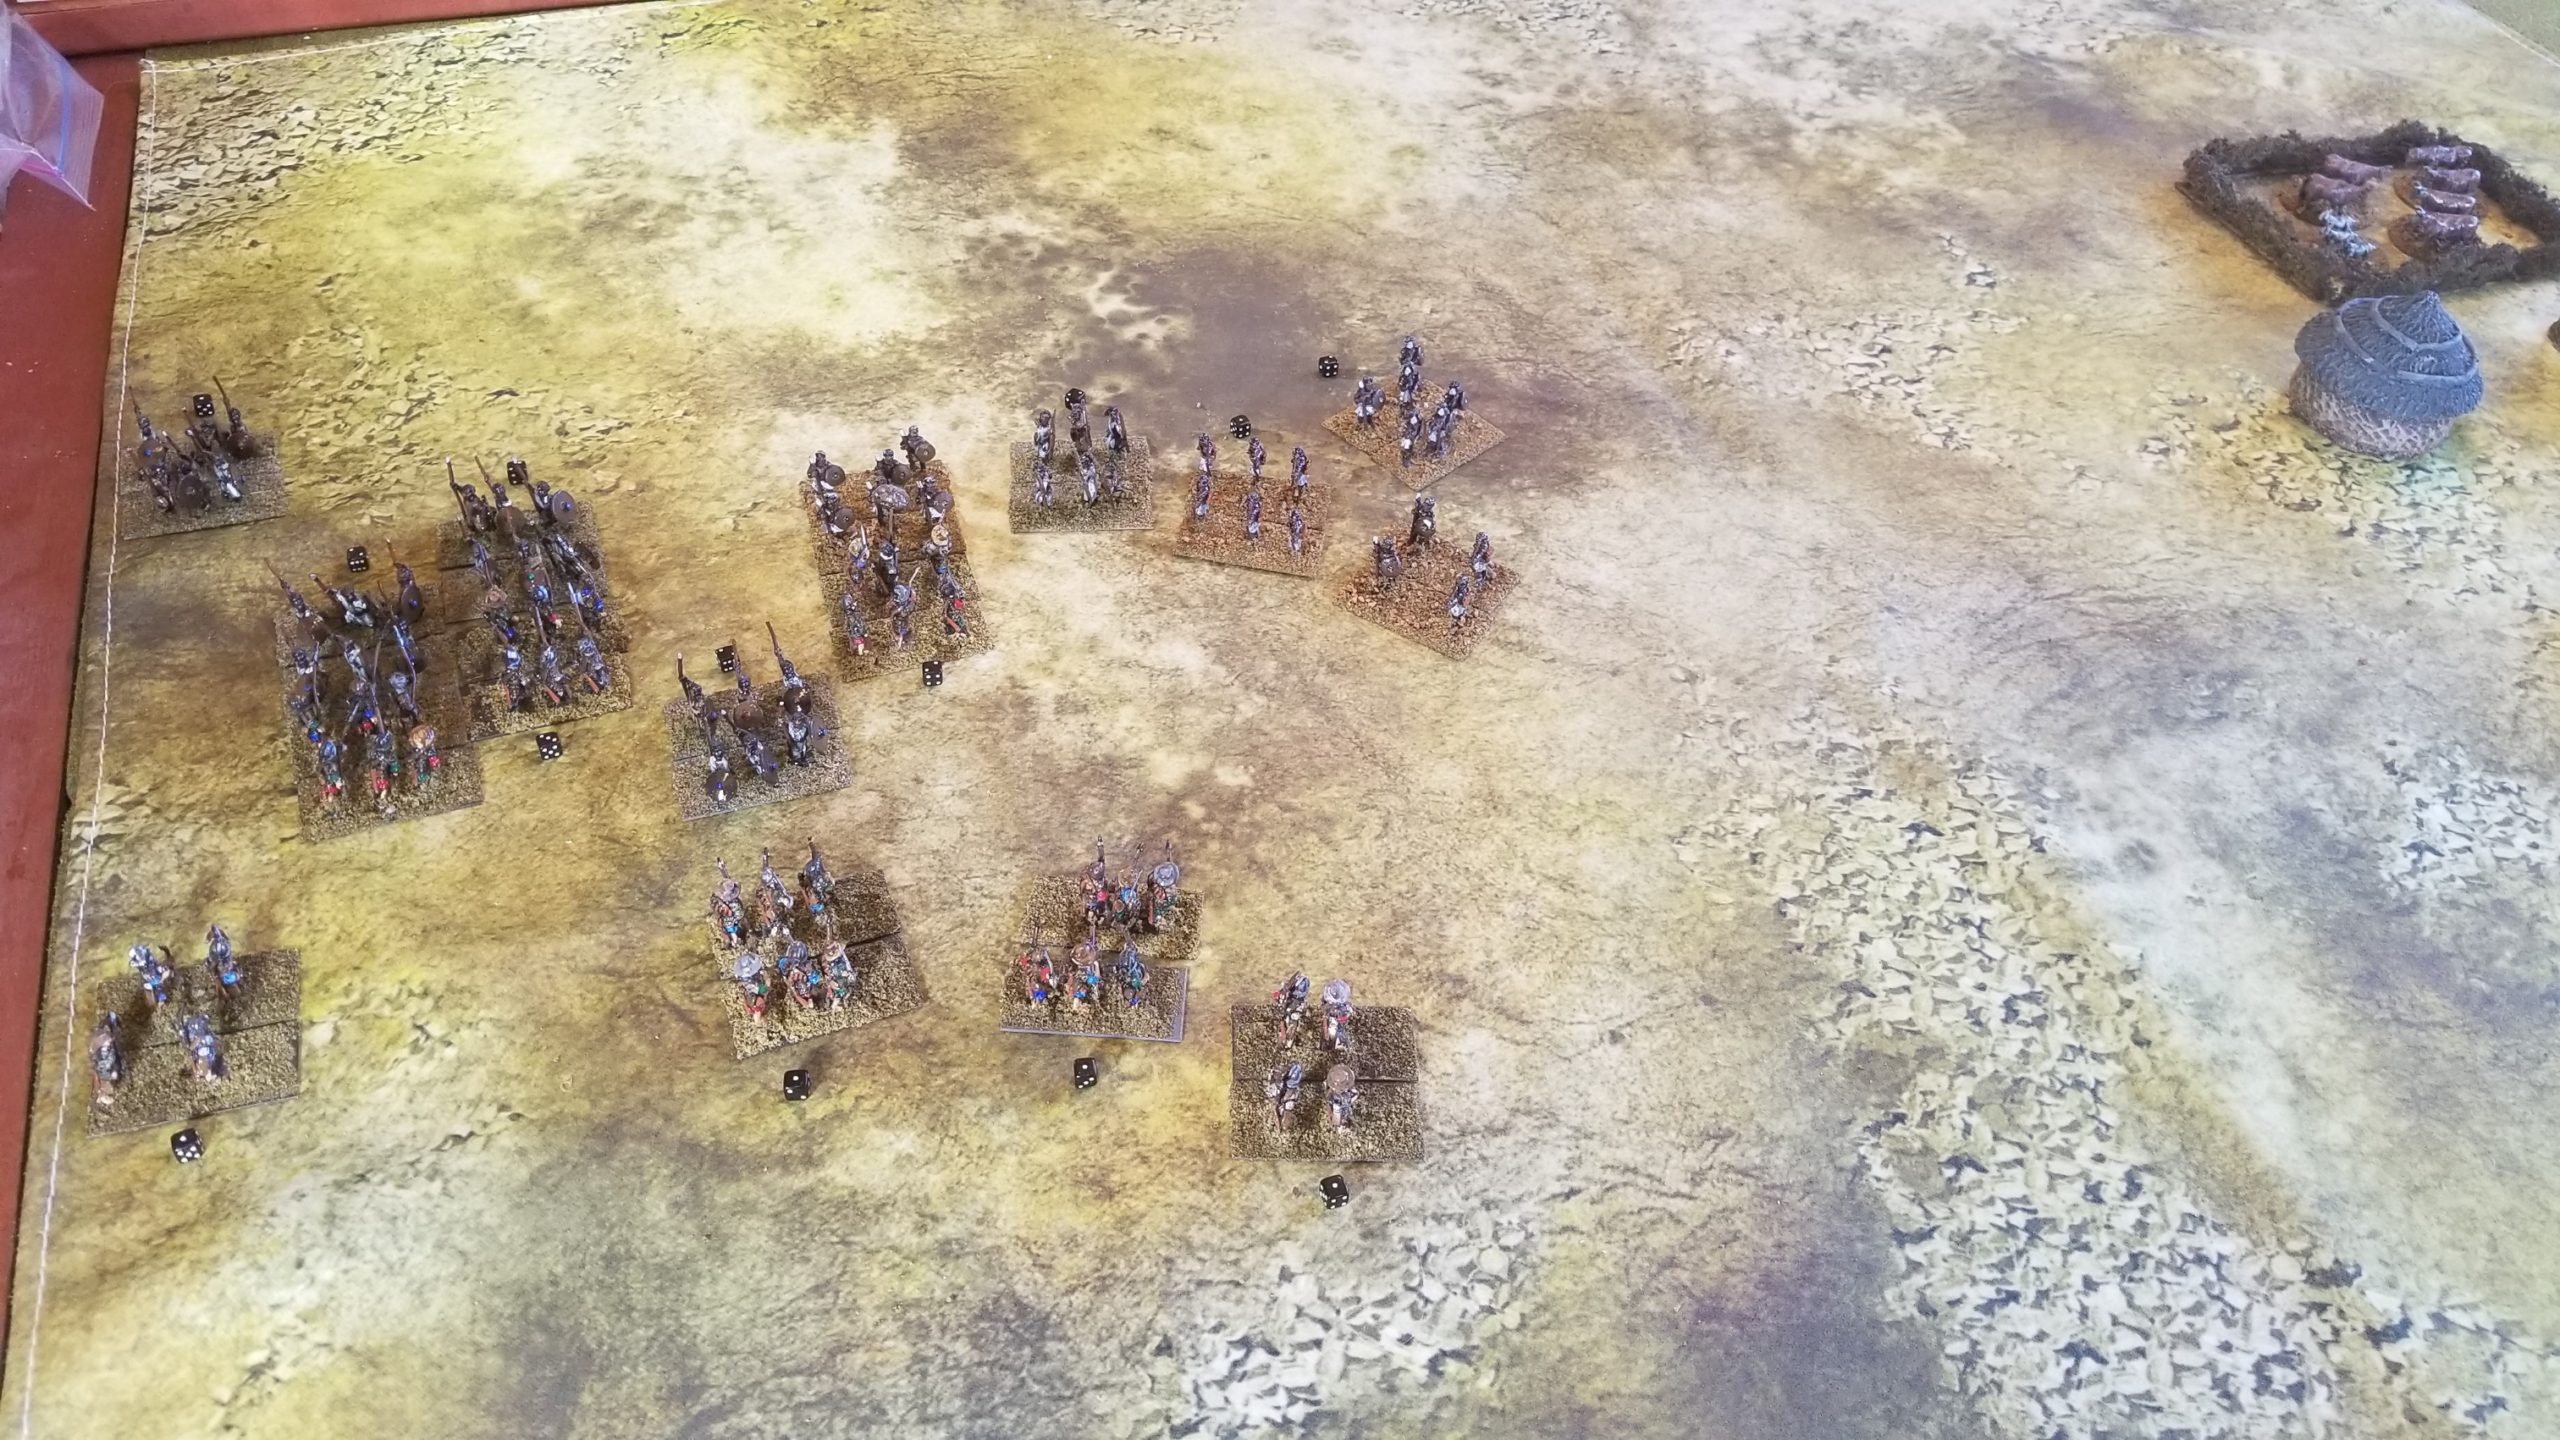
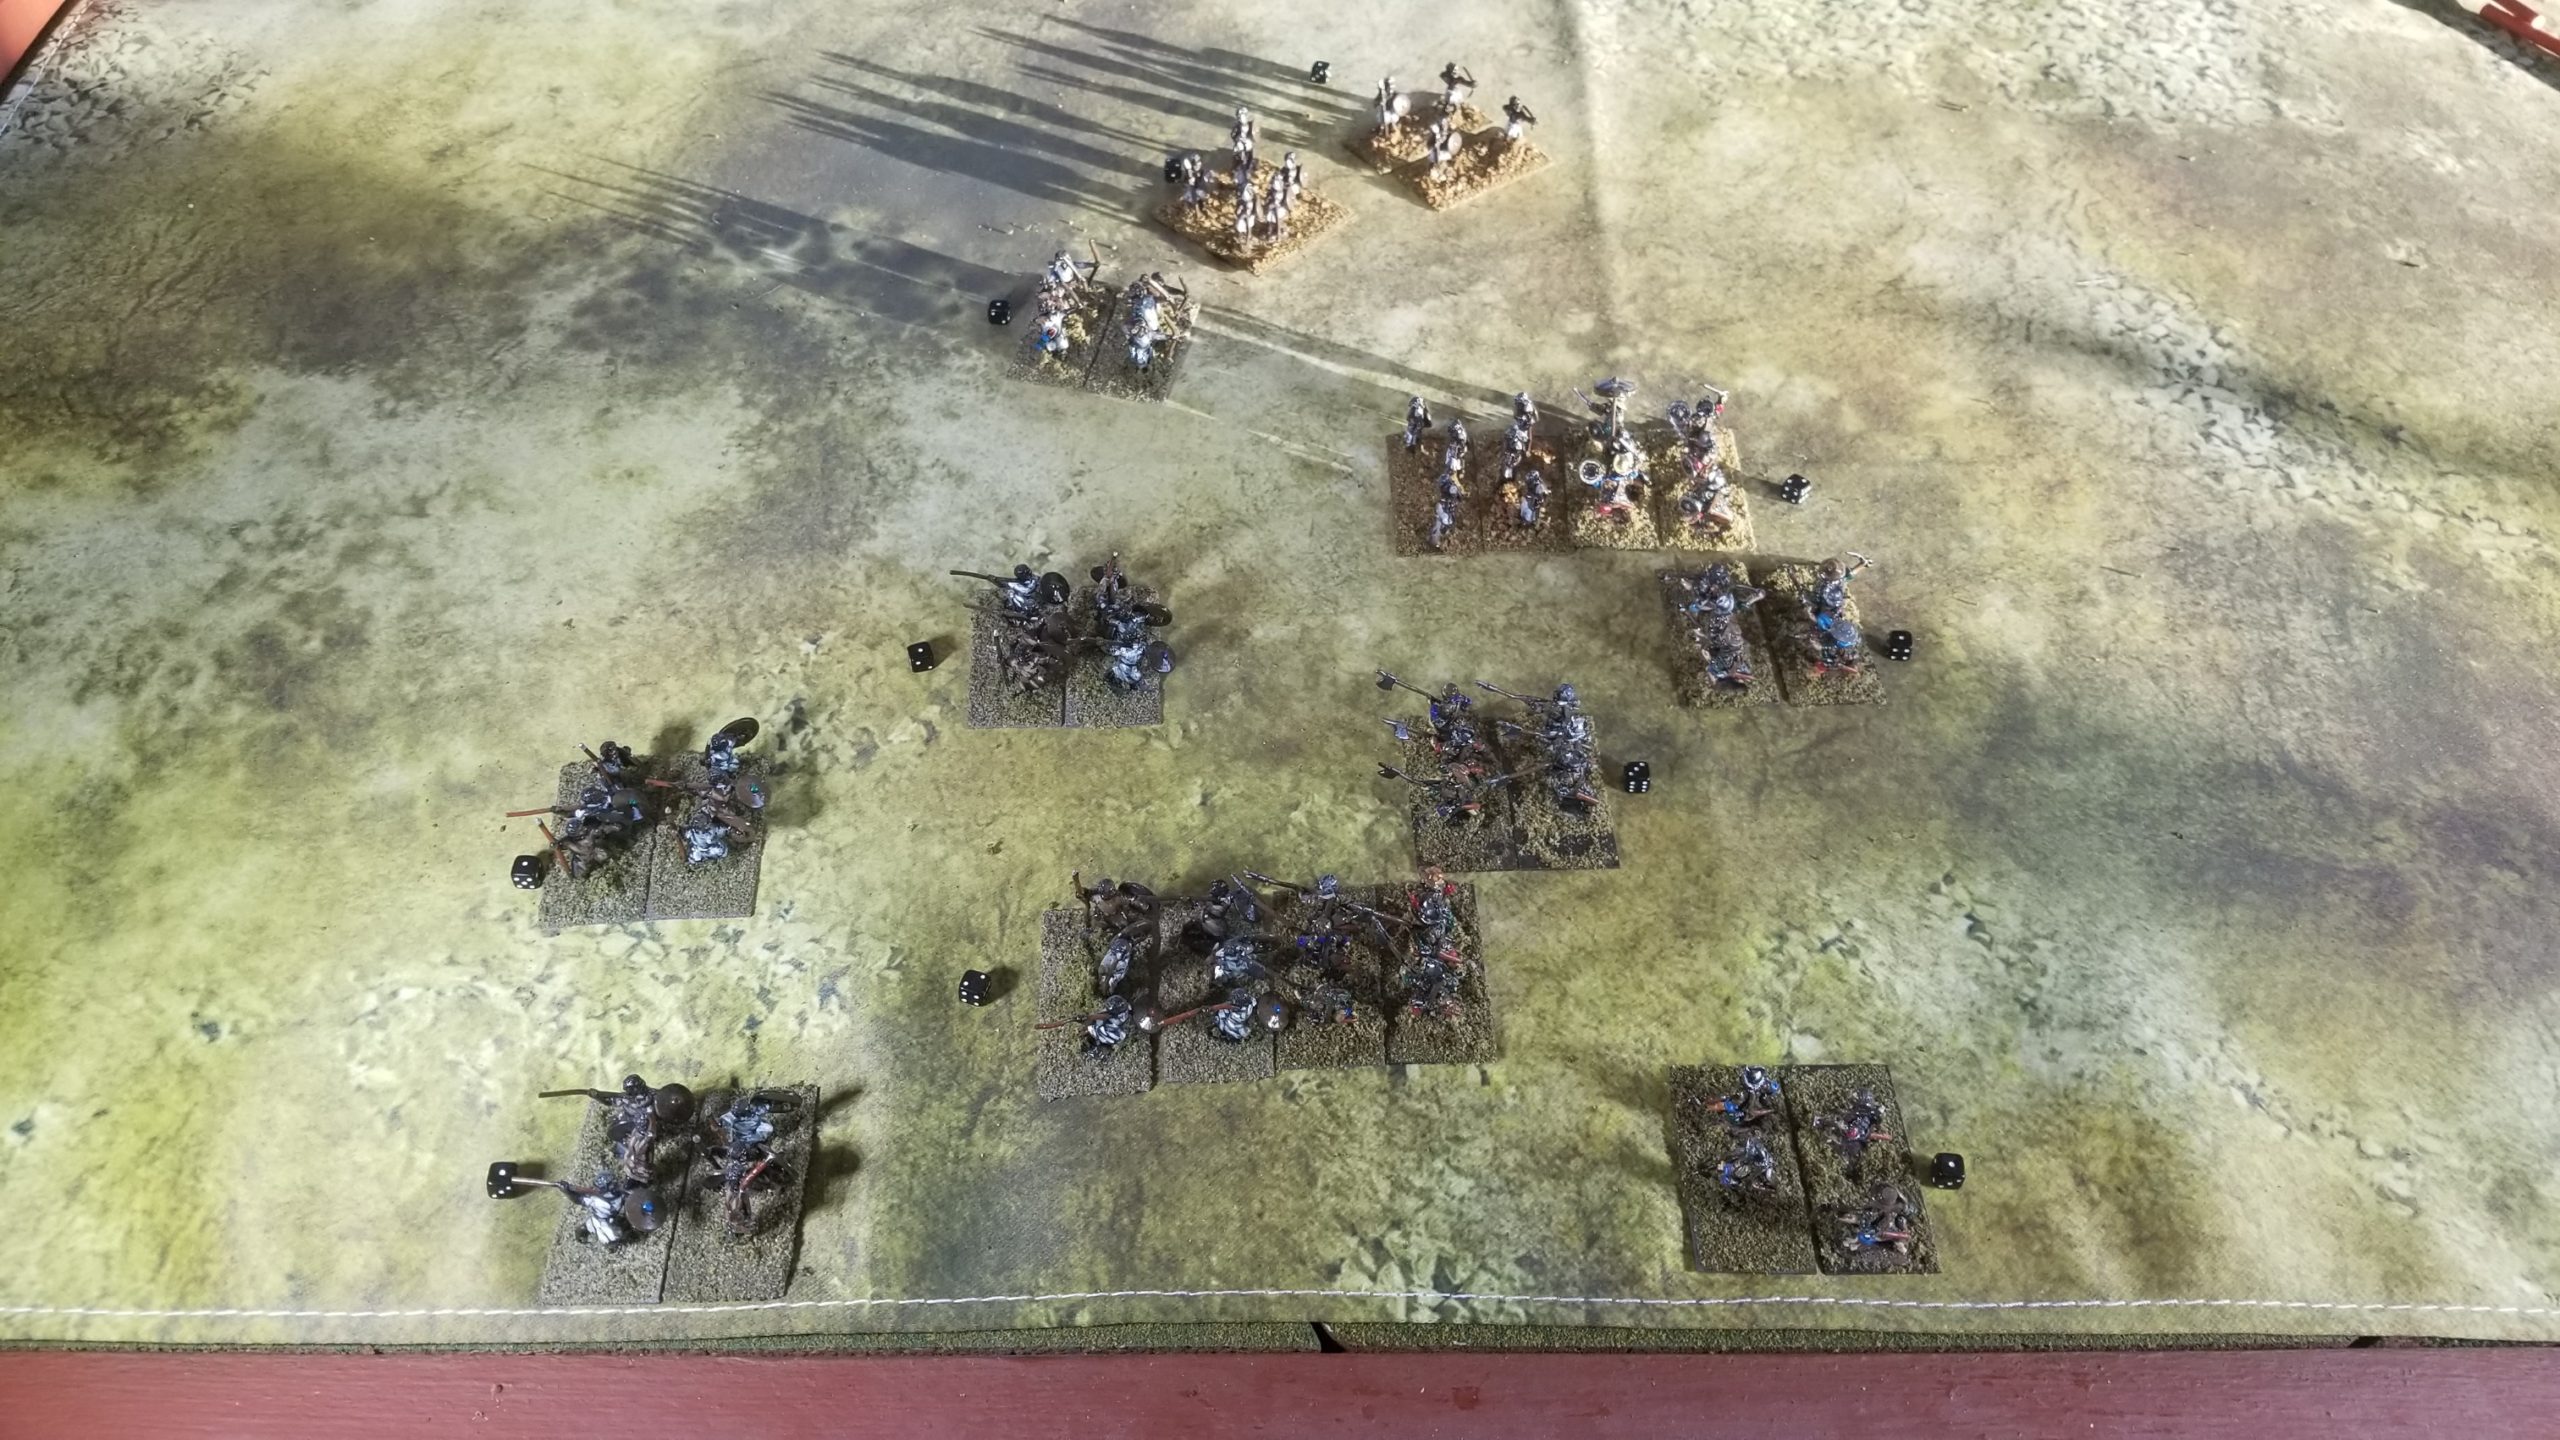
End Turn 6. Looking West. Note the number of “1” Resolves for the Portuguese. Pikemen on left. Lord Renaldo’s melee in center. Oumar’s company at the upper right behind archers.End Turn 7. Looking North.End Turn 8. Looking North. Oumar’s company moving towards contact with Renaldo’s Company. Kattegoans now with low Resolve.End Turn 9. Looking North. Carnage in center. Both sides’ companies scatter. Renaldo’s company scatters, also.
Remembered that I needed to role for Disease and Mishaps before starting play. The dice were not kind to Lord Renaldo. One of his two Targeteer units thought better of the whole proposition and deserted.
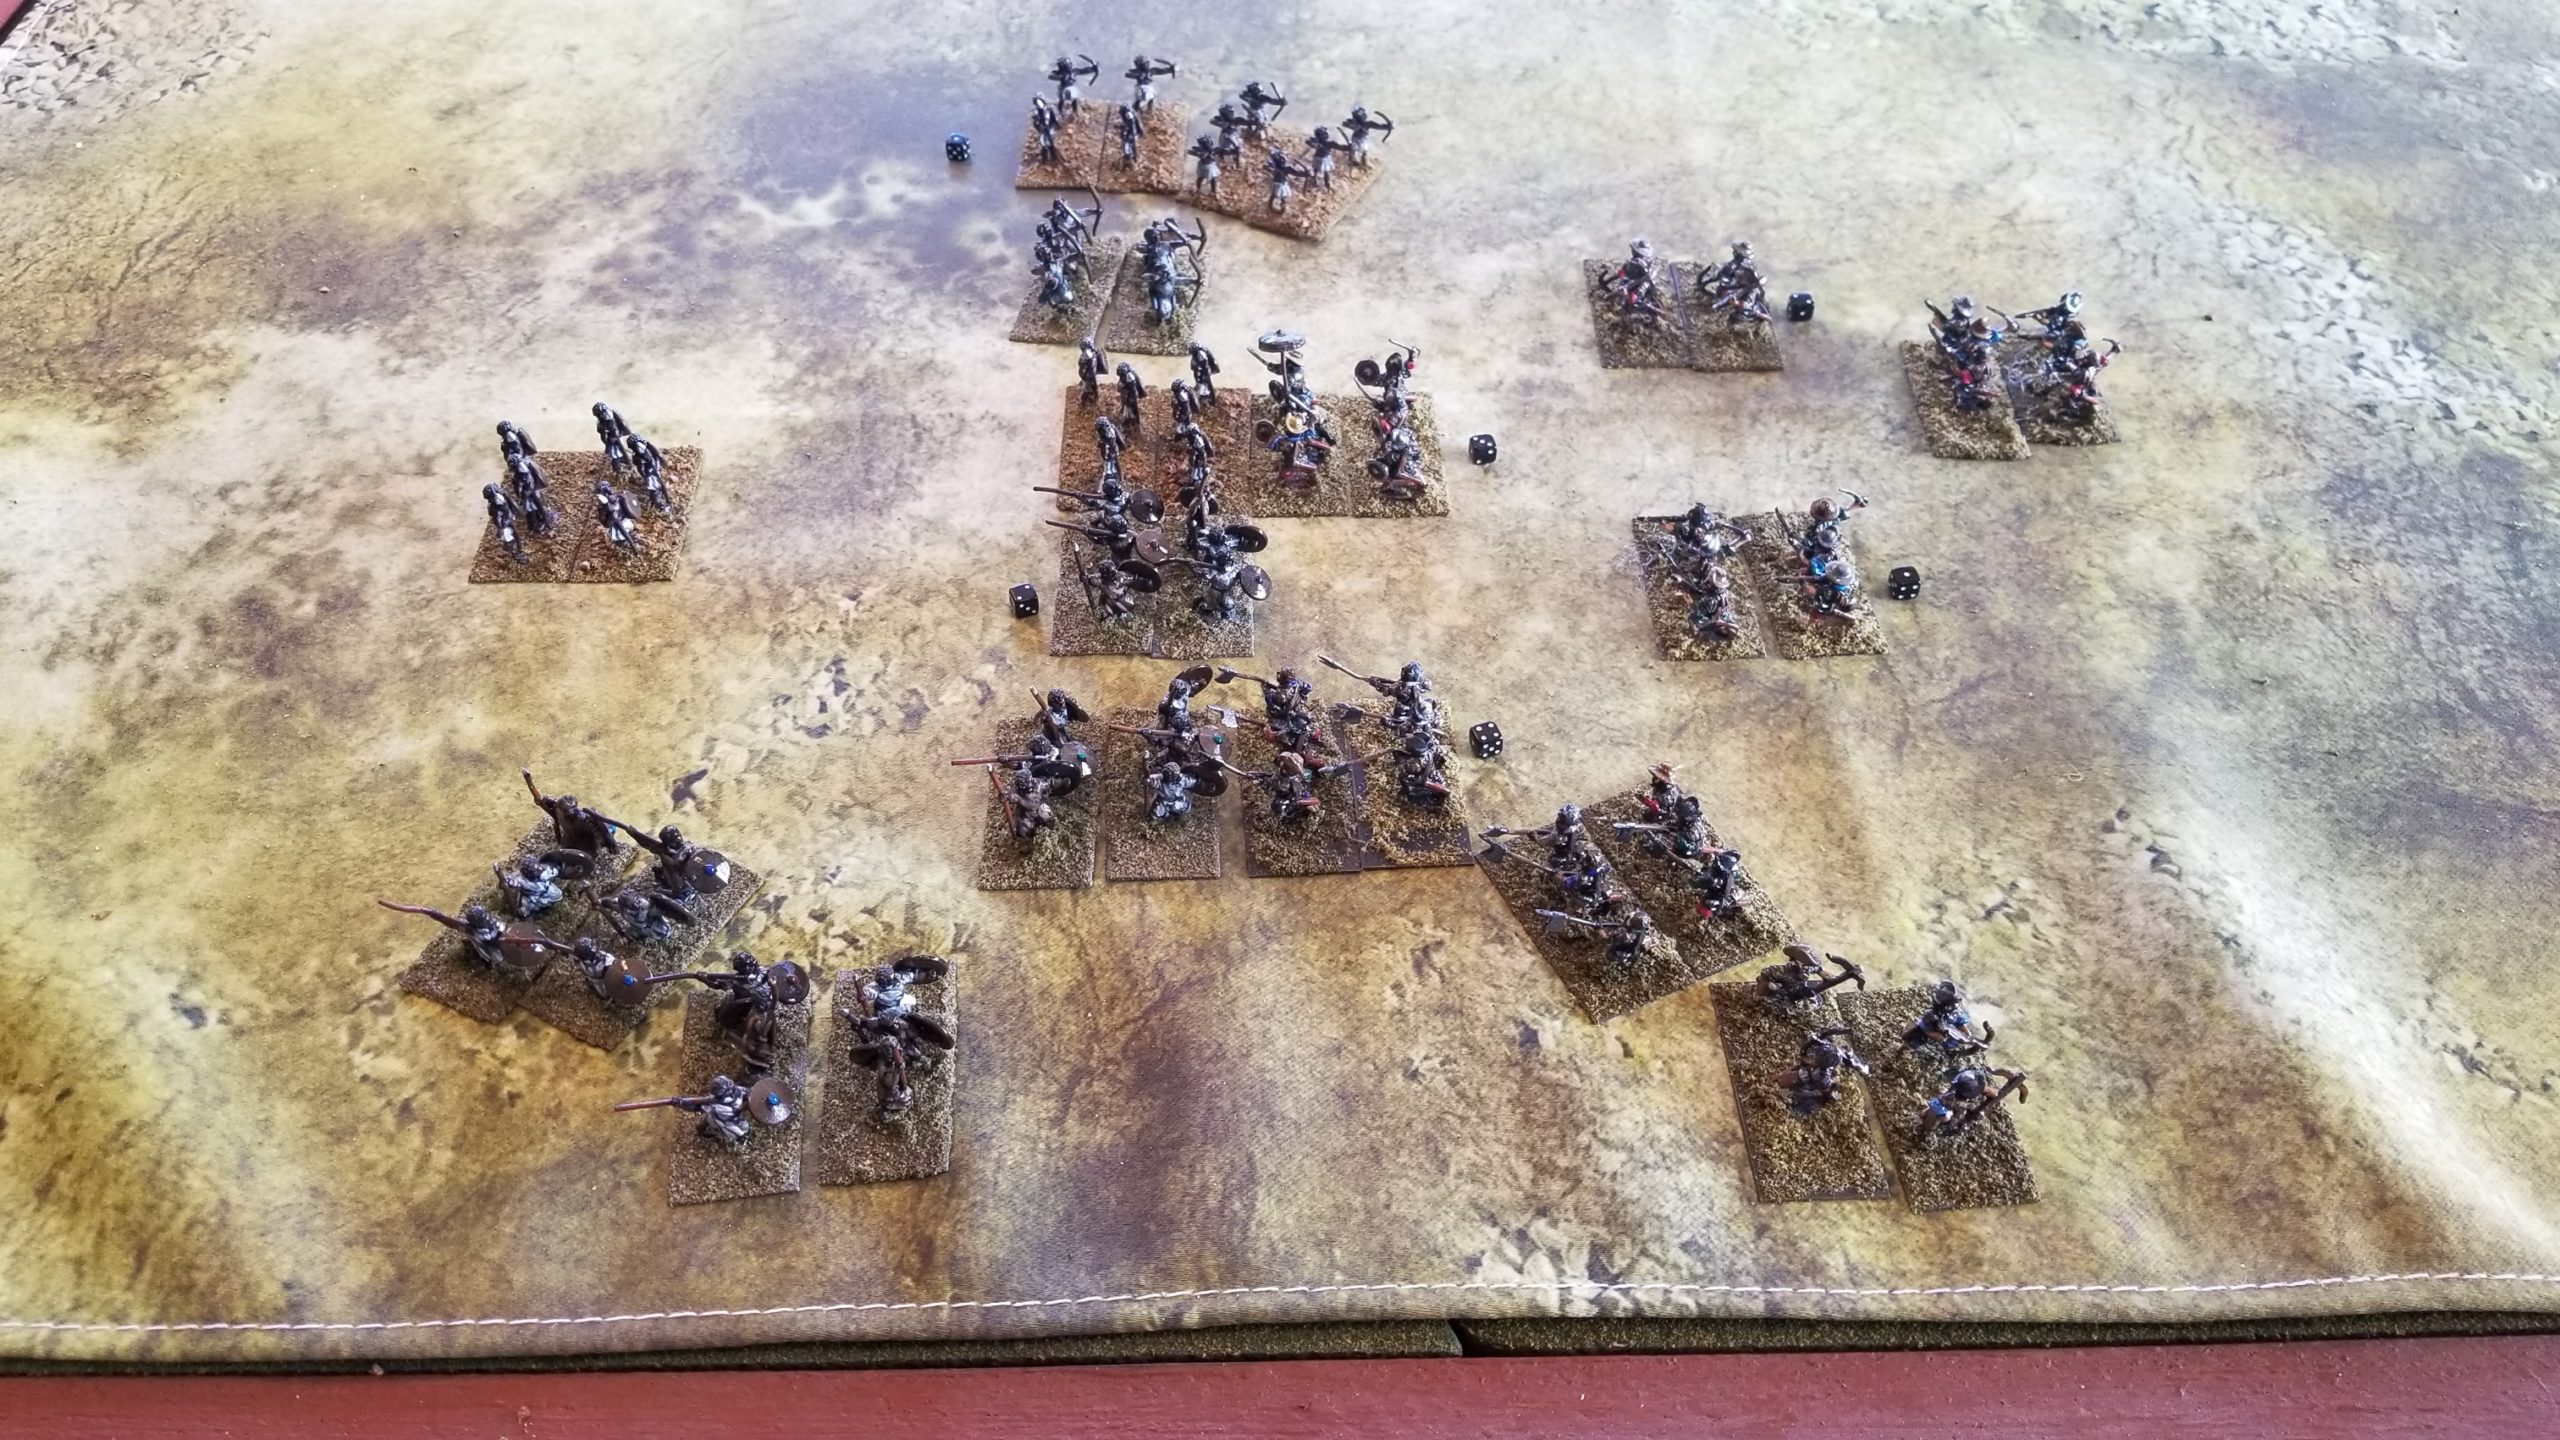
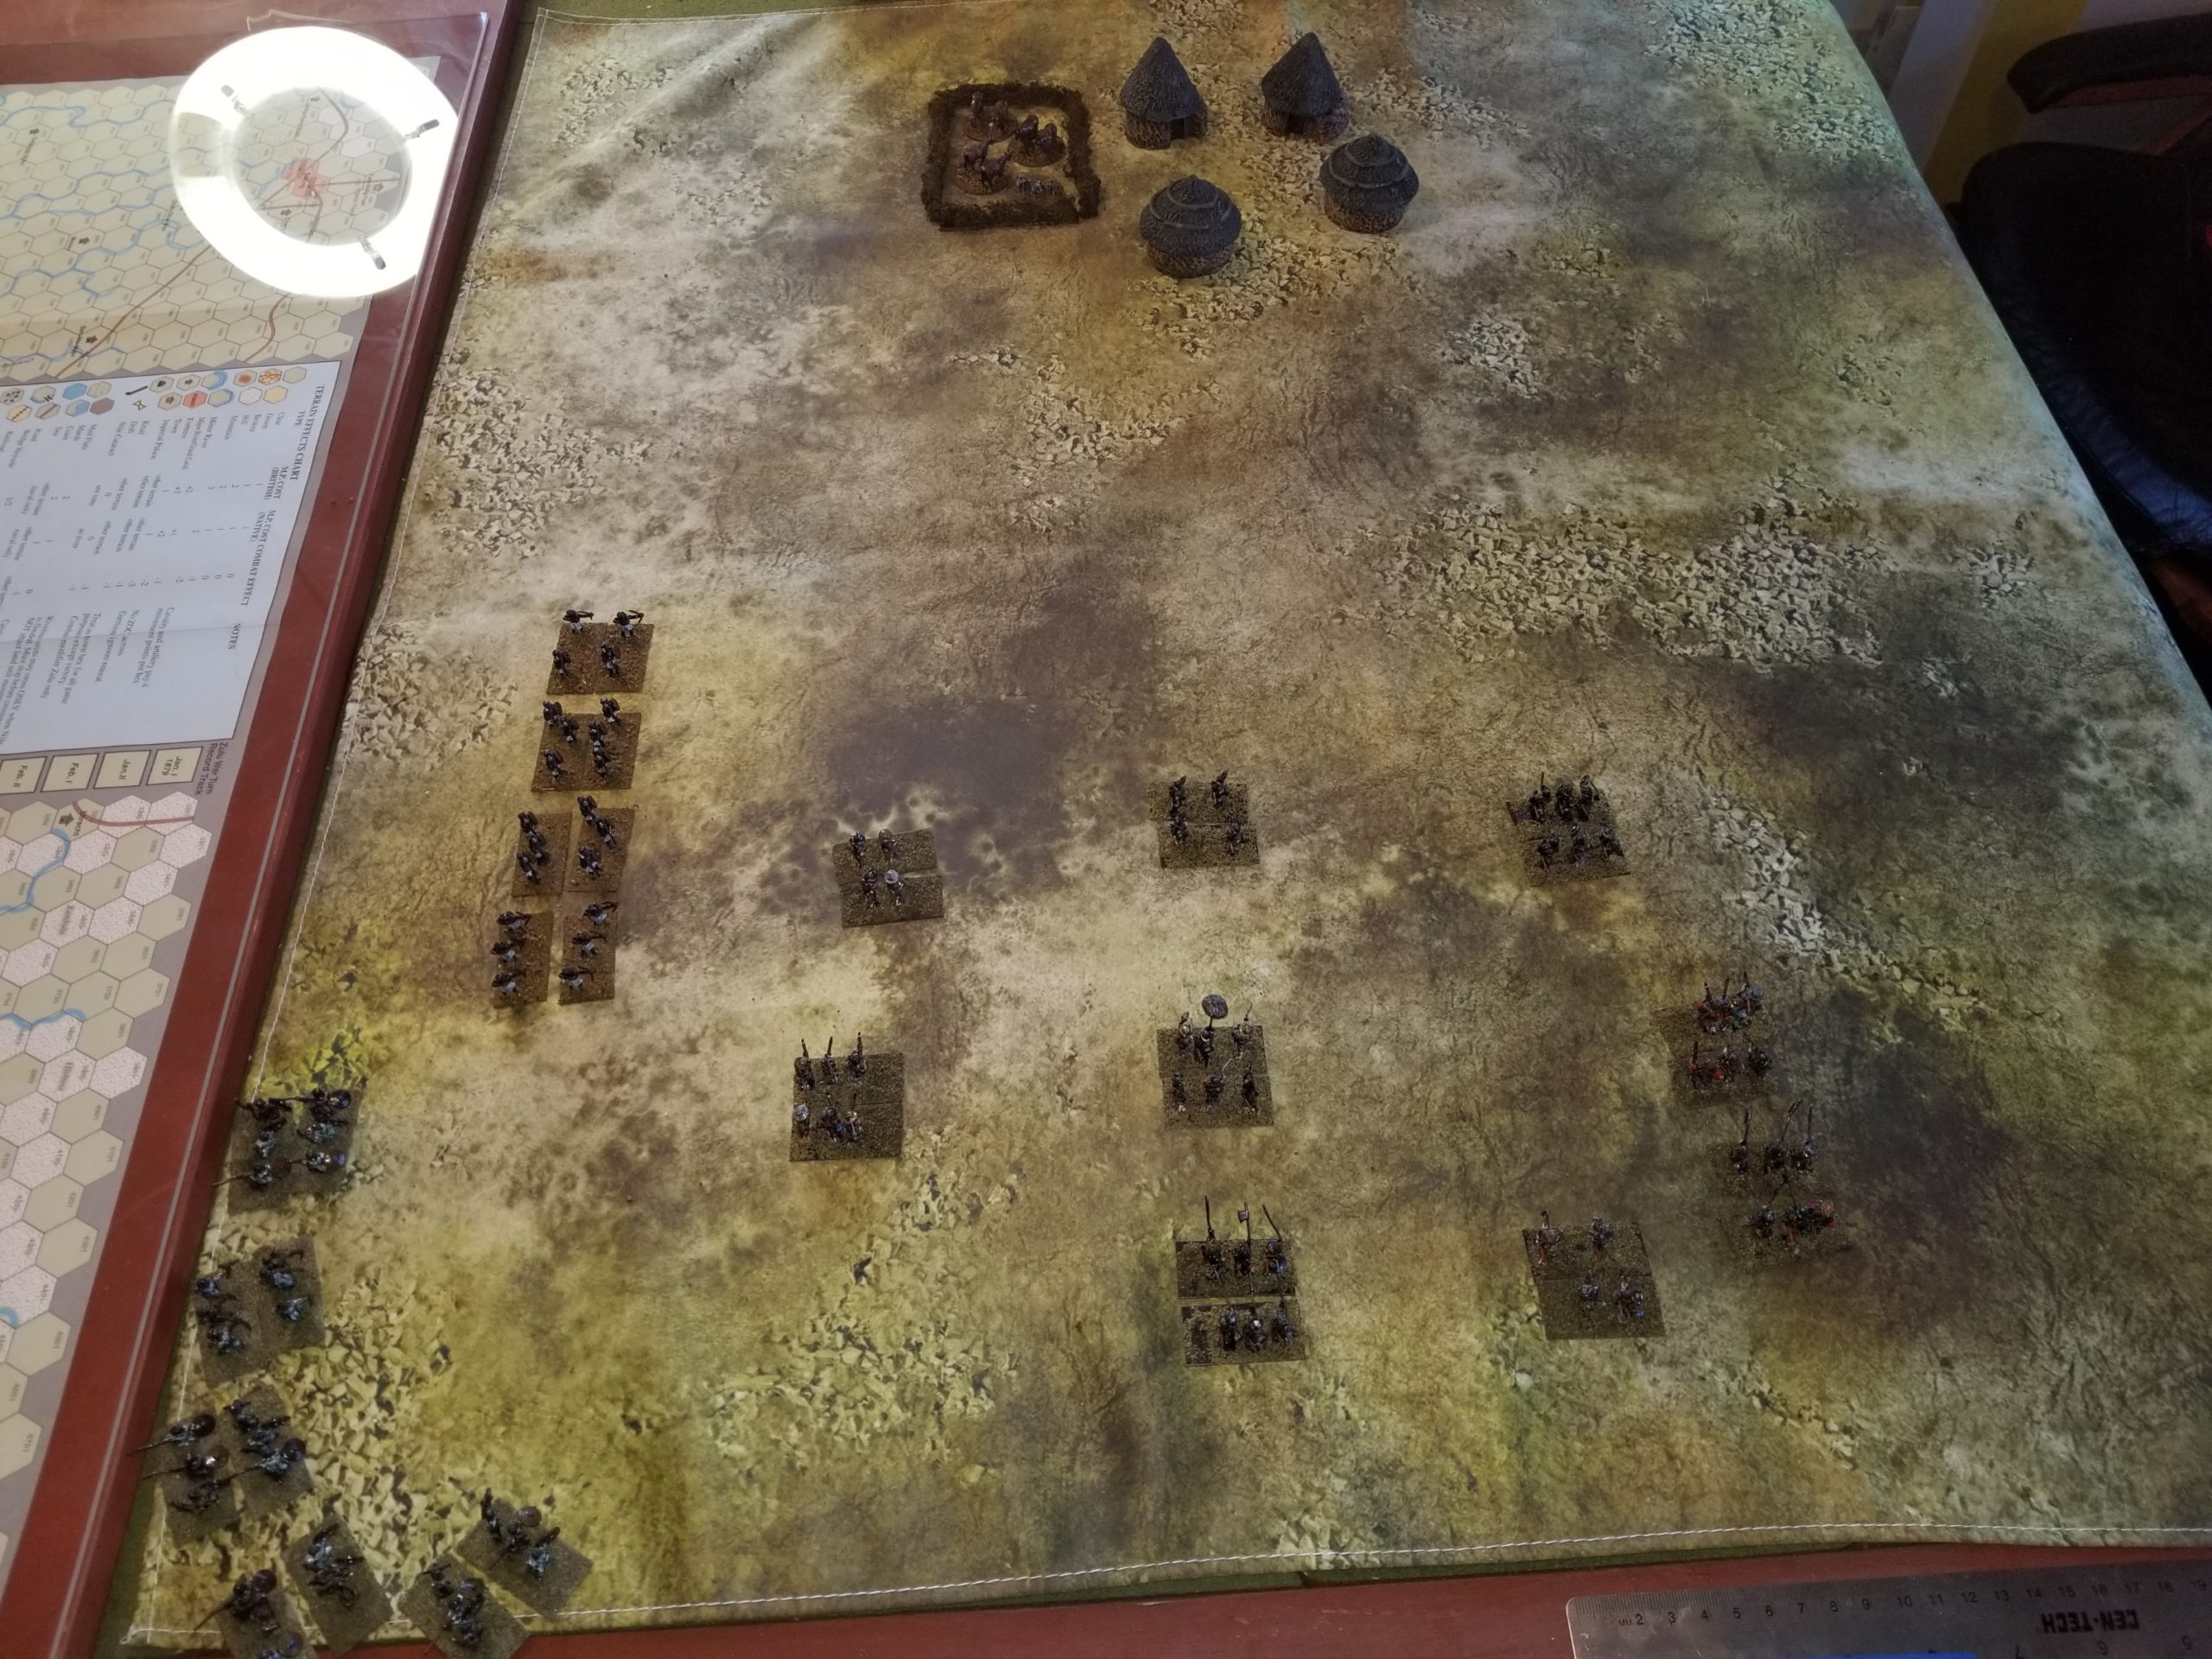
The Portuguese reacted well to the ambush, forming a defensive line. The Kattegoan warriors were too far away to make contact on their first move. View for the following photo is to the West.
By the end of Turn 3, the Portuguese right wing units had moved up to support units in melee. The Kattegoan archers focused their efforts on the Portuguese right, but with little effect. The Portuguese musketeers struggled to attain good lines of fire. The following photos are looking North and West, respectively.
During Turn 4, the Portuguese line stabilized. Lord Renaldo’s Targetters anchored their center. The Kattegoan archers flanking fire was still ineffective. Here’s another view looking North.
By the end of Turn 5, the Portuguese musketeers were firing with some effect. One melee has ended in a “Bloody Draw”, with both sides recoiling due to Resolve of only “1”. Neither unit can be rallied because Lord Renaldo is in melee, and the Kattegoan leader has somewhat inexplicably moved off some distance to the left (North) apparently to support the archers.
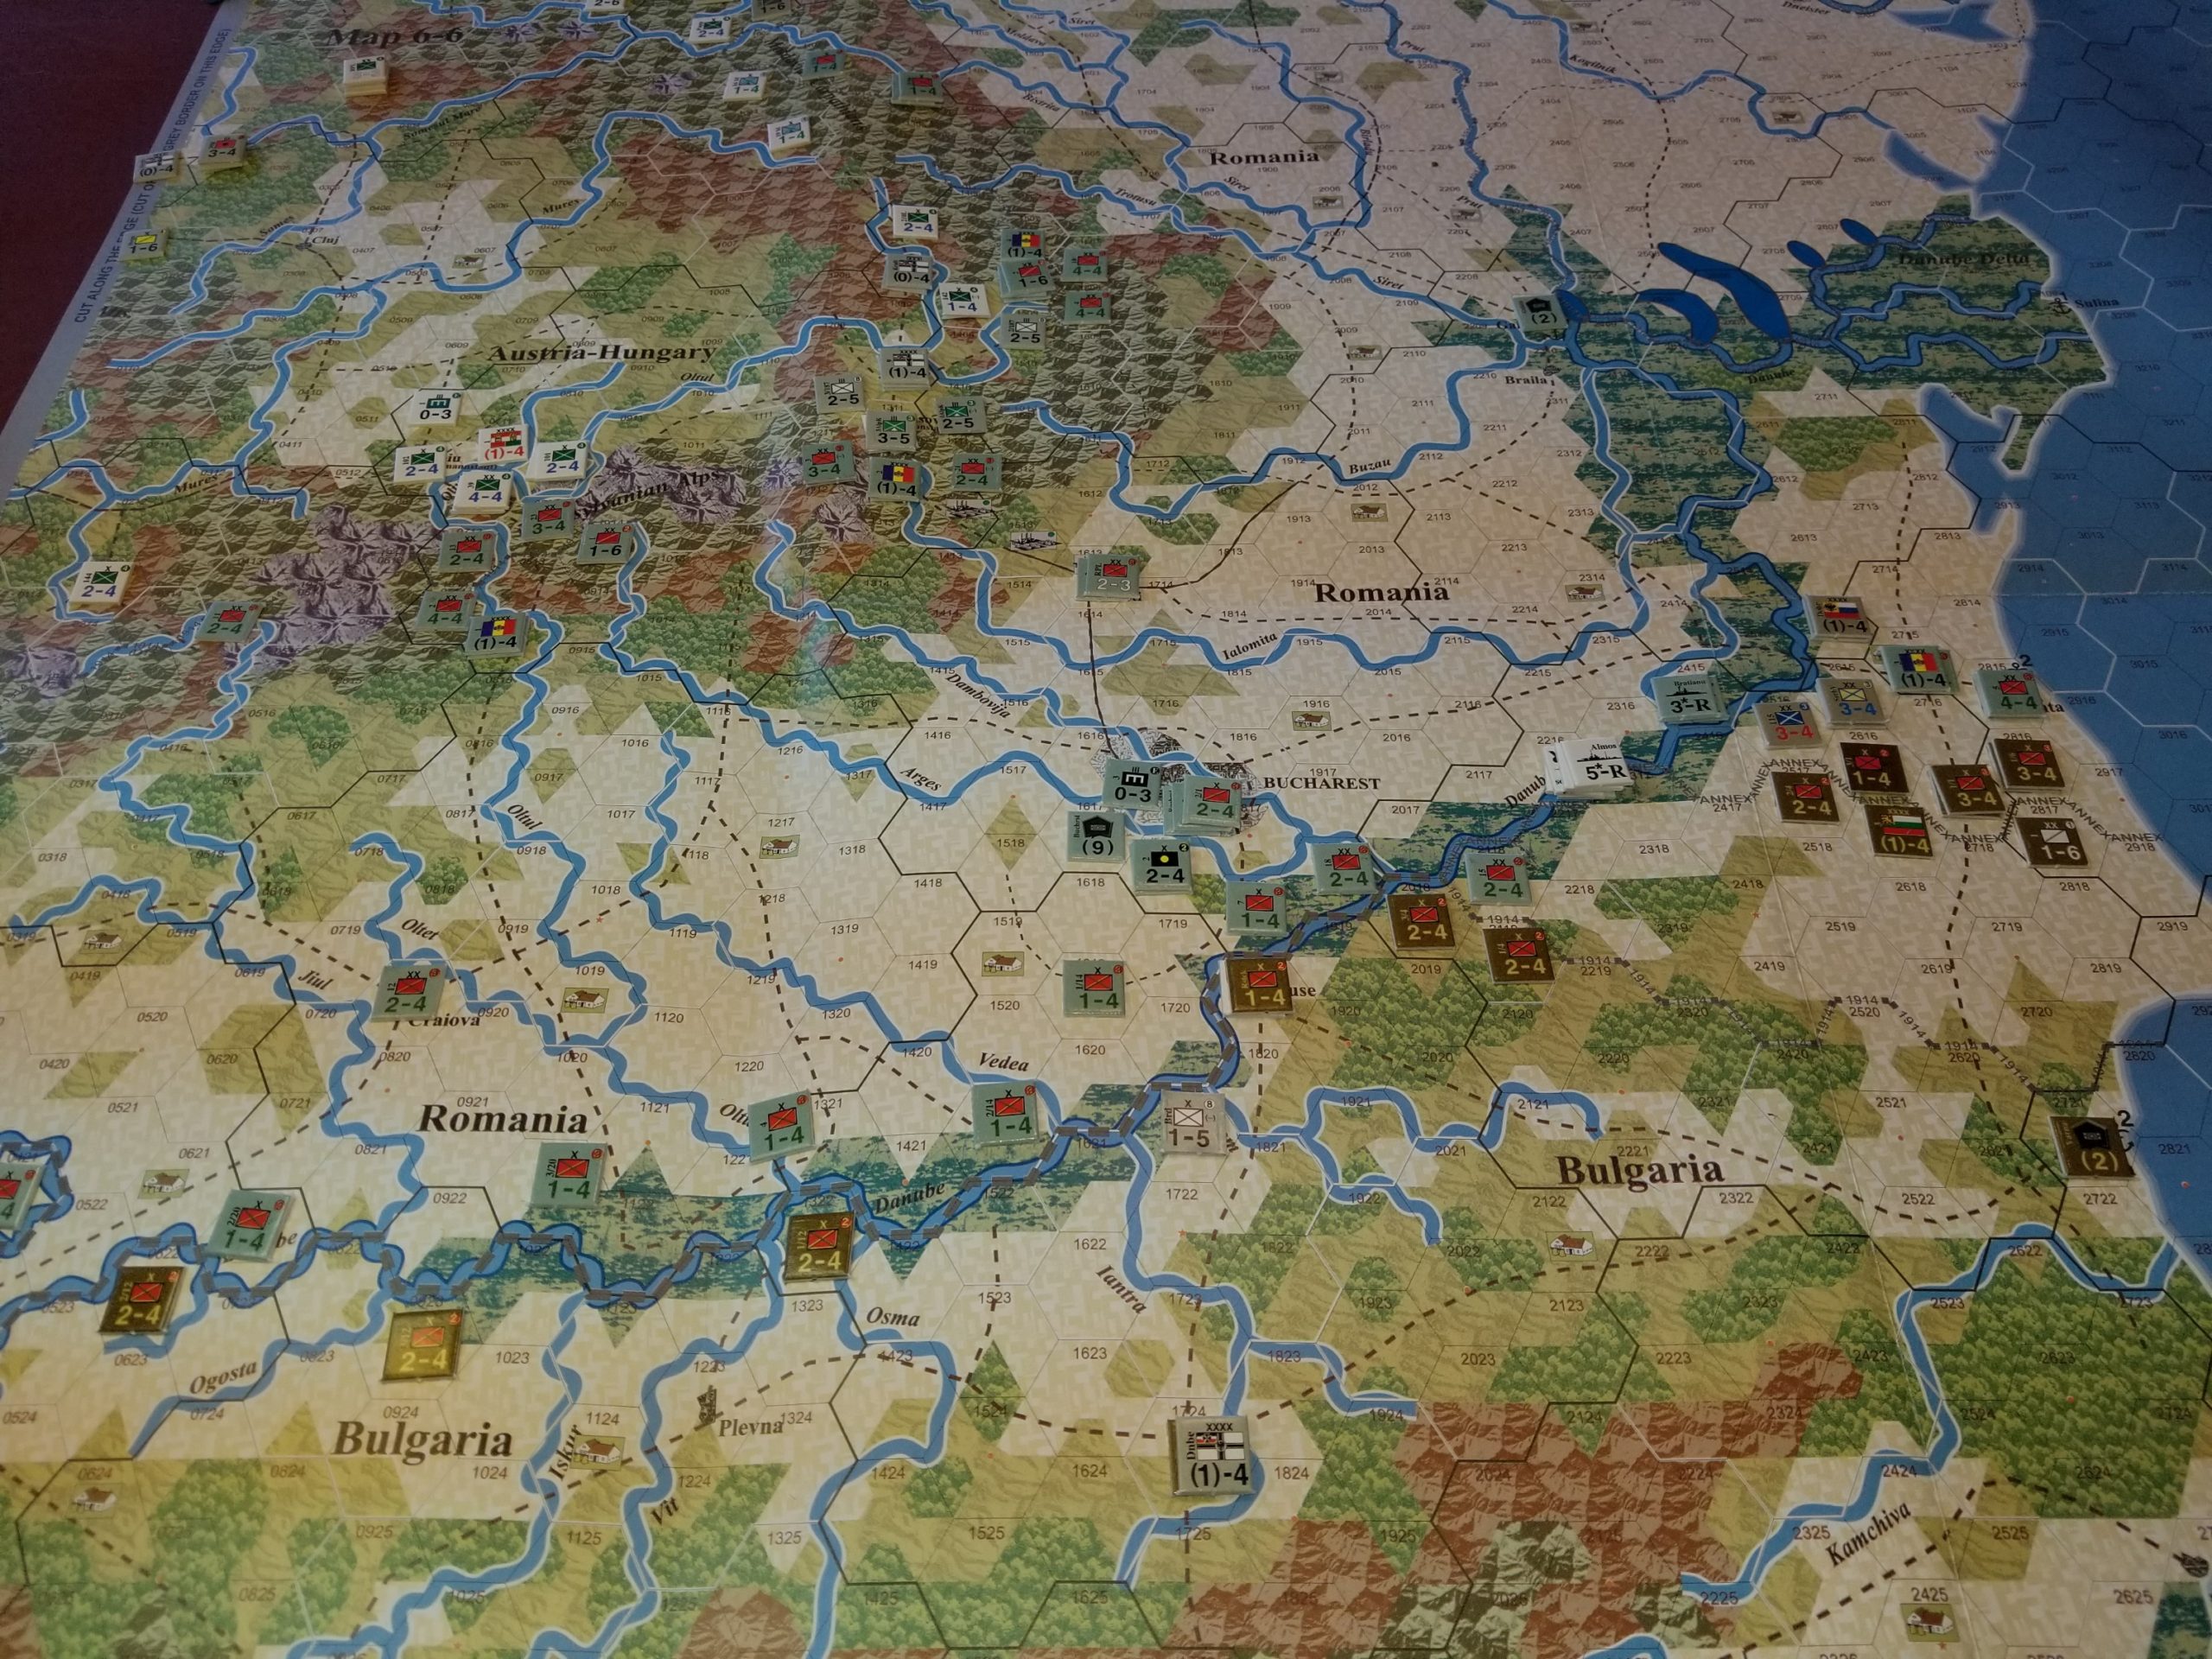
Finally got around to continuing my play of Romania – The Transylvania Gambit.
As previously posted, the Romania Army’s plan was badly flawed, and the scenario certainly reflects that. The availability of German reinforcements to bolster the Austro-Hungarians effectively stops any offensive across the Carpathians.
Despite the slow operational tempo of mountain fighting and Romania’s desperate-from-the-start prospects, I was settling down for another session when a casual glance at the rule book moved the game from the possibly forgettable to another memorable rules gaffe.
Tim’s been on me to compile and post a list of our grotesque errors of rules omissions and commissions. I have consistently demurred. Not out of personal shame, but because the compilation would be a very lengthy and time consuming process. So Tim, here’s one in real time.
All those German reinforcements hustled south using the Austro-Hungarian rail network, which has a capacity of three units per turn phase. It took a few phases, but the Romanian attacks were quickly blunted. Well, that was too quickly. While the entire rail capacity is three units, the capacity for any one rail line in that network is only one unit per phase. Whoops………..
The poor Romanians were not only fighting a flawed initial deployment and the mountainous terrain, but also some very tough units that should not have been there – at least not so quickly.
Well, that put paid to the game. It was going to be some time before the operational tempo accelerated past “slog” speed, especially with Winter just around the turn track corner. My current impatience is not the best mood to enjoy a scenario which accurately represents the time and resources required to build up combat power in this theater of operations.
So, despite my high regard for the system, I decided to pack it up, and move on to another game.
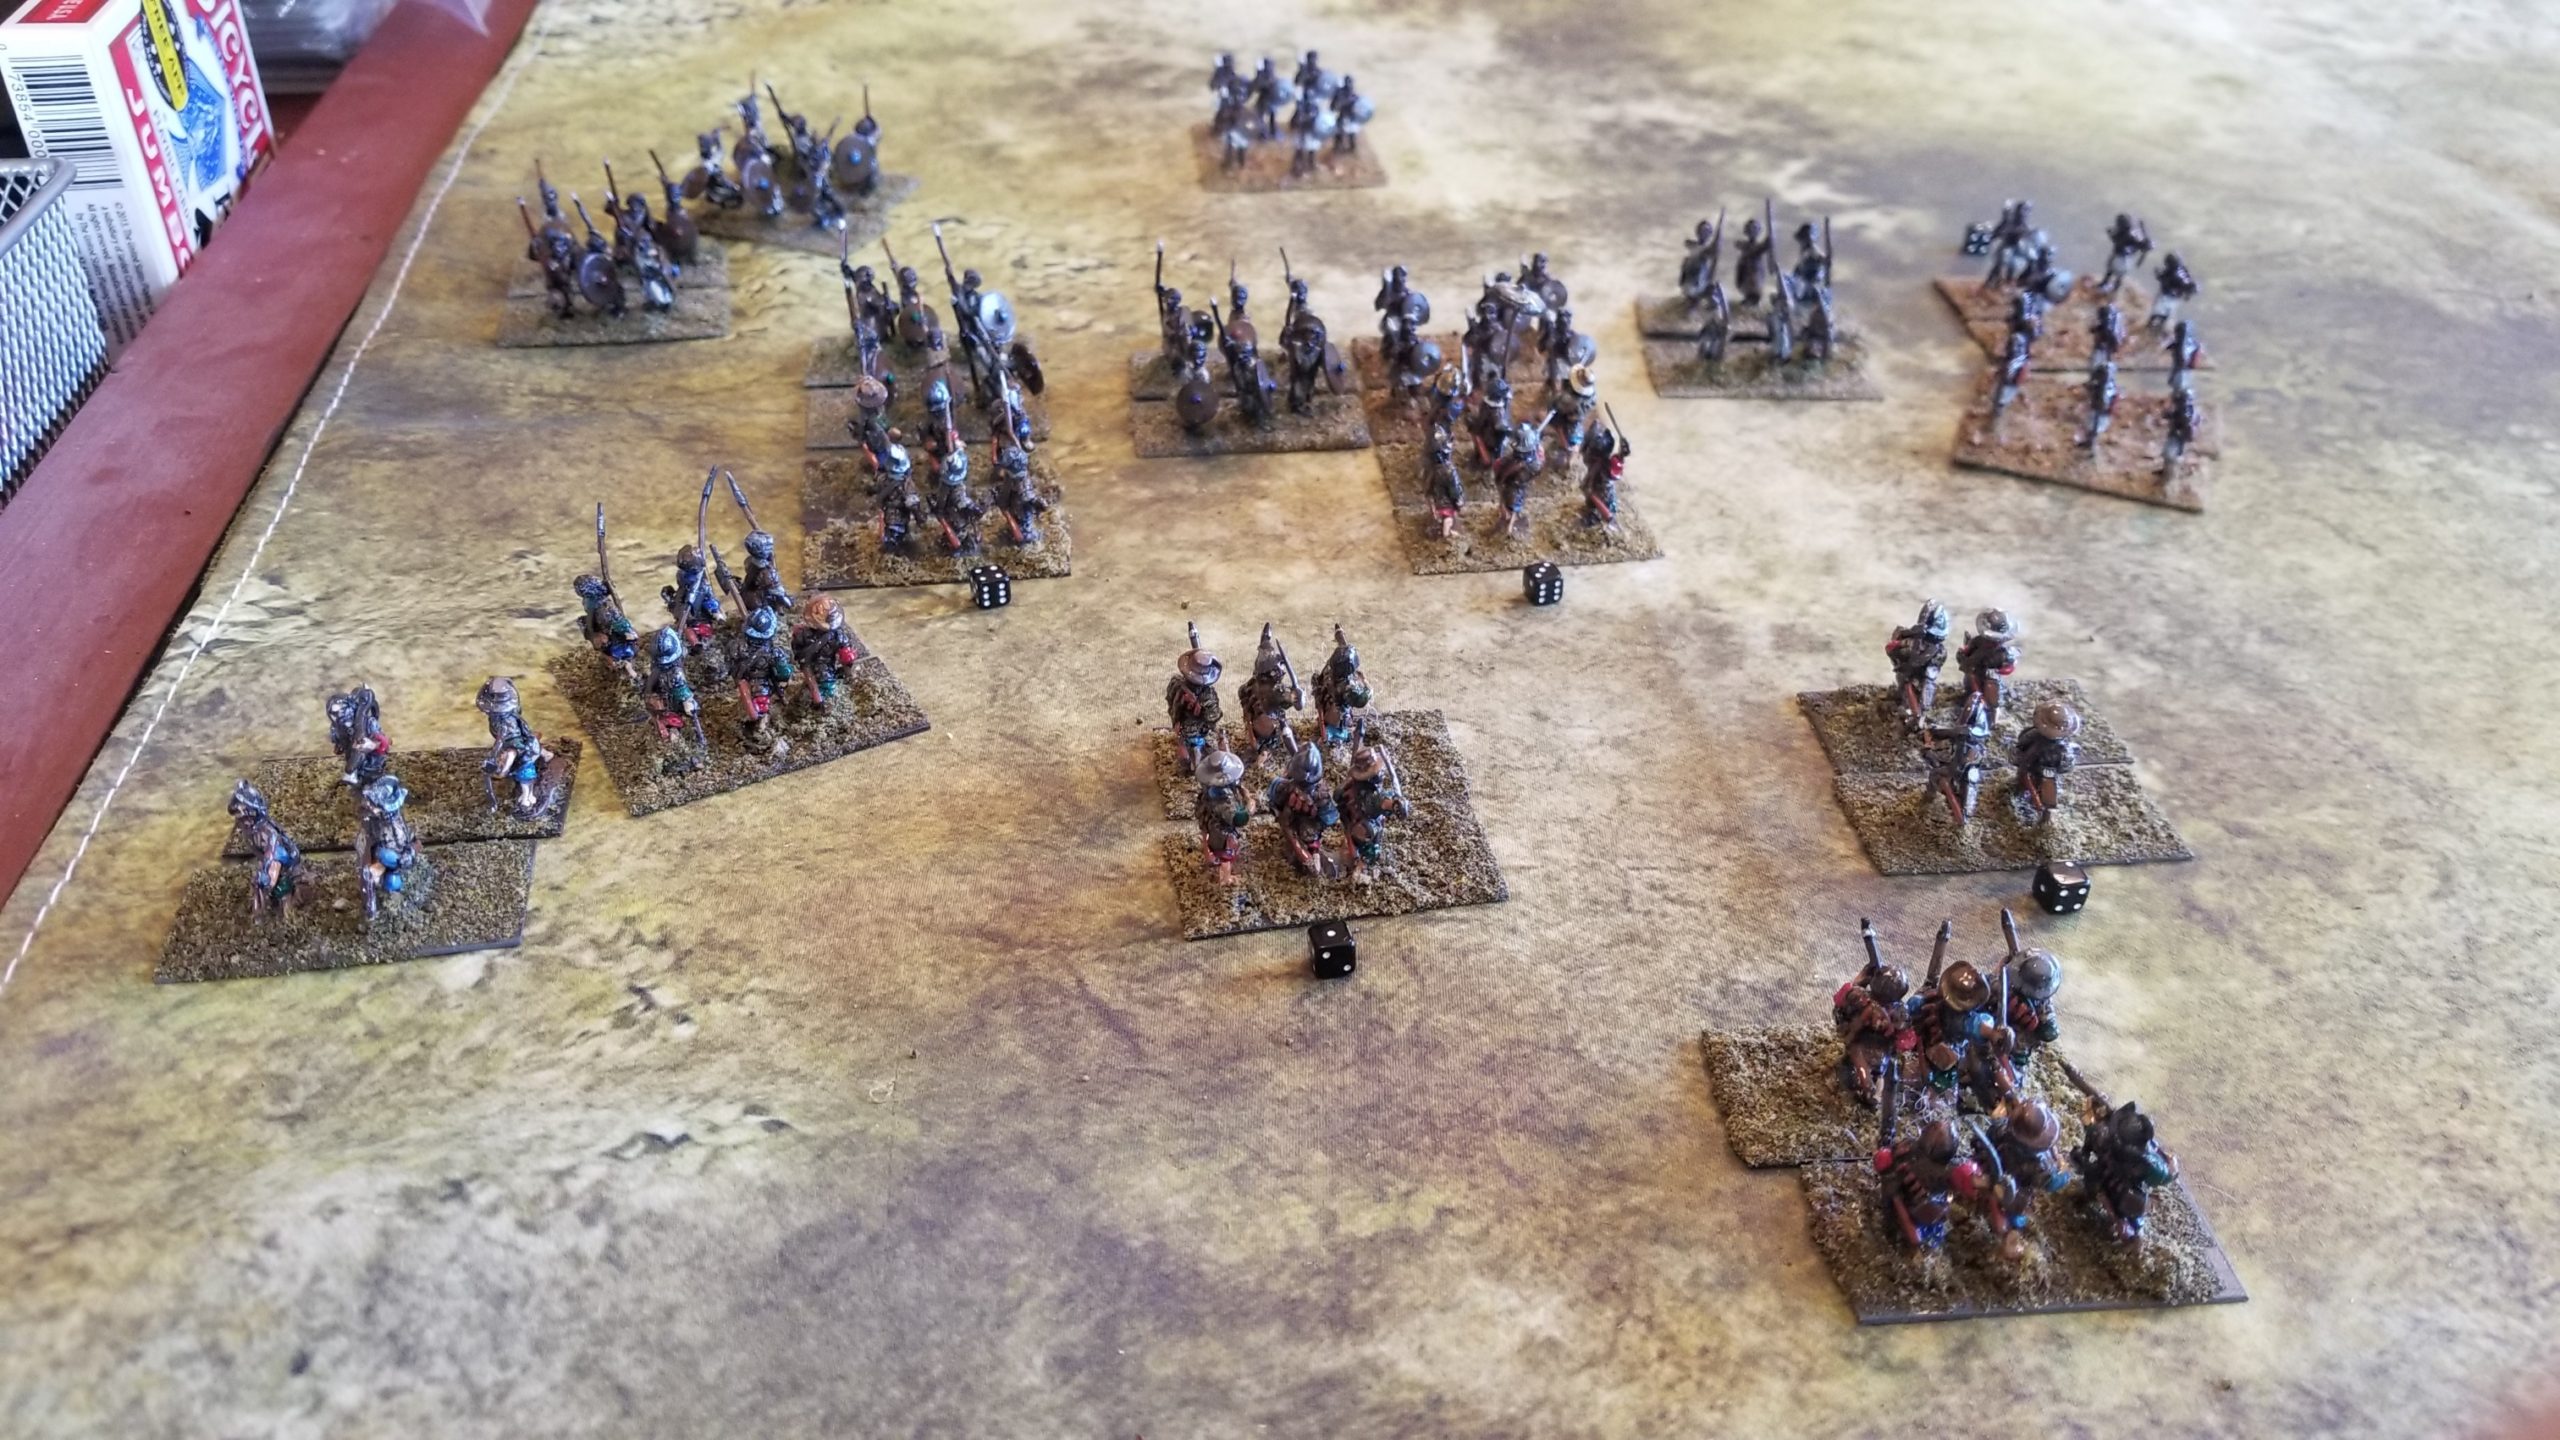
Here’s a photo taken right before it all went back in the box. Note all those gray German units in the North Central portion of the map.
I set up the initial dispositions using the die rolls described in the previous post.
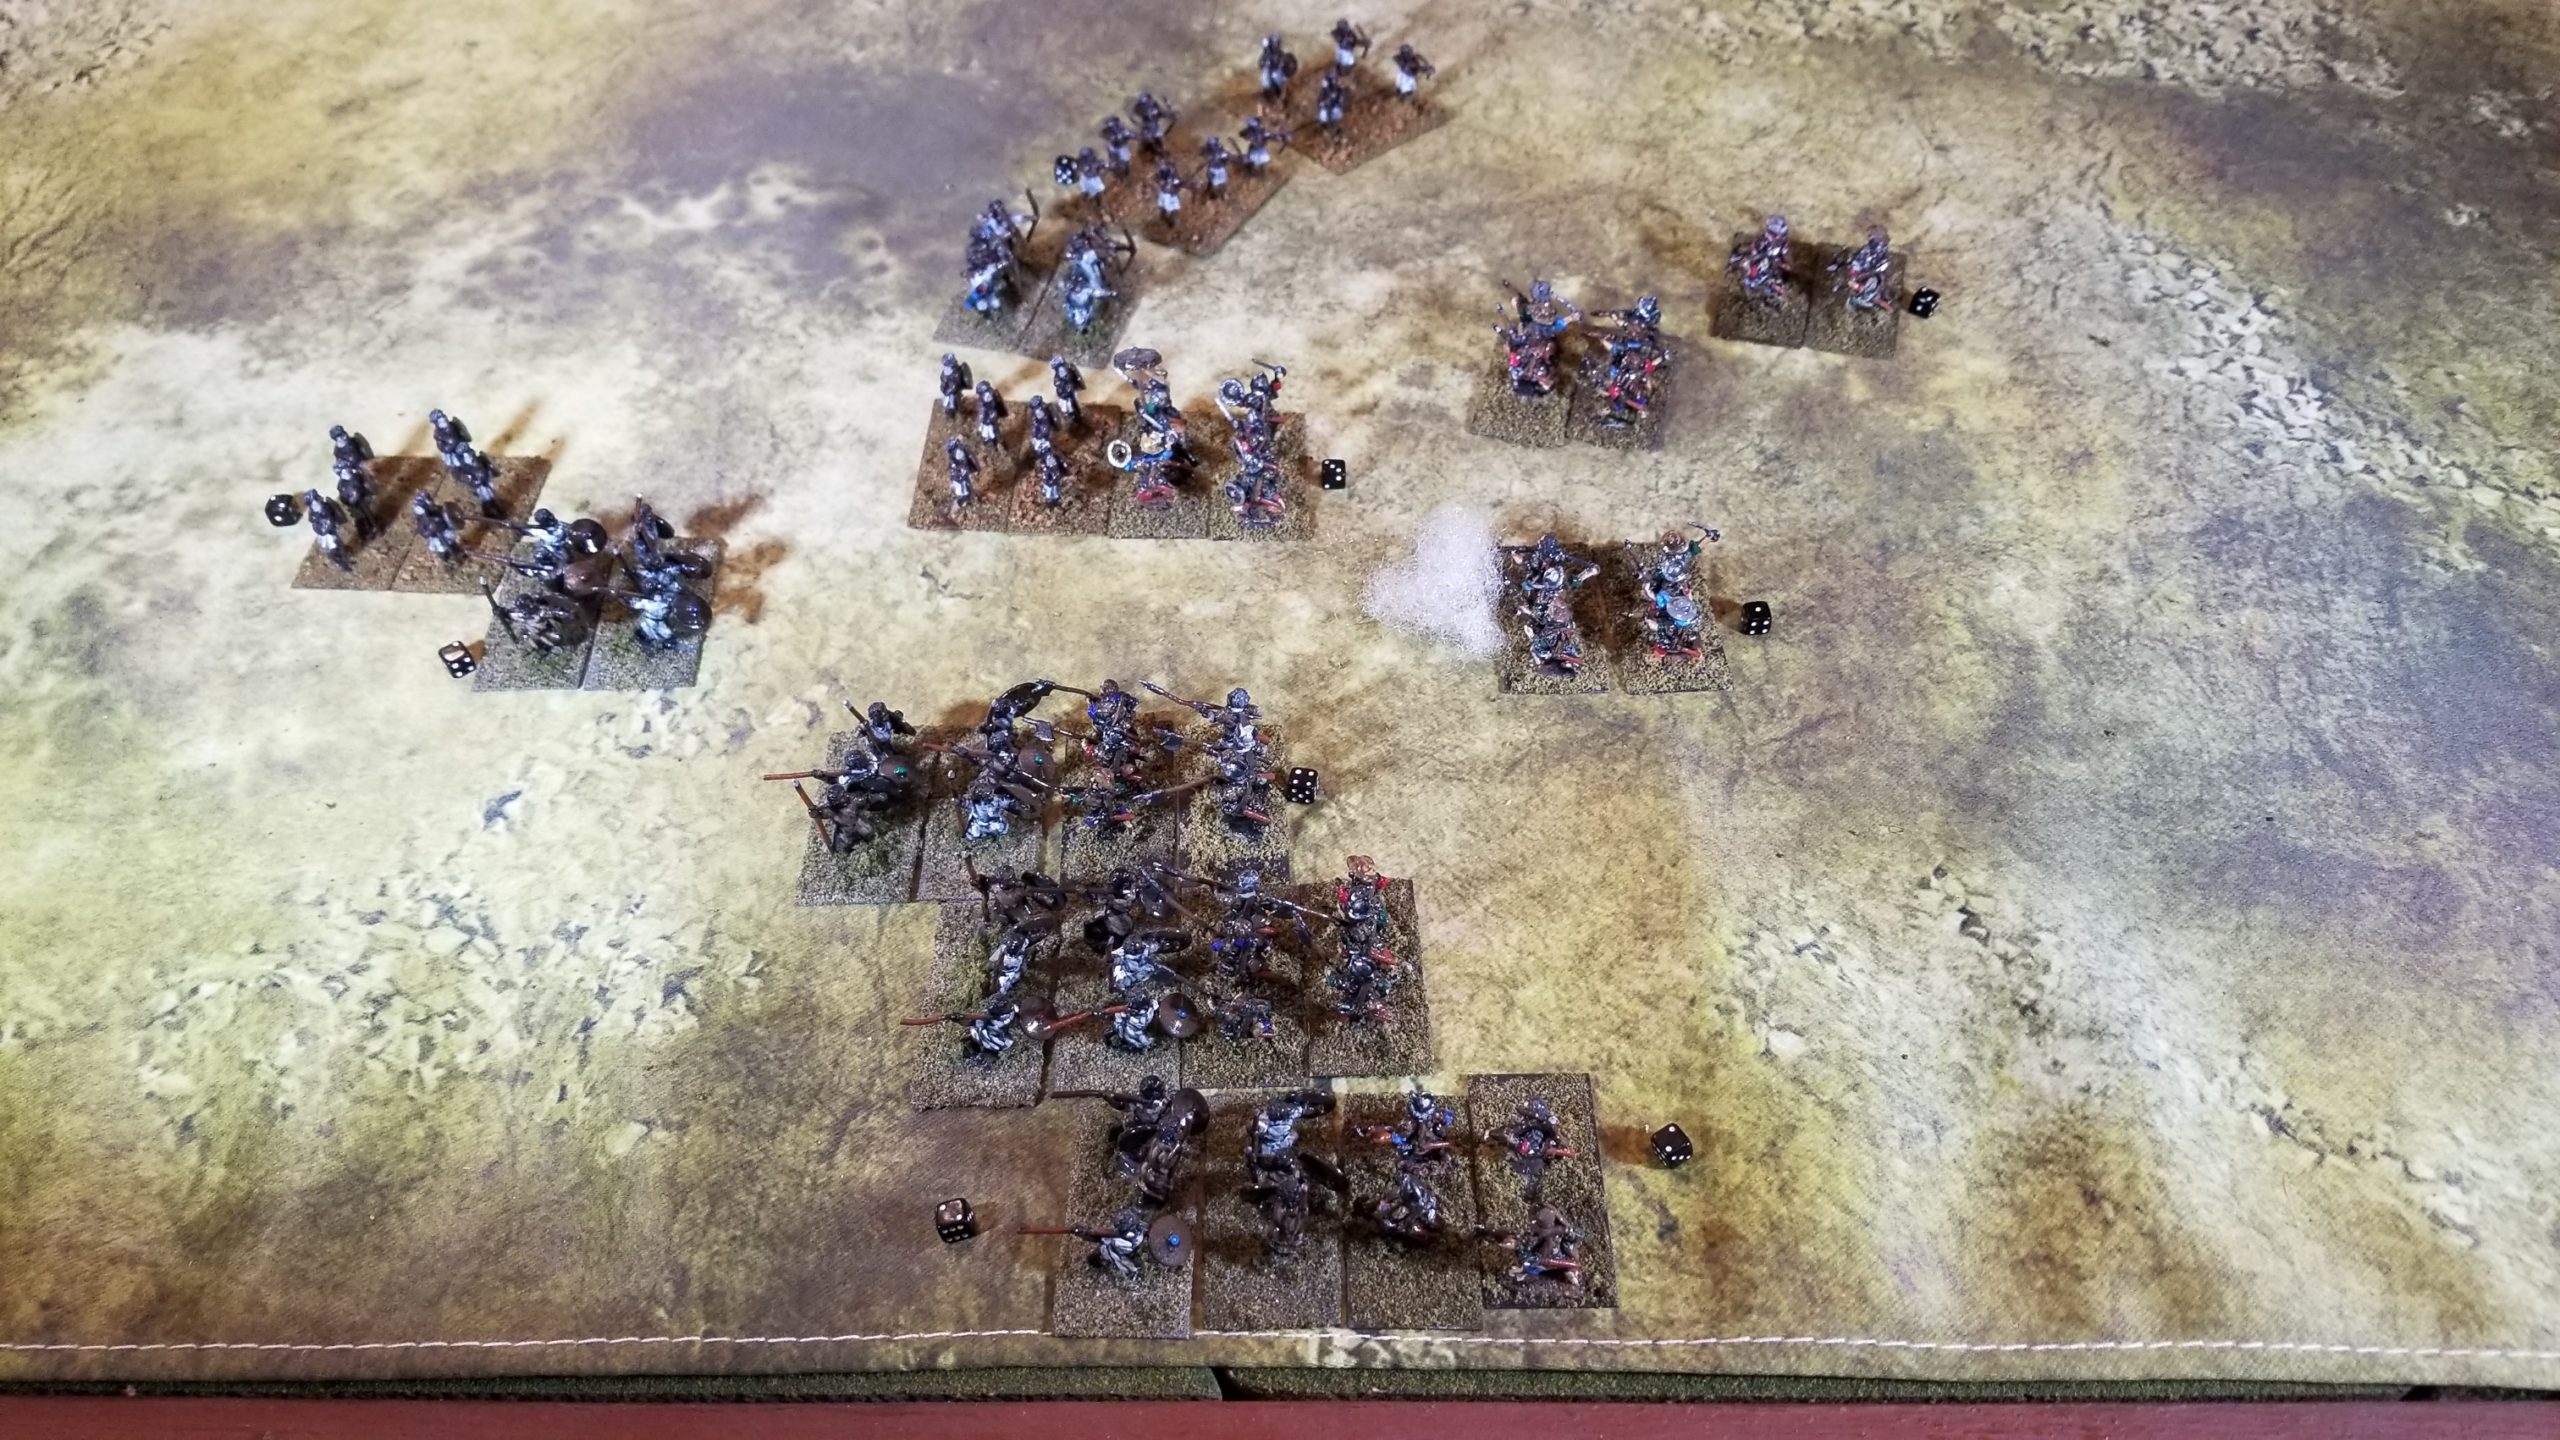
The Portuguese are disorganized, with Lord Renaldo near the front of his faction. The bulk of his companies are East and some distance from him. Only the grenadiers proceed him. His force is close enough to Kattego to trigger an immediate ambush.
The Kattegoans rolled for two ambush groups with forty percent of the force West of, and three units distance from the Portuguese. The larger group is to the Southwest and five units distance from the invadiers.
After a series of failed photographs last night, I changed the overhead light and saw the chance for a striking aerial shot of the battlefield. It is shown below. That orb is the reflection of a task lamp bouncing off my brand new plexiglass map cover. If it isn’t one thing…..