Category Archives: Sessions

What’s In Here?

While pawing through a closet I found a WalMart plastic bag.  “What The Hell Is This?”. Well, this is this…….

Forgot I had put together small Central Asian and Russian forces for “The Men Who Would Be Kings” last summer/fall.  Purchased them over at wargamevault.com
I did bring a game mat (if you can call a bolt of sand colored cloth purchased at Jo Ann’s Fabrics a game mat) with me.  The intent was to break out my World Of Fun Napoleonics and mess around with the Valour and Fortitude rules on the dining room table at some point during my stay.  That might still happen.
But, why not a couple of quick and fun games with these?

The Kaiser’s War – Central Powers Turn 1

Finished up the Central Powers’ turn.  Went all-in for both the Western and Italian Front offensives.  Used up victory points  to provide Maximum Attack Supply (which doubles unit attack values) in order to get odds of 5:1.
Each side has two combat phases (consecutive) per turn where any units can attack. With a Defender Panic combat result the defenders are eliminated if they roll a D6 greater than their movement allowance (most units have a movement allowance of “3”).  If not eliminated, they must retreat a number of hexes equal to that die roll.
The results were mixed.  In the West, the attacks were successful in forcing the engaged British units to retreat.  However, they did so in good order and were not eliminated.  A different story in Italy, where two Italian units were destroyed and a gaping hole opened (Caparetto).
Further east, Central Powers armies are massing along the Salonika Front.
Here are a photographs of the Western and Italian Fronts, respectively.

Kaiser’s War – Initial Dispositions

My resolve remains high.  Set up and ready to play.

With my usual lack of imagination, the Central Powers (CP)  focus is on The Western Front and Italy.  No ahistorical play right now.

The rules highly incentivize the CP player to attack in the West.  Tempting bonuses for using Storm units and occupying Allied (A) trenchlines at the end of Turn 1.

Here’s the situation in the West, followed by that in the East.  Play starts tomorrow…..I mean it!


This Time I Really Mean It

Boardgame Geek has a wargame forum thread entitled something like “What’s Your Table Look Like”.

Well, my table here in the Sunfish Capital of the World has been dipped in amber.  I’ve had The Kaiser’s War: 1918 on a card table for well….this is the third calendar year.  I think the initial map placement was in Fall 2022.

I’m setting it up now.  All credit to the dreary, rainy, windy weather of the past two weeks.  Yes, the forecast for the next several days is good, but it is now a matter of pride.

So, what approach to take?  Option Number One is a well thought out consideration of the strategic situation and painstaking referrals to the rules.  Option Number Two is just play the damn game.  I’m going with Option Number Two.

Not that I have something else lined up, but I’m genuinely curious how this system will play, especially since it has – by definition – many of the same “option(s) of difficulties” encountered in Paths of Glory and Pursuit of Glory, but using a traditional hex and counter approach without event cards or even random events.

Here’s a quick shot of the map with sorted counters and the beginnings of the Allied set-up.

I’ll finish the set-up tomorrow and get at it….really…..I mean it this time…..

Battle of Temple Hill – Part 2

A prolonged struggle due in no small part to my Annual Spring Cleanup.  It’s a once-a-year ritual here at the Pinecone Lodge.  Yes…..pine cones, pine needles along with pine tree limbs large and small, all on-the-curb by May 1.

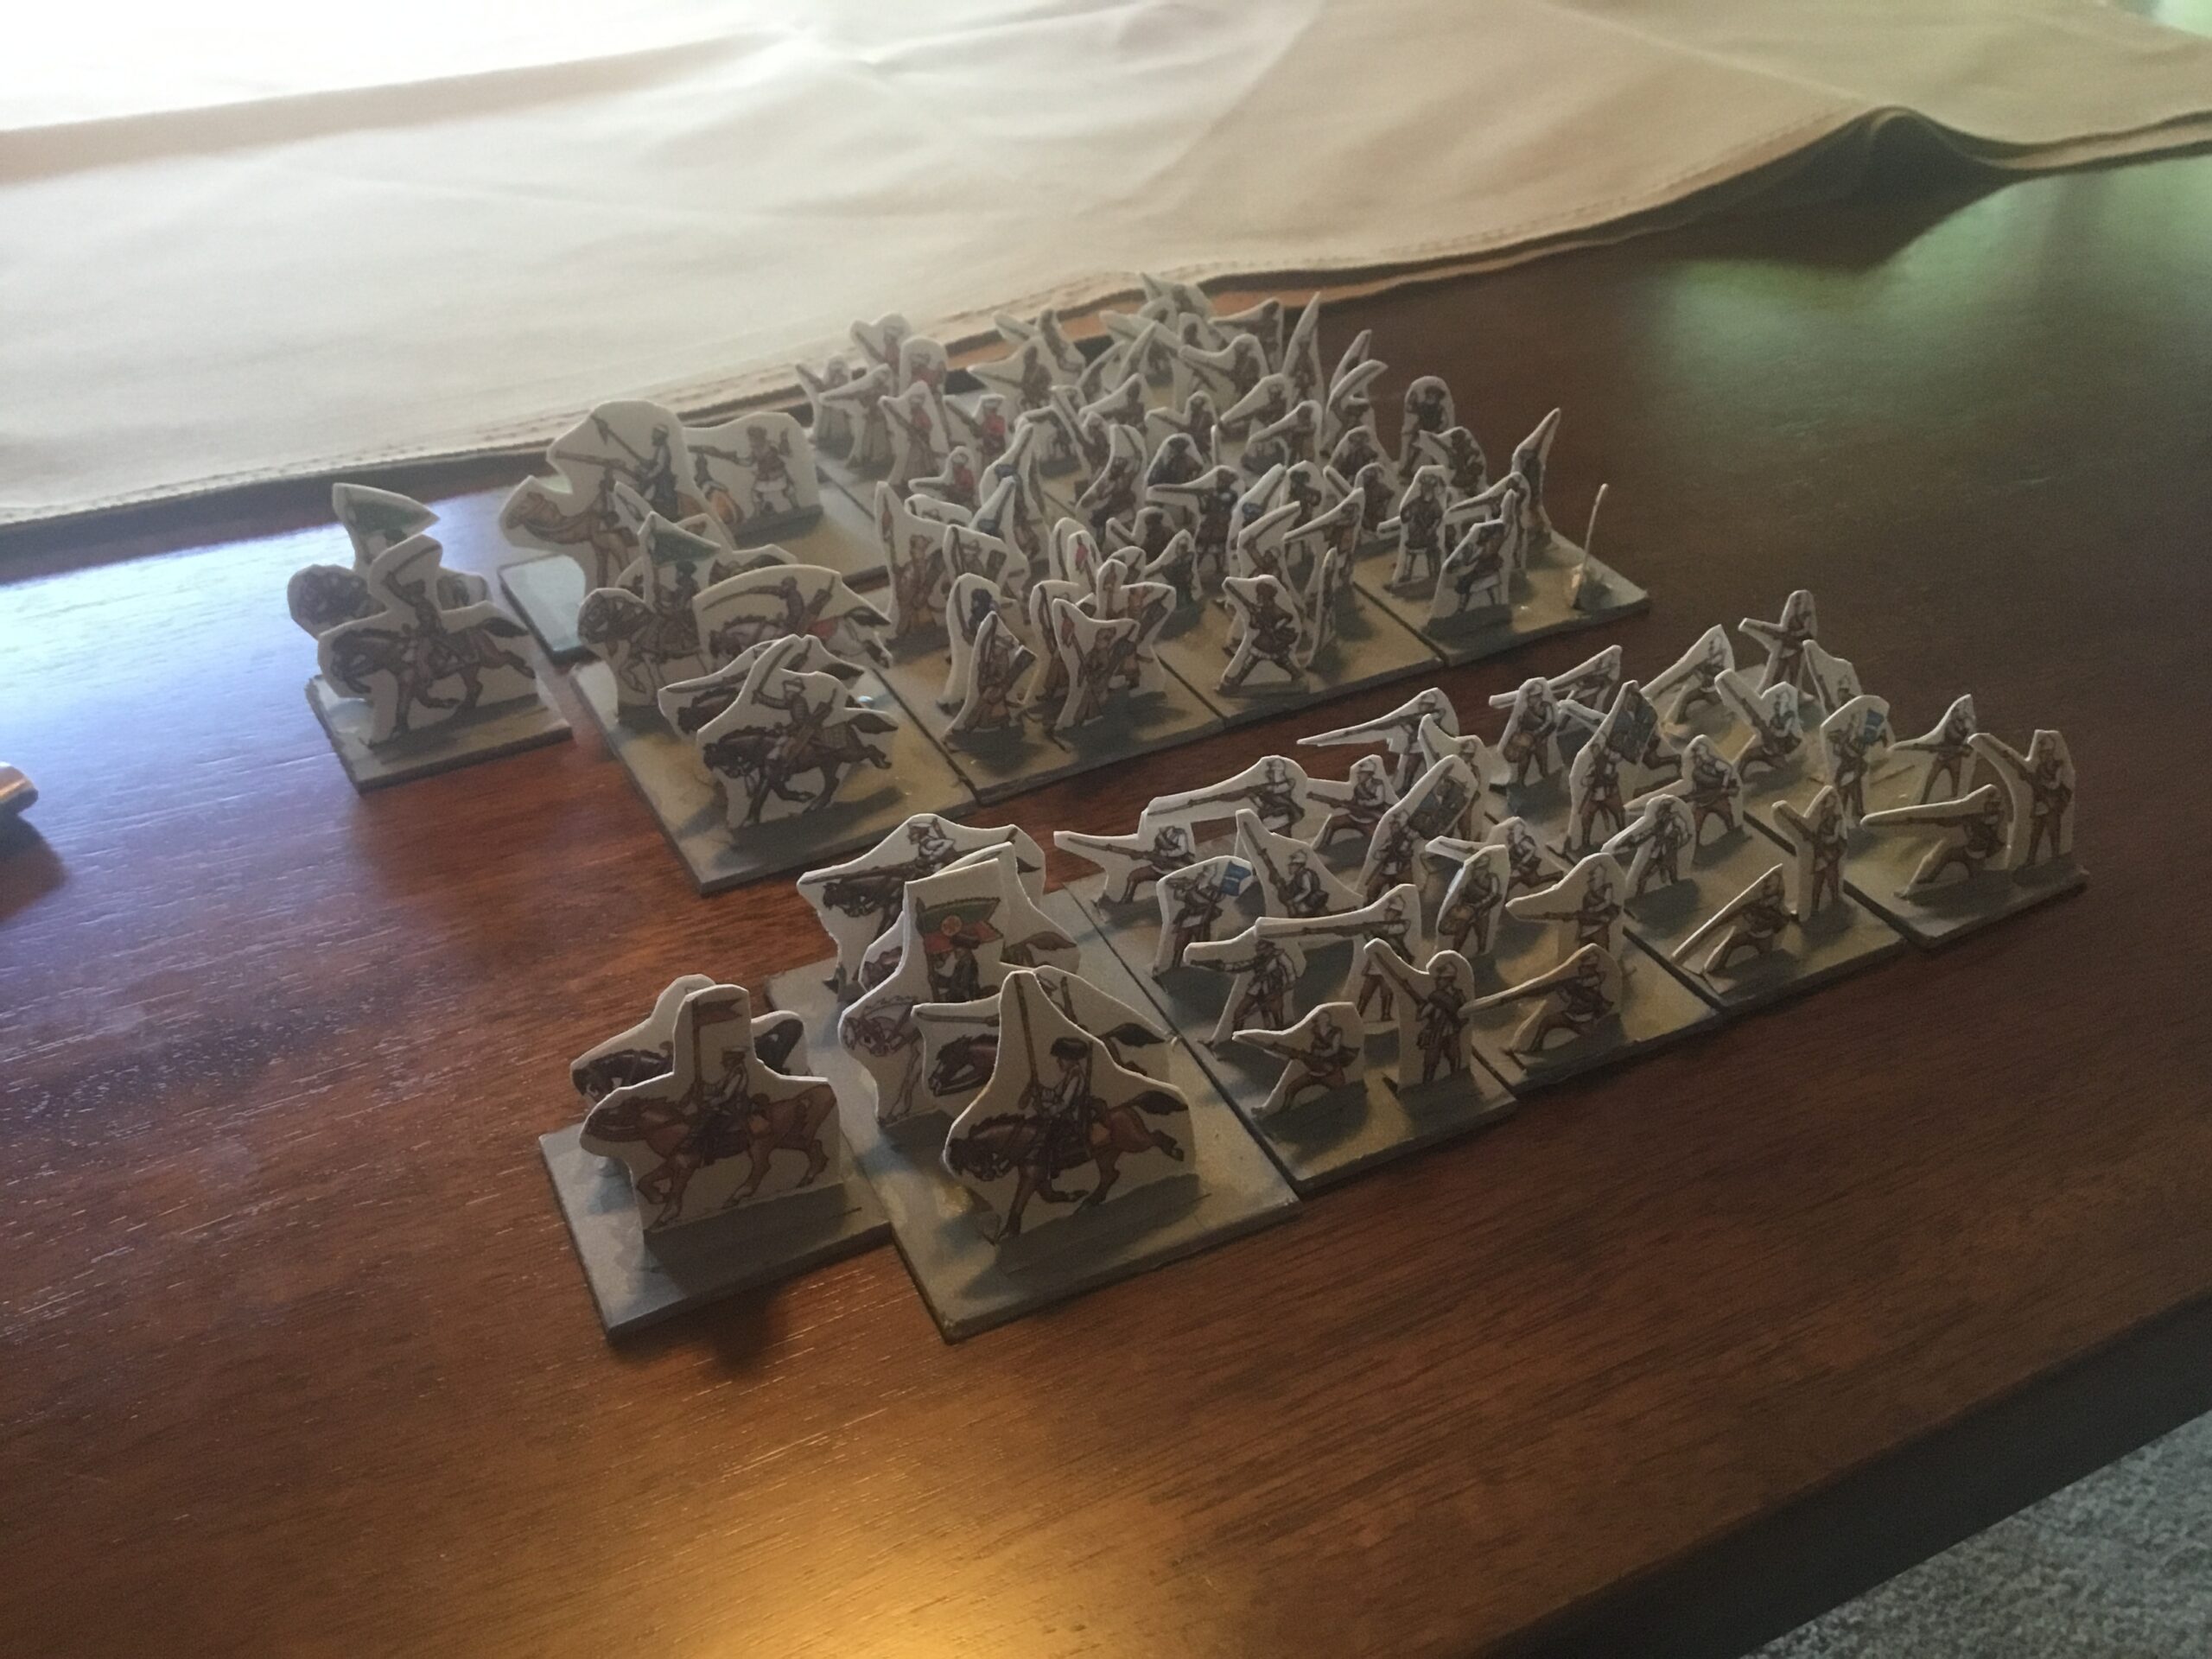
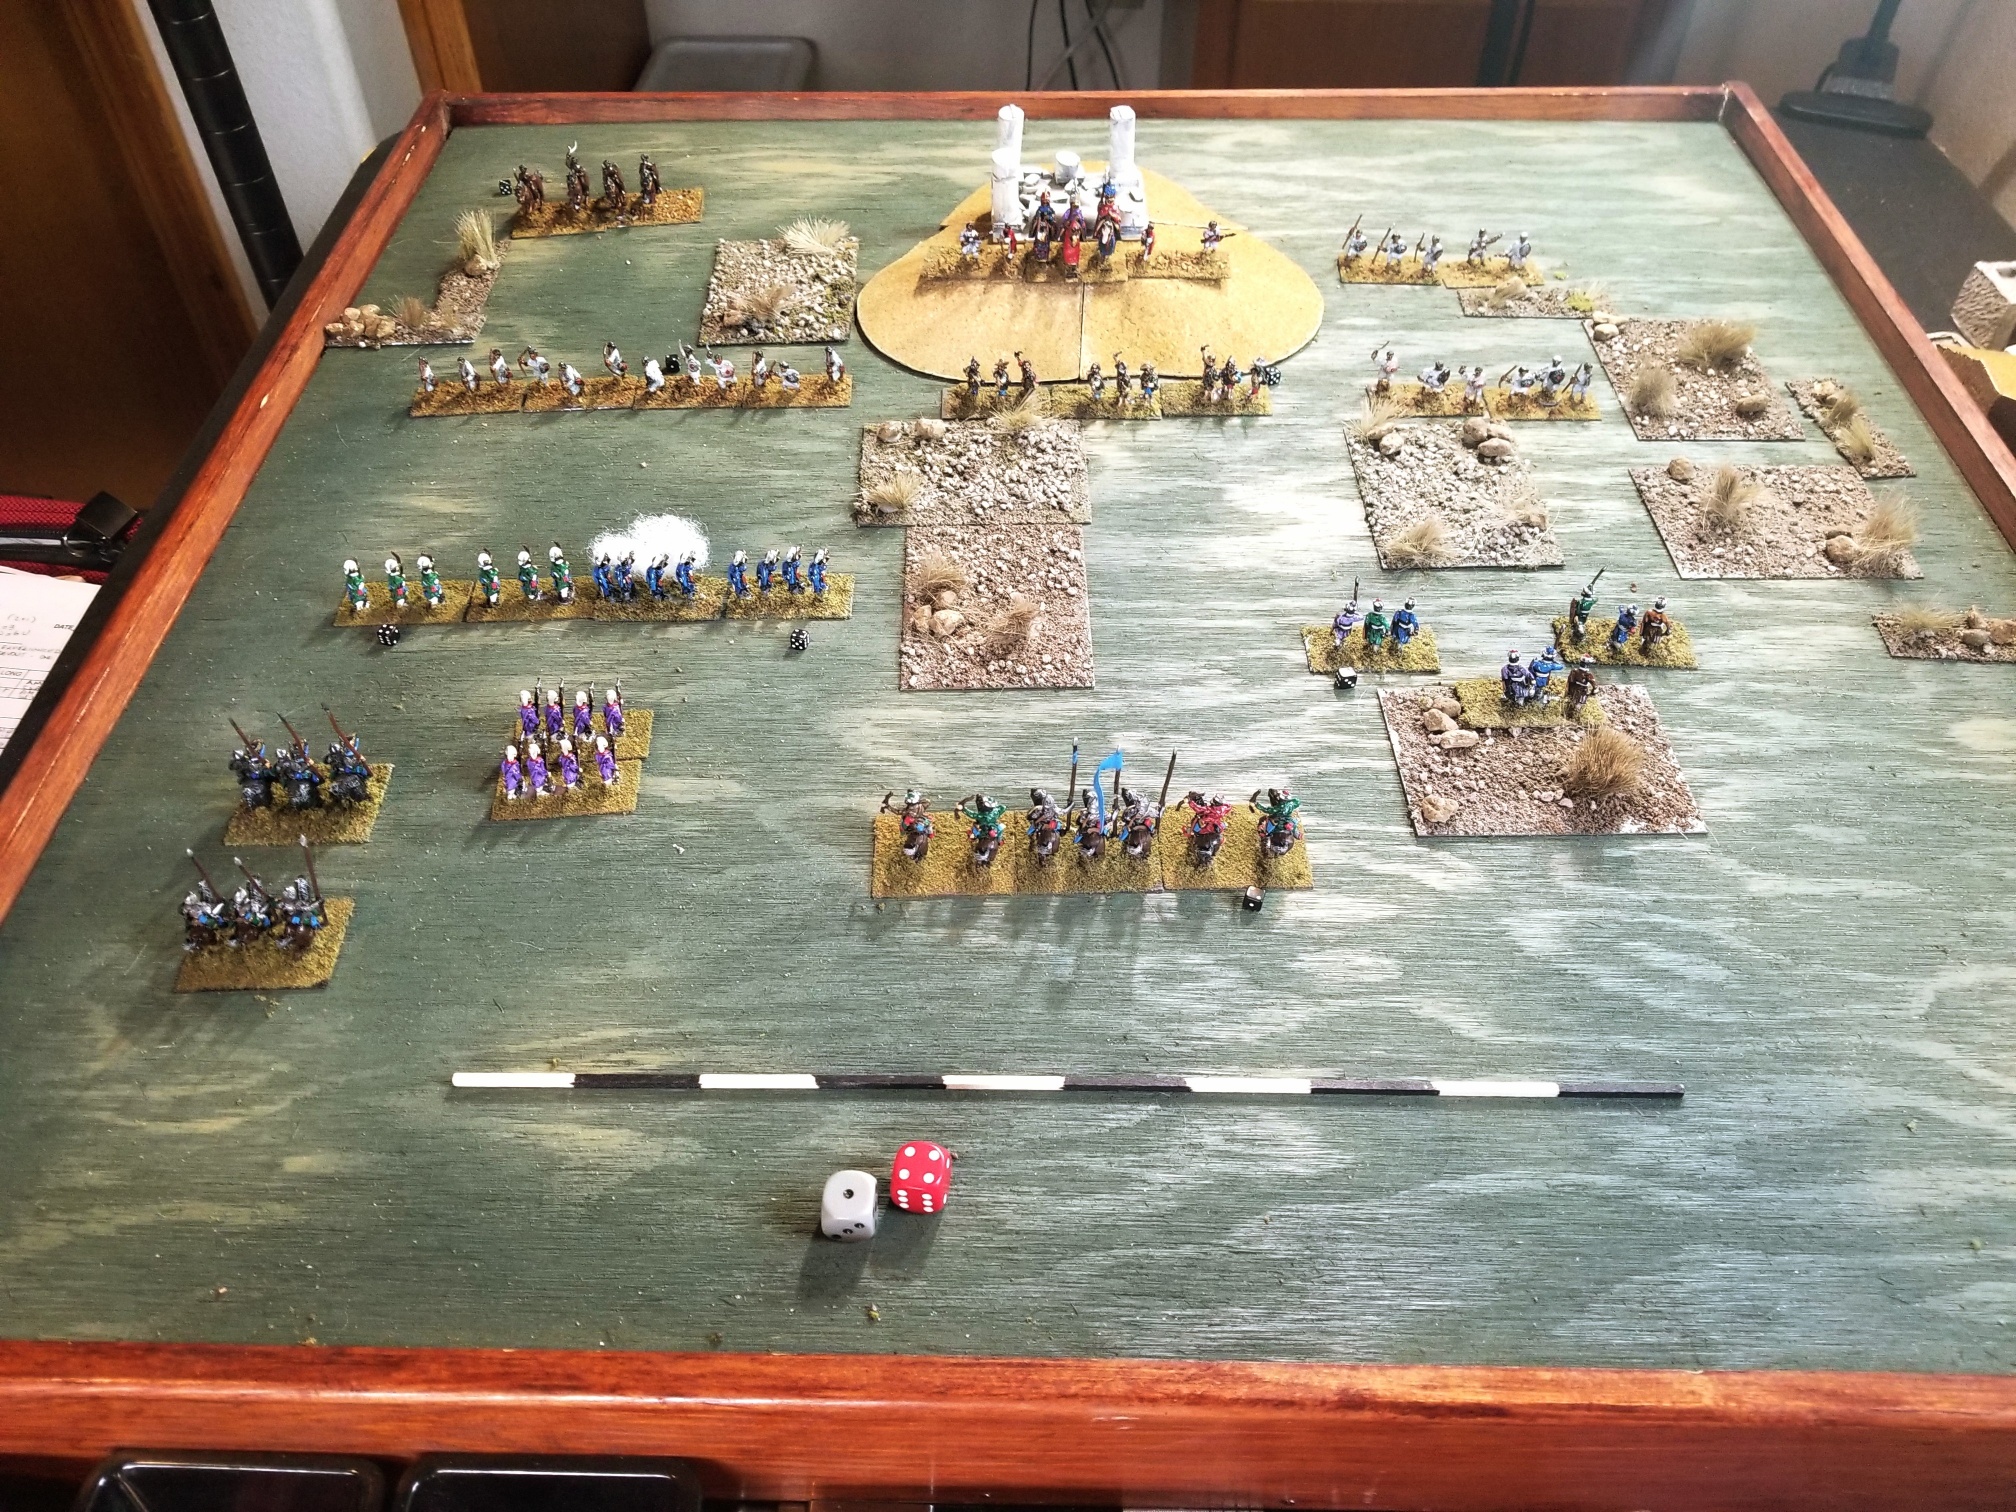
It was another (in what is becoming a) typical Irregular Wars battle.  The opening stages are orderly, with matters deteriorating into a series of isolated fights brought on by units wavering, scattering and moving beyond their command radius.

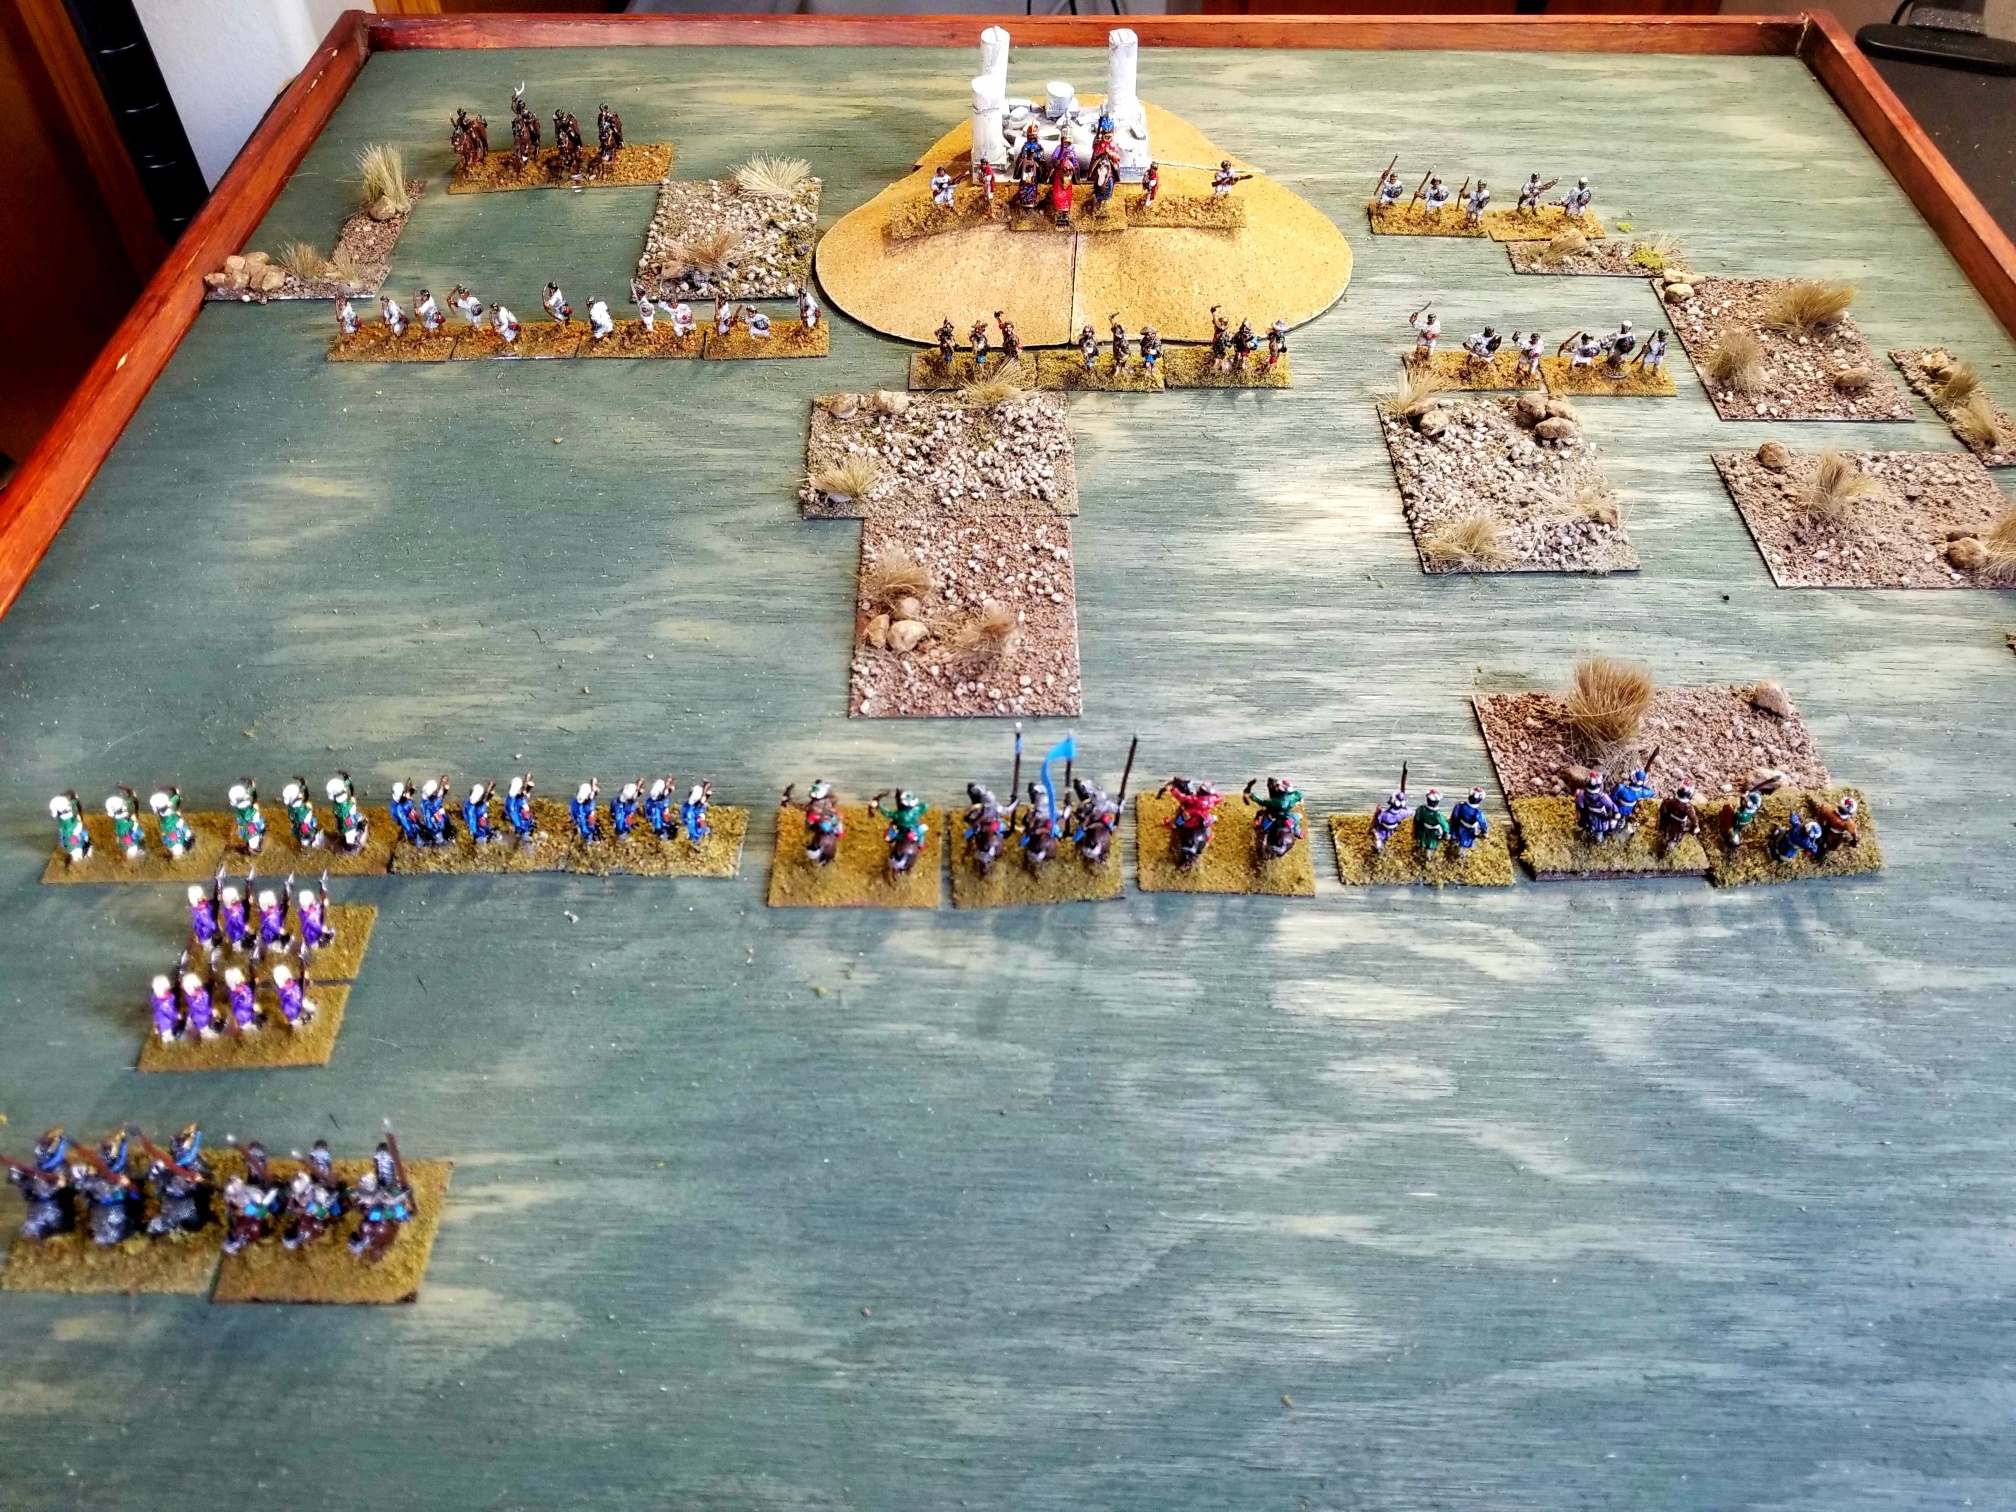
The photos illustrate the progression.  In fairness, the terrain on the Ottoman right (Viewer Right) does not lend itself to  neat and tidy contact.

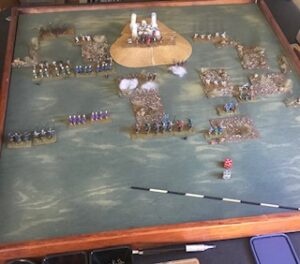
Here we have opening contact on the Ottoman left, with impending contact on the right.

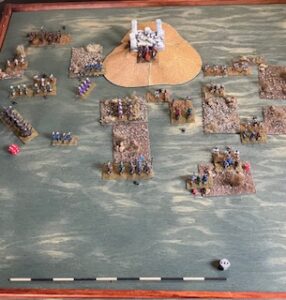
The Ottomans are positioning their reserves for support to  their left.  Because of the risk of losing resolve due to contact from wavering or scattering units in melee, this positioning has to leave lanes open and 2-inch distances from any units in melee.  Their Lord, in the Sipahi unit with blue flag, tries to stay in the center-rear to maintain command.  His Abyssinian counterpart is positioned on the crest of Temple Hill.

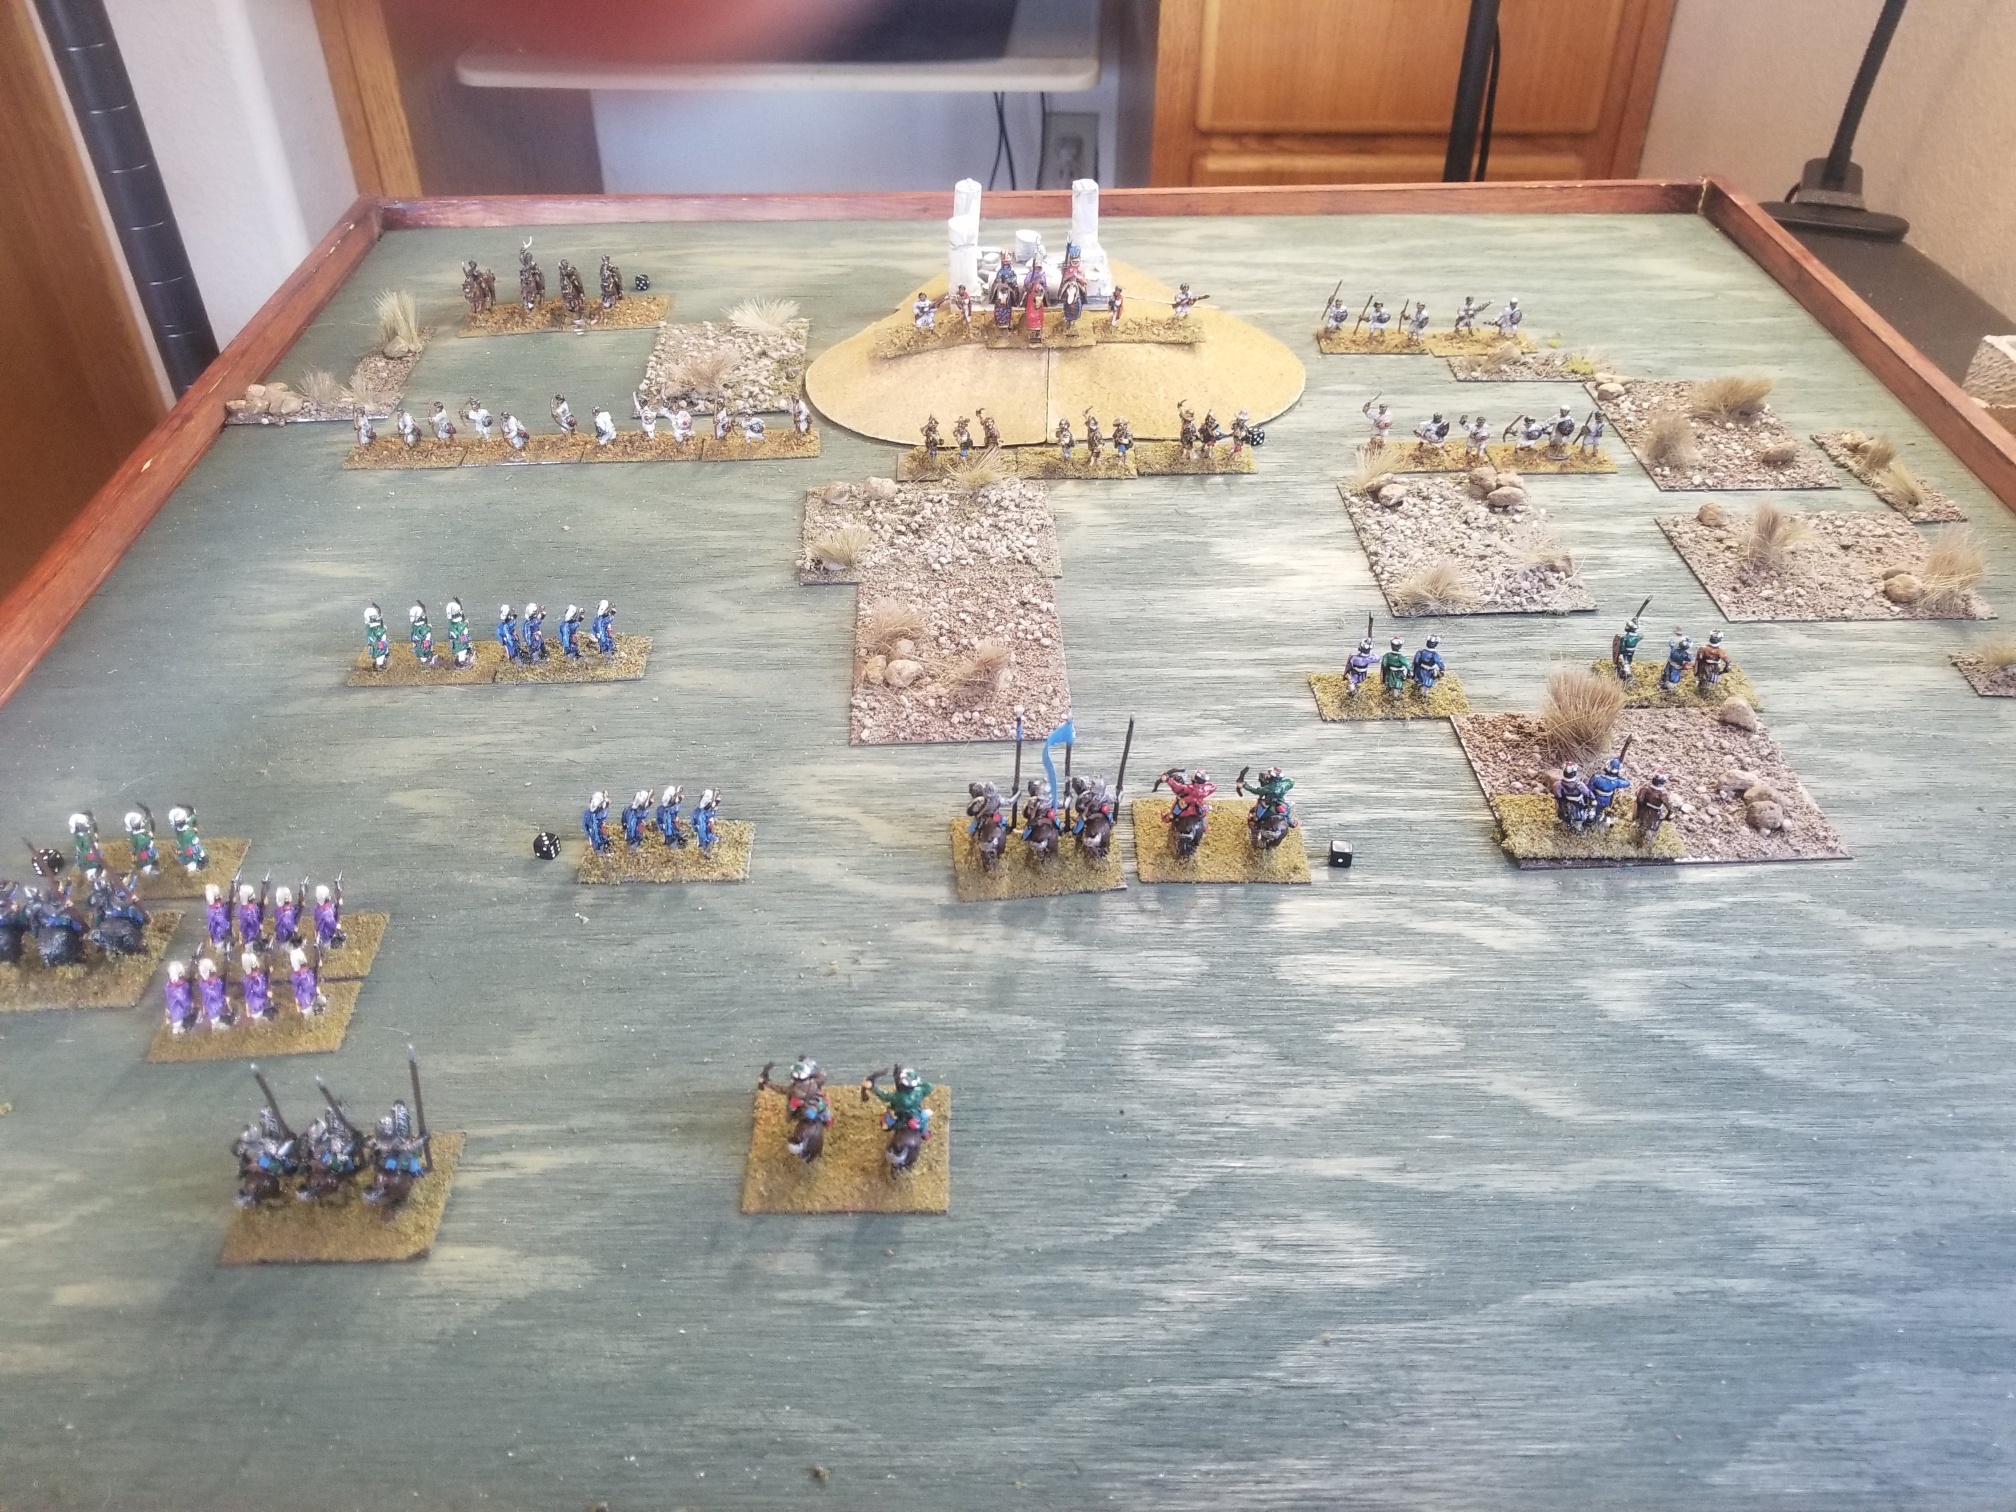
The Ottomans prevail on the left, withstanding a counter-attack by the Abyssinian light horse and lancers (with Lord).  The Abyssinians on the right have driven off the Ottoman Azabs, but do not advance, anticipating providing some support to their beleaguered right, which is unhinged due to units wavering, then scattering due to the Ottoman shot.  Again, this scattering causes a loss of resolve to any unit within 2-Units of movement.  This eliminates any nearby wavering unit and the chain reaction I’ve emphasized in past posts.

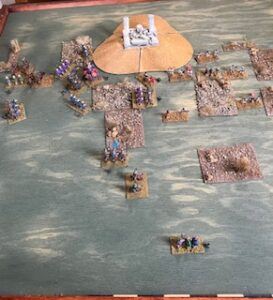
The Ottoman Akinjis (light cavalry) and Janissaries have now cleared the threat on their right, and the Abyssinian counter-attack has stalled.

Game Over.

Another fun contest, featuring a set of rules that certainly keeps things interesting.

Battle of Temple Hill – Part 1

The Ottoman attack has finally developed.  It took some time to rally unit resolve, and re-align the ranks after the poor Disease and Mishaps die rolls.

Beginning to think that I’m a tactical rut.  Once again (it seems) the main effort is on the left with a demonstration on the right.  Or, is it a terrain placement rut?  I’m not going back in the archives, because I just don’t want to know.  I guess it’s enough to be aware (?).

Trying very hard to honor the command radius distances for each side.  That does make a difference.

I bumped the Janissary missile troops rally value to a “2”, vice “1” based on my past readings of their tactics.  We’ll see how that works when they contact their Abyssinian counterparts.  I did remember one lesson from the previous Ottoman fight; the missile units are backed up by two units of Janissaries with cutting weapons.

Something New

The weather final cooperated, and Tim was able to make his long anticipated – and often delayed – trip to the Pine Cone Lodge.

He is a fan of the Standard Combat Series now published by Multiman.  I had purchased two of the games some time ago.  We decided to play Yom Kippur.  The game covers the initial Egyptian assault across  the Suez in the October War.

We started and reset about three time.  The first was due to a rules knowledge breakdown (shocking!), the second due to Tim’s die rolling breakdown, and the third for “let’s try it again”.

We never made to Turn Four, but had a lot of fun working through several  operational approaches.

I also gained an appreciation of why so many like this system and how it has stood the test of time.

The basic concepts are straight-forward for an experienced gamer.  The only real adjustment is that you always “round up” for die rolls and an eligible unit cannot move in the Exploitation Phase if it is in an enemy zone of control (ZOC).  Each game has its own specific rules, but I found these easy to work with.

Plenty of comments and insights into the system and game at the links posted above.

One thing, though.  The map……….BTW that’s the situation at the end of last play-thru.  Israelis are Blue.  Map is oriented to the East.

Even More Heroes

Set up another DIY scenario for Heroes of Normandie (HoN).

A meeting engagement between two reconnaissance forces attempting to secure a crossroads.

Both sides had a mix of reconnaissance sections, along with infantry support in two halftracks.  The Germans had a motorcycle/sidecar/machine gun , and panzerschreck section.  The US had a Greyhound armored car and Jeep with .50 caliber machine gun.

The scenario length was 8 turns, with turn initiative alternating between sides.  Each side entered on opposite sides (east and west) of the map.  I used event cards, but did not remove any inappropriate ones from the draw decks.  This was a conscious attempt to incorporate them in gameplay, but reduce their possible impact.

It was quite the slugfest both times I played.

If I had set this scenario up in Advanced Squad Leader, my play would be far more constrained, with concerns about doctrine and realism.  Not with HoN.  The cartoonishness that is off-putting for some, seems liberating to me.  I feel encouraged to take more chances; that is within tactical reason.  Maybe it’s the straightforward vehicle rules…….

Here’s a photo of what was left after eight turns.  Most of the vehicles are wrecks, with units huddled in the hedgerows, or in the house at the crossroads.  North at top of photo.

Another Day, Another Ottoman

Lazy.

Too much work to move two armies down to storage, so elected to keep the Ottomans (and a chance for redemption) on the table and re-introduce the Abyssinians, as well as a detachment of Portuguese.

This keeps the focus north of the campaign’s Area of Operations (AO), but still following the general storyline involving the  Ottomans moving south on an overland route towards the Horn of Africa.

The battlefield is dominated by a hill and ruined temple.  So, in a burst of originality, this struggle will be remembered as “The Battle of Temple Hill”.

Patches of rocky scrub limits mobility for all troops, and provides defensive advantages for the Abyssinians.

Here are photos of the original dispositions and the dispositions after rolling for Disease & Mishaps (D&M).  Not as bad as the previous Ottoman debacle, but the Incompetent Quartermaster (adversely affecting D12 rolls) contributed to the disarray and some loss in Resolve.  The Abyssinians enjoyed the benefits of a Skilled Physician, and have suffered few adverse effects.  The black mini-dice indicate reduced Resolve.

Here’s the Army List.  Only Losers Scan.


More Heroes

Still having lots of fun with Heroes of Normandie (HoN).

Set up a quick scenario the other night.  Simple objective for the Americans; Get your armor across two boards.  Six turns, but Germans already in  ambush positions.  Same basic forces for both sides, except each now has a tank.

Played it through a few times.  It all boiled down to the last turn or two.  That’s when the German Pz IV and panzerschreck each get a shot  at the US M4 Sherman.  However, the US advance sequence during the preceding turns is critical in order to get infantry in position to support.  To make things even more difficult, I ran a scenario where the US had to also get an infantry unit off-board.

Did not use cards.  Drew them, though.  What wild outcomes they could have produced!  Need to reconcile my need for order with even more possible fun and confusion.  I’m not in a hurry to resolve this psychological conundrum.  I think a reading of the solitaire rules published on Boardgamegeek may be in order.

Simple, but interesting and fun.  Here’s a bad pic taken before the final game turn, with the Germans having initiative and Americans hoping to get to their turn with the tank still operational.  Cell phone is holding down a non-compliant map corner.