Category Archives: Sessions

This Should Be Fun

Finally developing momentum getting Operation Groza, a Europa variant published way-too-long-ago in The Europa Magazine 23, to the virtual table.

Tim’s doing the heavy lifting, providing the JET module, Scorched Earth rules, and scans of the appropriate magazine pages with orders of battles, deployments, and special rules.

JET was/is an interesting creature.  Developed by Europa enthusiasts in Finland, it has fallen by the wayside (as has Europa) over the past couple of decades (gulp!  that long!).  Graphics are very crude by Vassal standards, but it is a good, intuitive, platform.  Tim and I used it in our Fall Of France game.

I’m heading out to The Sunfish Capital Of The World next week, so this will be an excellent off-site wargaming endeavor.

No Nuance

Grinding away at Galacia: The Forgotten Cauldron.

Taking a “historical” approach, with both sides aggressively attacking, with little finesse.  At this point, the Russians are the most successful aggressors.  Their successes were helped by the requirement that Austro-Hungarian units must attack early in the game.  These attacks had limited success, but with heavy loss.

One tactic has emerged in this session.  The Der Weltkrieg rule set calls for mandatory retreats if losses represent one-half of a combat force.  In this particular scenario, the threshold is reduced to one-third.

The operational area has a wide frontage, so most stacks are in the 12-16 (3-4 divisions) factor range, with 8 factor stacks often used to plug gaps.  A two hex attack can typically generate a 3-4 factor loss, which not only attrits the defenders, but also forces a retreat.  The Russians have been very successful at this, albeit aided by some favorable d6 rolls.

In attempt to avoid the odd angle/glare influenced photo in my recent game report, I tried shooting these in half-light.  Further explanation is senseless.

This is the  Austro-Hungarian (white counters, with some Germans in gray) left flank.  Russian progress is limited.

Not so on the center/ right flank, where the A-H right  (bottom right of photo) is under some real pressure.

Interesting game, and I’m now fairly fluent with the rules.

ASLSK Fun

Really enjoying my latest dive into ASLSK.

Set up another scenario and had quite the time.

“Over Open Sights” (S12) uses the same board and orientation as my previous game, but what a difference!

German avenues of approach have more cover and concealment, and the US has fewer units to cover these approaches.  However, the US artillery is lethal in a direct fire mode….if the gun can score a hit.

I’m loathe to put together detailed session reports as they will pale in comparison to others out there.  Grumble Jones is my favorite.  But, this game was so exciting I had to take a few photos.

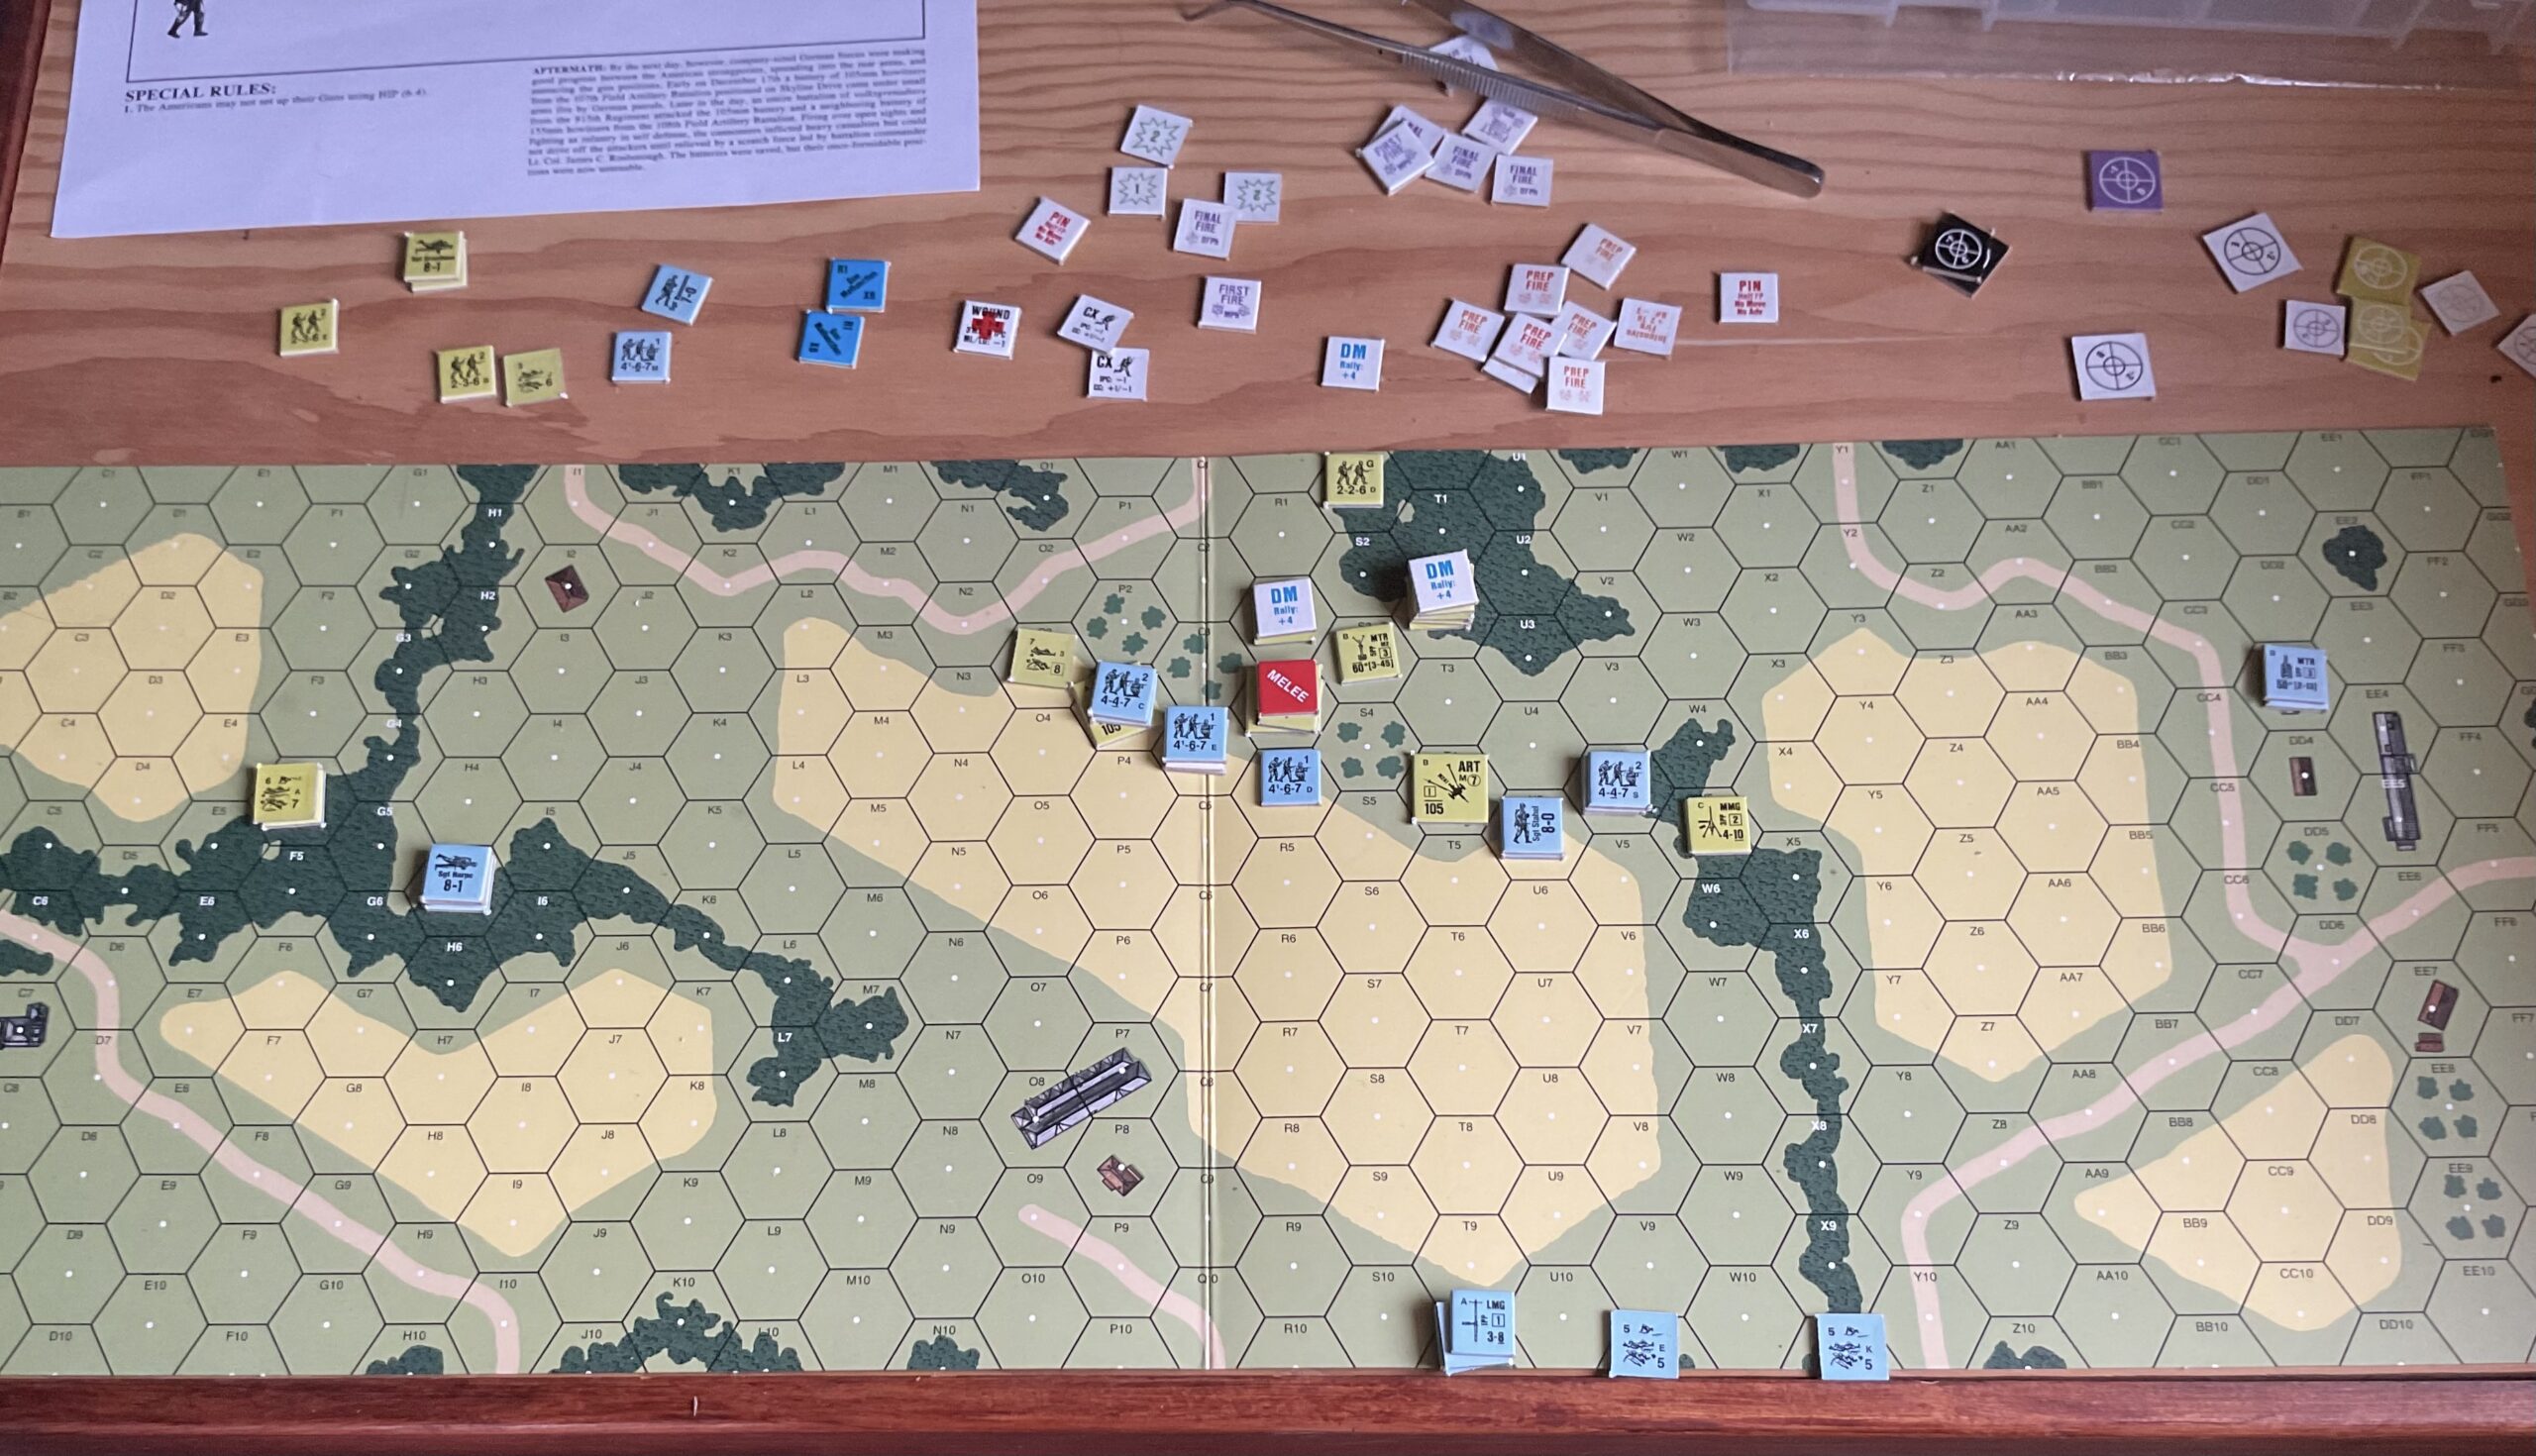
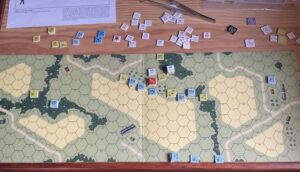
This first one involves my initial attempt to use a cheap graphics app along with a cheap iPad pencil to mark up a photo.  It attempts to convey the initial positions of the Germans and their assaults, since I was already well into the game.  The initial US positions can be inferred by the MG counter on the right (east) , and routed unit on the left (left).

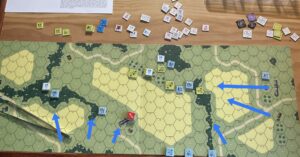
The German advance from the southeast stalled due to effective artillery fire, but the advance from the east ( really a sprint across the open ground – the scenario takes place in December so the fields are barren) was made possible by some remarkable shooting from the 50mm mortar.  Usually derided, this light mortar eliminated the machine gun crew as well as routed one artillery crew, thanks to low rolls which maintained its rate of fire, as well as abysmal morale check rolls for the US.

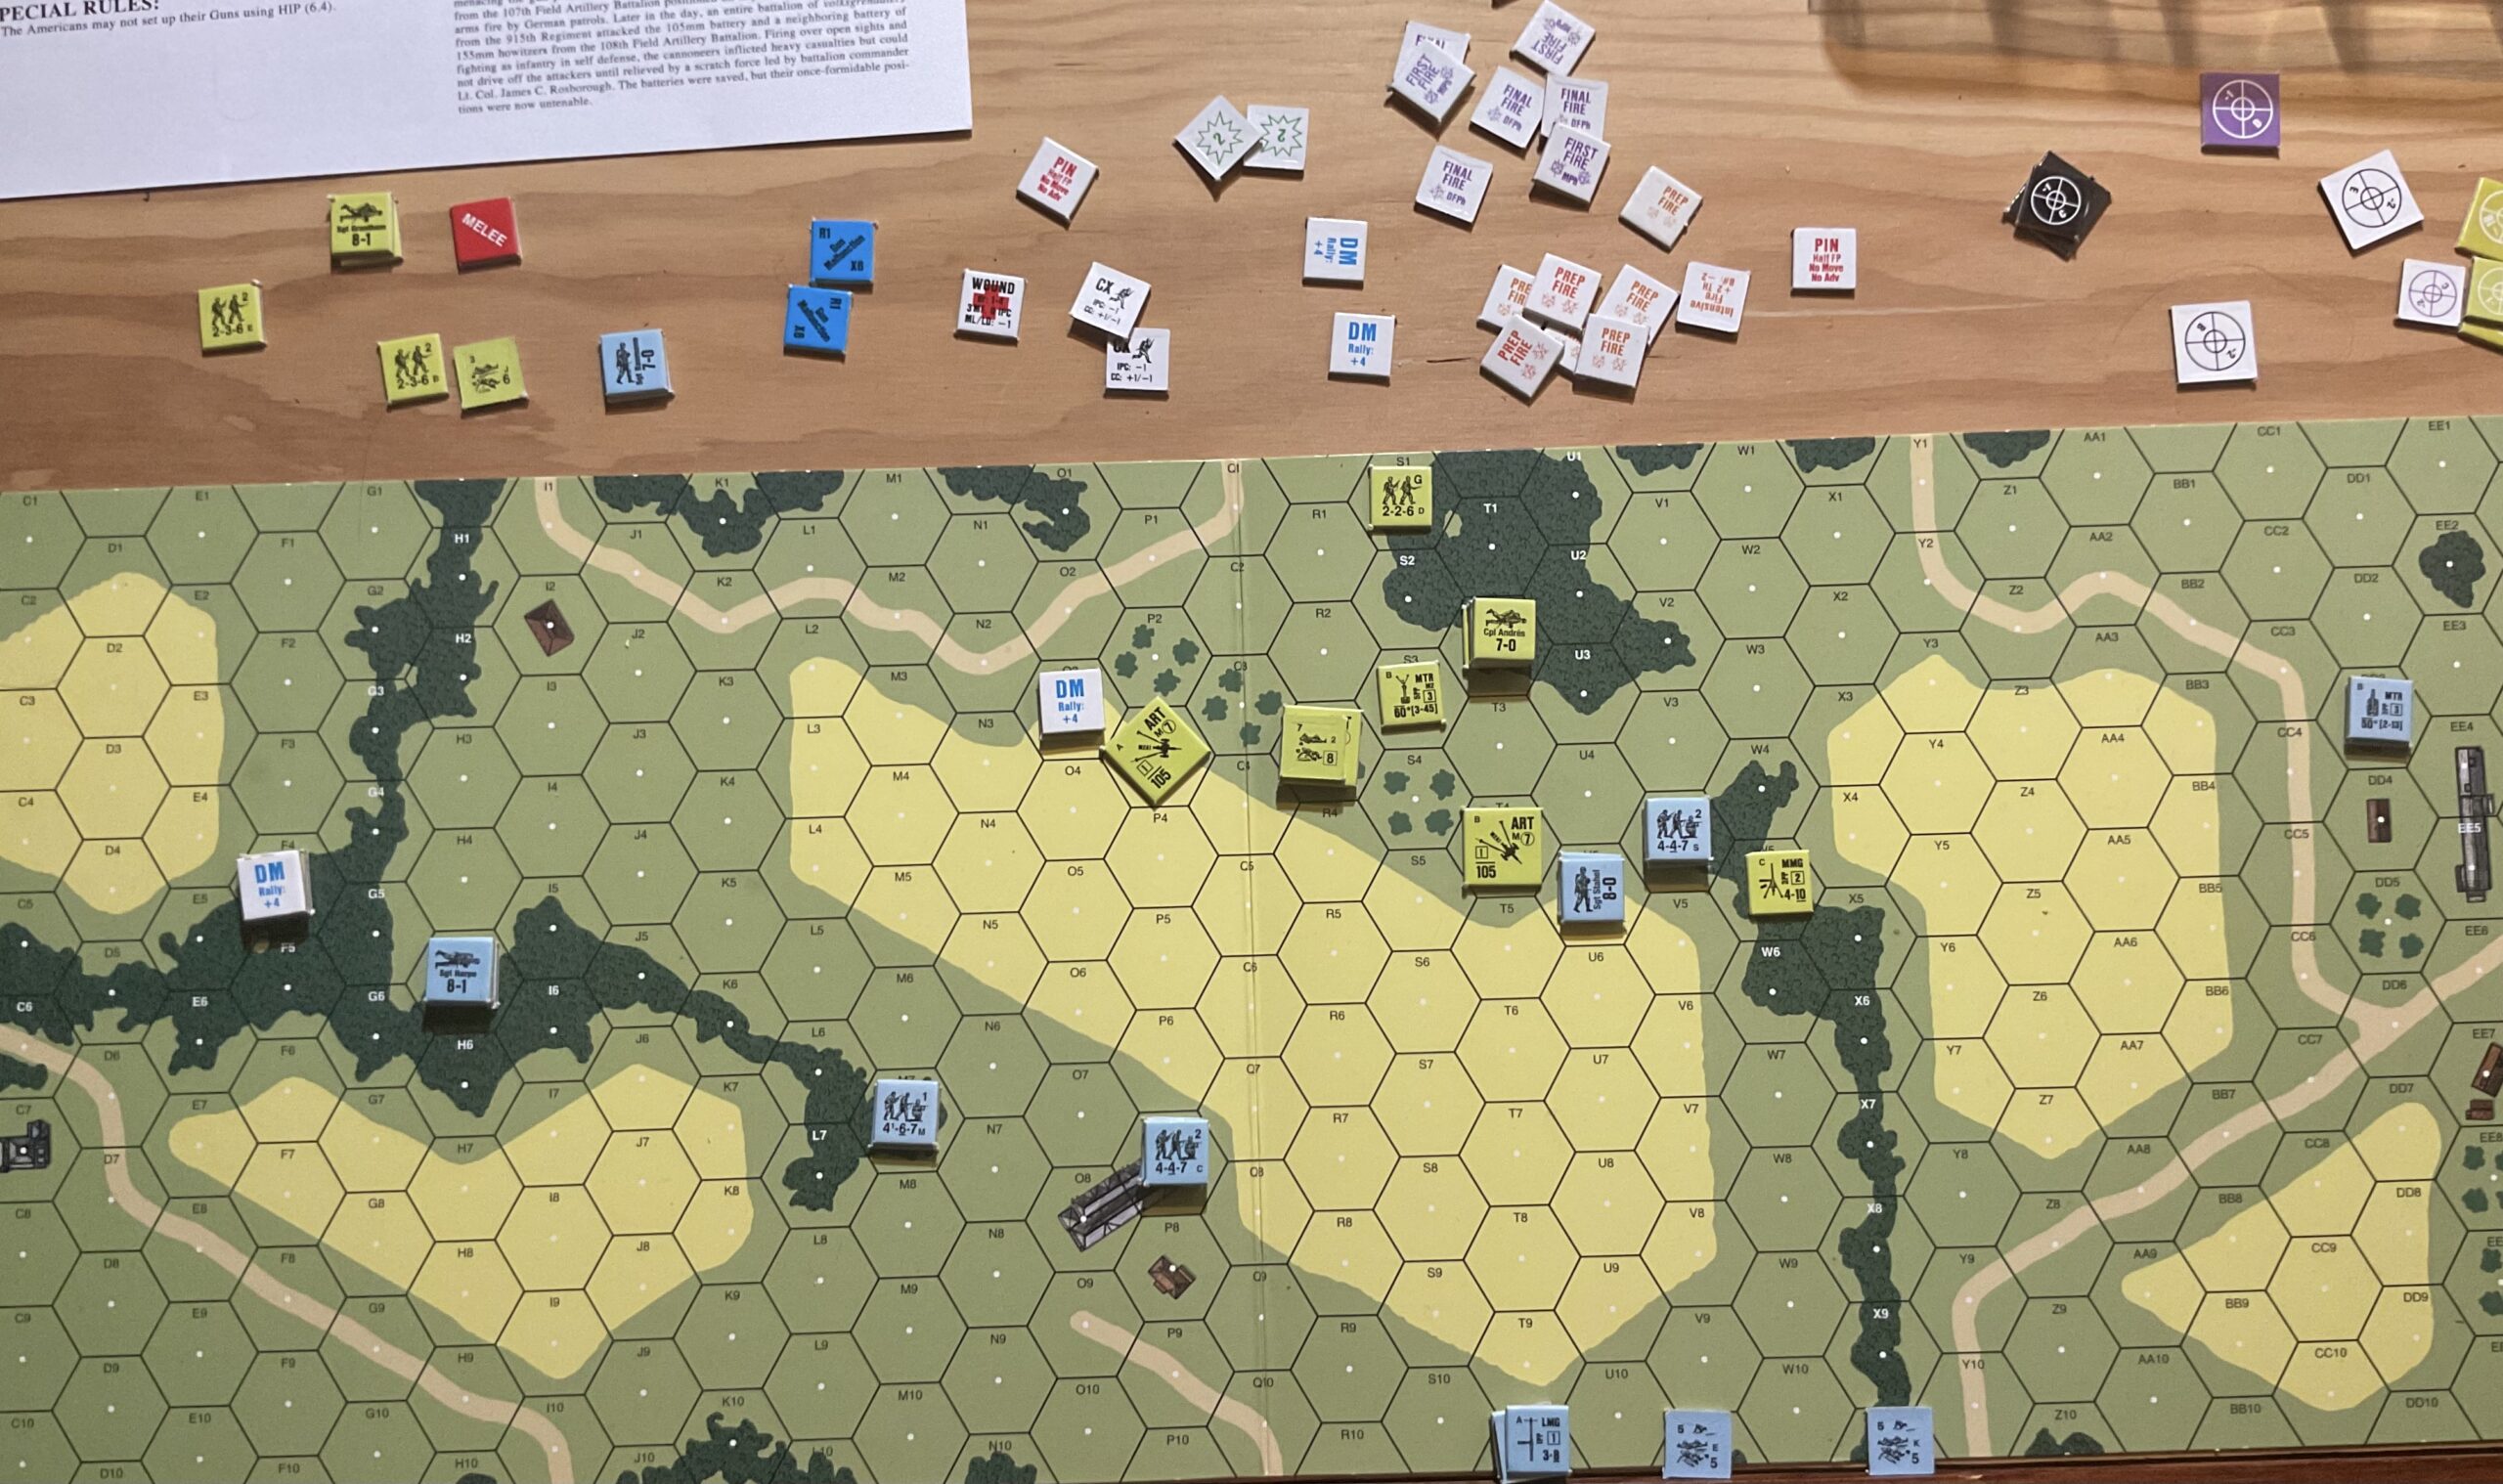
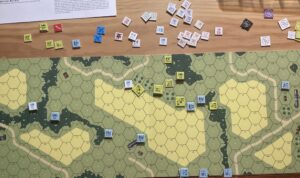
It was all but over by Turn 3…..or was it Turn 4?  I  started to pick the game up but then  remembered the US received reinforcements in Turn 4.  Unfortunately, I had grabbed the turn marker and couldn’t recall the turn.  So, I brought in the reinforcements anyway.  Things got interesting quick, because this plucky band checked the German advance.  This  change in fortunes was short-lived because, once again, good German shooting routed the newcomers.  The following shot shows the climatic assault on the artillery (used Melee marker to emphasize).

When the smoke had cleared, the Germans had attained their objective of capturing all three artillery positions.

Fun game.  Still struggling with some rules.  Need to remember ELRs and that casualty reduction is to half-squads, not reduced strength squads.

Let Me Count The Ways

Started play on Galacia: The Forgotten Cauldron.

Turn One featured both sides maneuvering towards their scenario objectives.  There was even a bit of screening cavalry skirmishes.

Thought I had finally figured things out.  No.

While flipping through the scenario booklet anticipating reinforcements, I found that each Army had a specific mobilization turn, and that very few units could move initially.

Massive reset and just another in a seemingly endless number of ways of fouling up the rules.

New game is now (literally) moving forward.  There will be Army level contact next turn.

And yes, the perspective for the picture is strange, to say the least.  Map is covered with a plexiglass advertised as “non-glare”.  No.  Well, unless the garage fluorescent fixtures have superpowers.  Best I could do.  And, I can’t just turn the lights off.  Motion activated.

Austro-Hungarians in white, Russians brown.

Where was I? Why worry? – Part II

Reached a stopping point at Serbia The Defiant.   And yes, I made a hash the rules.

The new combat results table (CRT) worked just fine. Once again, operator error. Well, the new CRT is based on column shifts, as opposed to die roll modifiers.  But, the die roll modifier for attacking across  rivers still holds. Well, I didn’t grasp that pesky detail, and since the Austrian avenues of approach to Belgrade cross rivers, their attritional successes are now suspect.

Rather than the classic re-do,  I’ll pick it up and continue playing the series.  This is a topic I’ve brought  in the past:  Play a game/system and then move on to another game/system, or focus on getting better at one particular series of games.

In this case I’m not going to be an omnivore, but focus on Der Weltkrieg.  So, it’s time to set-up Galicia:  The Forgotten Cauldron.

Almost

Was going to title this post “Abject Failure”, but decided that was a little harsh and I need to cling to some shreds of self-respect.

I didn’t finish the game.  In fact, I couldn’t even finish the Central Powers’ turn.  I just had to role for the attacks.  I could use guests as an excuse, but it was probably  the prospect of failure, as the outcomes were grim, and I was hoping for an (more fun) ahistorical outcome.

Here’s where I’m at.

Despite my malingering, I am intrigued by this game.  Lots of options for the Central Powers.

The intriguing peripheral strategy is constrained by a limited ability to move reinforcements to Salonika much less the Middle East.  Yes,  Allied resources can be diverted from the Western Front, but the chances for the Central Powers to force game altering outcomes outside of the West seem very limited.

Maybe their chances are improved using the optional East Front rules, creating additional victory point possibilities, or by playing the 1919 scenario, putting the onus on the Allies to conduct attacks, with the possibility of losing victory points due to losses, and allowing additional time to develop strategies in the east.

Well, to be continued (sure, easy to say) in September when I return to the Sunfish Capital of the World.

The Kaiser’s War – Allies Turn 2 and Central Powers Turn 3

The Allies added three (3) Italian and one (1) US Army during their mobilization phase.  The Italians will arrive at the beginning of Turn 3, with the US Army not arriving until Turn 4.

Arriving Allied units were fed into gaps on the Western Front and Italy.  A French army sailed to and arrived in Salonika. The Allies did not mount any attacks, content to remain on the defensive this turn.

At the end of the turn, the Victory Point count was Central Powers @ 132 and Allies @ 60.  This would be a significant Allied victory if the game ended.

The calculation of victory points is a little different.  Each country has a basic victory point production of 43 points.  I had to figure that out myself.  These points are for Major Capitals, Resource Centers and Political Cities occupied at the beginning of the game.  My understanding is that these points (+/- points for enemy capitals, resources, political cities taken) are added at the beginning of the turn to the net victory points calculated at the end of the preceeding turn.

Here are the three major theaters and the end of the game turn.

The Central Powers started Turn 3 by mobilizing one shock army and deploying the few units they had (or could) mobilize at the beginning of Turn 2.  Another series of shock army attacks on the Western Front drove back the newly arrived US Army.  They managed to avoid elimination by a fortunate die roll.
To the East, continued attacks drove Allied units back into Rome and Genoa.  These will be tough cities to capture, but are needed for victory points.
German, Austrian and Bulgarian armies continued to advance in Salonika, eliminating the original French Army.
One aspect of the rules that takes some getting used to are Zones of Control (ZOC).  Unlike many other games,  friendly units (except those representing fortified zones, or trench lines) do not negate enemy zones.  So, a unit can be eliminated if retreating through a friendly hex in a enemy ZOC, or if a supply line runs through a friendly unit, but that unit is in an enemy ZOC.

The Kaisers War – Central Powers Turn 2

The Central Powers continued their attacks both in Italy and along the Western Front.

In Italy the attacks came up just short of capturing Genoa, but did expand Turn One’s gains along the Adriatic.

Two British armies were pinned along the coast and destroyed near Calais.  German units are now adjacent to Paris.

Combined German and Austrian attacks captured Salonika, cutting off Allied armies from that port.

Here are photos of each front showing dispositions at the end of the turn.

The Kaiser’s War – Allies Turn 1

Unlike the Central Powers, the Allies have no limitations effecting their Turn 1 Mobilization Phase.  Italian, French and British armies are mobilized (cannot enter until Turn 2), and a US army with Pershing’s headquarters, already mobilized, is sailing to France.  This will all cost victory points, but the situation in Italy is bordering on the desperate, and additional units are needed for operational flexibility (that’s a nice euphemism for “jeez I have no idea what might happen next”).
In Italy, a very weak defense has been strung out to (hopefully) delay the Central Powers until reinforcements arrive.  In the West, a fairly strong defense has been established north of Paris.  British forces are advancing towards Beirut and moving west of Baghdad.
Here’s the situation in Salonika, Italy, and Western Front

What’s In Here?

While pawing through a closet I found a WalMart plastic bag.  “What The Hell Is This?”. Well, this is this…….

Forgot I had put together small Central Asian and Russian forces for “The Men Who Would Be Kings” last summer/fall.  Purchased them over at wargamevault.com
I did bring a game mat (if you can call a bolt of sand colored cloth purchased at Jo Ann’s Fabrics a game mat) with me.  The intent was to break out my World Of Fun Napoleonics and mess around with the Valour and Fortitude rules on the dining room table at some point during my stay.  That might still happen.
But, why not a couple of quick and fun games with these?