Category Archives: Sessions

Picking Up The Pieces

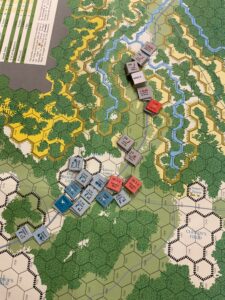
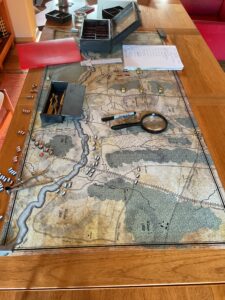
Former clients over for a visit, so the dining room table had to be cleared of my Brandywine Kriegsspiel.  Here’s a final look.

Well, not quite final.  I did move the British into melee and that’s where I started thinking about the importance of the Umpire in Kriegsspiel.  Not an original or deep thought, but with a twist.  Let the rambling begin…….

The Umpire is The Rules.  In other wargames you have a rulebook and units with attack, defense, morale and movement ratings.  In Kriegsspiel all of these factors are generic.  The Umpire decides and/or arbitrates unit capabilities.

For example:  How well will units fight in melee?  Yes, there are guidelines for the effect of losses, but how well will that unit fight today?  Is that simply a product of die rolls, or is there an intrinsic capability for this particular engagement?  The rules provide for differentiation in capabilities in certain situations – attacking uphill, across barricades, when tired – but not necessarily between units.

Sure, Continental or British Regular units will perform better than militia and/or irregulars, but how about each regular unit?  Are all Continental units inferior to the British in musketry and so use a different die to resolve fire combat?  How about melee, an across the board adjustment?  At Brandywine, Stephen’s and Stirling’s Continentals fought the British toe-to-toe, while Sullivan’s ran.  Yes, they were trying to adjust their position, but what happened?

On top of that, how much research is the player willing to put in to provide a kriegsspiel that takes into account differences that existed on that day?  I learned that is very hard work, even if the resources are available.

This leads to the idea that Kriegsspiel is best suited for the generic and scripted encounters.  Without an Umpire, the player(s) must decide army or unit capabilities and how they are expressed.  What you have is an “ImaginNations” game on a low level operational and tactical scale.  Trying for a historical simulation is just too hard.

After all, Kriegsspiel was developed as a teaching tool, incorporating basic concepts/precepts but then crafted to meet, as we used to say, specific “learning objectives”.

So, the next time I pull my Kriegsspiel maps and counters out, I’ll use them to pursue a theoretical situation or, maybe, a historical one, but be satisfied with broad precepts, especially concerning a fighting force’s intangibles.
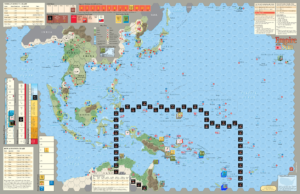
 

SOPAC So Far – Reboot

Made it through the first turn of the SOPAC scenario (which is Turn 3 of the campaign game).

I’m pretty good with the Offensives Phase of the Sequence of Play.  Did have a major revelation, though.  Apparently any movement of a unit is considered an Offensive, and the destination is declared a Battle Hex.  So, my movement of two air units to a different base in Australia (see map screenshot below) results in that destination being declared a Battle Hex, with the possibility of the opponent making a Reaction Move if opposing units are within range.

Will have to do some research over at Boardgamegeek to confirm/deny this interpretation.

In any event, the Allies have landed at Guadalcanal, reinforced the initial landing, as well as moving units to New Guinea in preparation for an offensive out of Port Moresby.  The Japanese attempt to defeat the initial Guadalcanal landings with air and naval forces out of Rabaul was turned back with losses on both sides.

Any Japanese efforts during this initial turn are limited as the bulk of the Combined Fleet is in home waters, and not available until the following turn.  The Allies will also receive significant naval reinforcements during Turn 4.  Should be interesting.

Here’s a Vassal screen shot for the end of Turn 3.  The Area of Operations (AO) is outlined in the bottom right corner.

Grinding It Out – Part 3

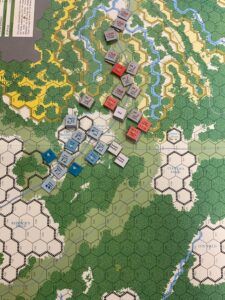
Have now finished up nine turns.  Both Army’s respective flanks are locked in contact, with the terrain favoring the Federal defenders.

On the Federal right flank….

Although the Federals’ positions seemed exposed, the Confederates are armed with muskets which have an effective range of only one hex.  At two hexes firing strength is halved, which renders their musketry ineffectual.  The Federal rifles have an effective range of two hexes, doubled at one hex.  This is a significant advantage.

However, the two units anchoring the Federal right have run out of ammunition.  This occurs on a fire combat D6 roll of “one”, with a follow up D6 roll of “one” or “two”.  But, the Confederate requirement to roll a D6 to enter melee, with score equal to or below their morale rating, combined with their already low ratings, have hindered their efforts to turn the Federal right.

On the Federal left, the terrain/situation is different, but results  much the same.

The Rebels have to cross open ground to engage the Federal left, while their center advance is channelized by unfavorable terrain.  Some progress is being made  in flanking the Federal right.  However, the Federals will receive reinforcements beginning Turn 10.

The battle is being shaped by terrain that limits each side’s ability to fully or even partially deploy their rather significant artillery assets.

I am looking forward to reading about this battle, but want to hold off until the game is finished.  It’s always fun to find out what I did that was historical, and what was ahistorical.

Working The Room

The “Room For One More” has its limitations….overhead light doesn’t work.  One of those fan lights with wiggy wall switch.  Trouble shot it.  Must be the bulb.  Two person job to remove since fixture so spindly.  Need a repair accomplice.  So, daylight sessions with the Brandywine scenario.

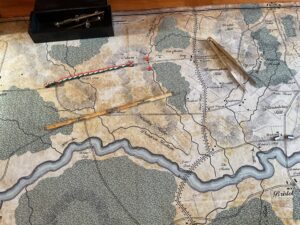
I want to believe this is a “process over results” effort.  Slow sledding since accounts are conflicting, and the map scale had me puzzled.  According to the Command Post Games site, their Pub Battles’ maps have a 1/1600 scale as opposed to Kriegsspiel’s 1/750-1/800 scale.  I was perplexed because distances seemed off.  When I checked the map’s scale legend against my Kriegsspiel Distance Ruler, the map was, in fact 1/800 or so.

I hammered my way through working out time-distance movements for the Continental right flank’s shift.  Came fairly close, with some help from concepts published at this interesting site.

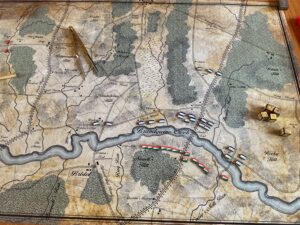
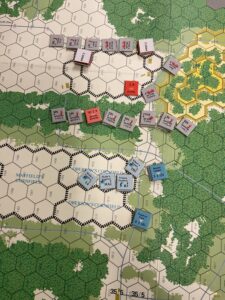
So, here we are…….Top photo is Cornwallis approaching Osborne Hill, where his forces took a break from their 9-hour flank march.  Bottom photo shows the  British demonstration at Chadd’s (also spelled Chad’s in some accounts) Ford.  Time is approximately 1400.

Grinding It Out – Part 2

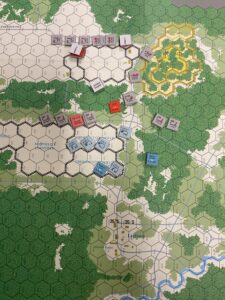
The Pea Ridge game is developing some action as both flanks are  in contact.

To the South, both sides are deploying, with the Confederates moving into contact.  Van Dorn’s force has managed to unlimber artillery to support this advance against the Union right.  Little room to maneuver, so Van Dorn’s brigadiers are moving right down road, with supports moving into the adjacent woods.

A different story to the North, where McCulloch’s wing is deploying in the woods in order to flank the Union position.  The Confederates have been able to unlimber two artillery units for support but, again, the terrain is masking fields of fire`

Room For One More

I’m Home Alone, so the Dining Room Table is available.

Haven’t played Kriegsspiel for a while, and that beautiful Command Post Games Brandywine map has been just sitting in the garage……Why Not?  Use all available horizontal surfaces!

Cycled through any number of Internet sites as well as my West Point Atlas Of American Wars to put together Order of Battle, general dispositions, and background on the battle.  The process was time consuming, but interesting and fun work.

Decided to use Kriegsspiel’s standard scale of one block represents 450-500 men.   Since most of the brigades involved had 1,500-2,000 men, this works just fine.  However, the respective forces were organized in (divisions) groups of two (2) brigades.  I’ll have to ignore this lack of symmetry as my table-top groupings will have three (3) blocks, not  four (4)……just grit my teeth and suppress those compulsive instincts.

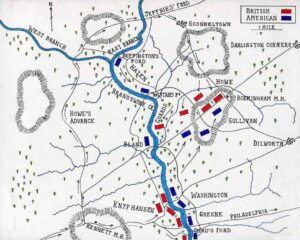
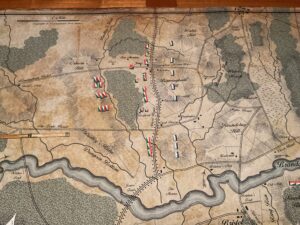
Here’s a viable map of the initial dispositions that I will use (North at top).  The Continentals were initially positioned along Brandywine Creek, but have reacted  to Howe’s flanking march from the north by pulling brigades off the line.  The remaining Continental brigades are facing Knyphausen’s force  moving east towards Chad’s Ford.

My map’s scale is roughly 1/16,000, while Kriegsspiel uses 1/8,000 scale maps.  Ranges and rates of movement are reduced by one-half.  Fortunately, the weapons used in 1777 are the same as those used in the 1824 Kriegsspiel rules, so no adjustments for effectiveness needed.

Another set of rules to read and become (semi) fluent with.  Also, I get to re-learn working with Kriegsspiel Dice.  That process is interesting in and of itself.

SOPAC – So Far

As threatened, I’ve plunged into  VASSAL to play Empire Of The Sun’s (EOTS) “South Pacific” scenario.

Turned out to be double learning curve.  First curve is working with VASSAL.  Have  made a couple of half-hearted attempts in the past, without any sustained or focused play.  As to the scenario, I was surprised how quickly I’d forgotten the rules since my last play with Tim back in July.

In retrospect, I should have read that post.  Repeated a couple mistakes I had noted.

This is a great learning scenario that allows you to focus on card draw mechanics, activation, movement and both air/naval, as well as ground battle phases in just one area of the map.  While the scenario allows for play (and the significant rules overhead involved) in the  China/Burma theaters, those regions are not critical for achieving victory.

VASSAL’s Log function is handy for “What the Hell have I done” references as it  records everything you do.  It also documents but  your “back button” adventures when the player decides to “un-do” a previous decision.  Vacillation can be amusing.

You can quickly change sides, which makes solitaire play a breeze.

I also like the screen shot option, which I intend to use for this blog as soon as I reset my first game.

More later…Game One of the World Series is starting……

Grinding It Out – Part 1

You can only read the rules and stare at the setup for so long.  At some point, you have to play the game.

Started my Great Battles Of The American Civil War (GBACW) game the other day.  Pea Ridge is a classic meeting engagement, with only one unit on the map before Turn 1. Then both sides start moving troops onto the map, with each side’s respective forces entering through two hexes.

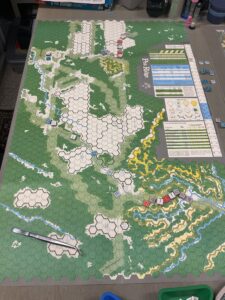
During movement I maintained brigade integrity for the most part, attaching artillery to brigades to maximize unit density and minimize the length of the “column of columns” moving on roads through heavy forest.  Here’s an overall shot of the game map during Turn 5,  when contact first occurred.

One of the problems I’m having working with the game system is the rules.  There are a number of iterations, which is not surprising since the initial game (Terrible Swift Sword – a true Monster Game) was introduced close to fifty years (!) ago.  The rules changed as publishers changed;  first SPI, then TSR , SDI, and then GMT.  These changes were in both additional detail as well as scope.  In fact, from what I’ve read, the earlier editions of the game are not playable with the new – GMT – rules.  Fortunately, for those just getting into the system, GMT has reissued the main games, and has added others.

Since I had the earlier games, I decided to work with the earlier rules and sold off my GMT GBACW collection.  But the question remained, “Which set?”.  I’m not the only one with this  quandary.

Another rules problem is that many of charts are printed on the individual game maps,  not in the game specific rules packets so they can be copied, consolidated and stapled.  One possible  reason is that the scales of the games vary.  The best I can tell is between 150 and 120 yards per hex.

Ugh!

My current approach will be to use the Standard Rules V.1 (with the included charts), individual map charts,  Quick Reference Card and Consolidated Errata.  The latter two are available over at Russ Gifford’s great SPI site.

Enough of this.  I’ll get to the game in the next post.


ASLSK – Rules Maintenance

Set up another scenario.  Need to keep hammering the rules into my brain.

This one is S16, Legio Nostra Patria.  It’s a one-mapper, with Free French Legionnaires assaulting a German held town.

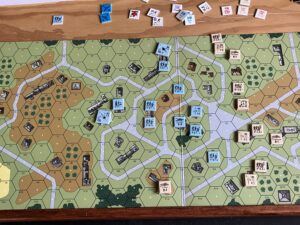
Here’s my initial set-up.  Top of the photo is East.

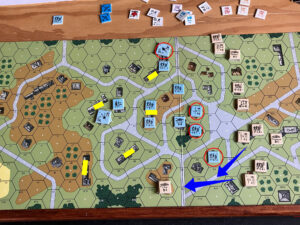
And here’s my plan.

The French need to occupy three of the multi- hex building highlighted in yellow.  They already occupy the building at bottom center  of the photo.

The red-circled German units will be suppressed, and with that accomplished, the squads will move towards the occupied multi-hex building and, from there move Northeast.

As I worked with my cheap photo markup app, I realized this is not a good initial deployment or  plan.  However, I’ll give it a try.  My own little “Defense of Duffer’s Drift”.

This Should Be Fun

Finally developing momentum getting Operation Groza, a Europa variant published way-too-long-ago in The Europa Magazine 23, to the virtual table.

Tim’s doing the heavy lifting, providing the JET module, Scorched Earth rules, and scans of the appropriate magazine pages with orders of battles, deployments, and special rules.

JET was/is an interesting creature.  Developed by Europa enthusiasts in Finland, it has fallen by the wayside (as has Europa) over the past couple of decades (gulp!  that long!).  Graphics are very crude by Vassal standards, but it is a good, intuitive, platform.  Tim and I used it in our Fall Of France game.

I’m heading out to The Sunfish Capital Of The World next week, so this will be an excellent off-site wargaming endeavor.