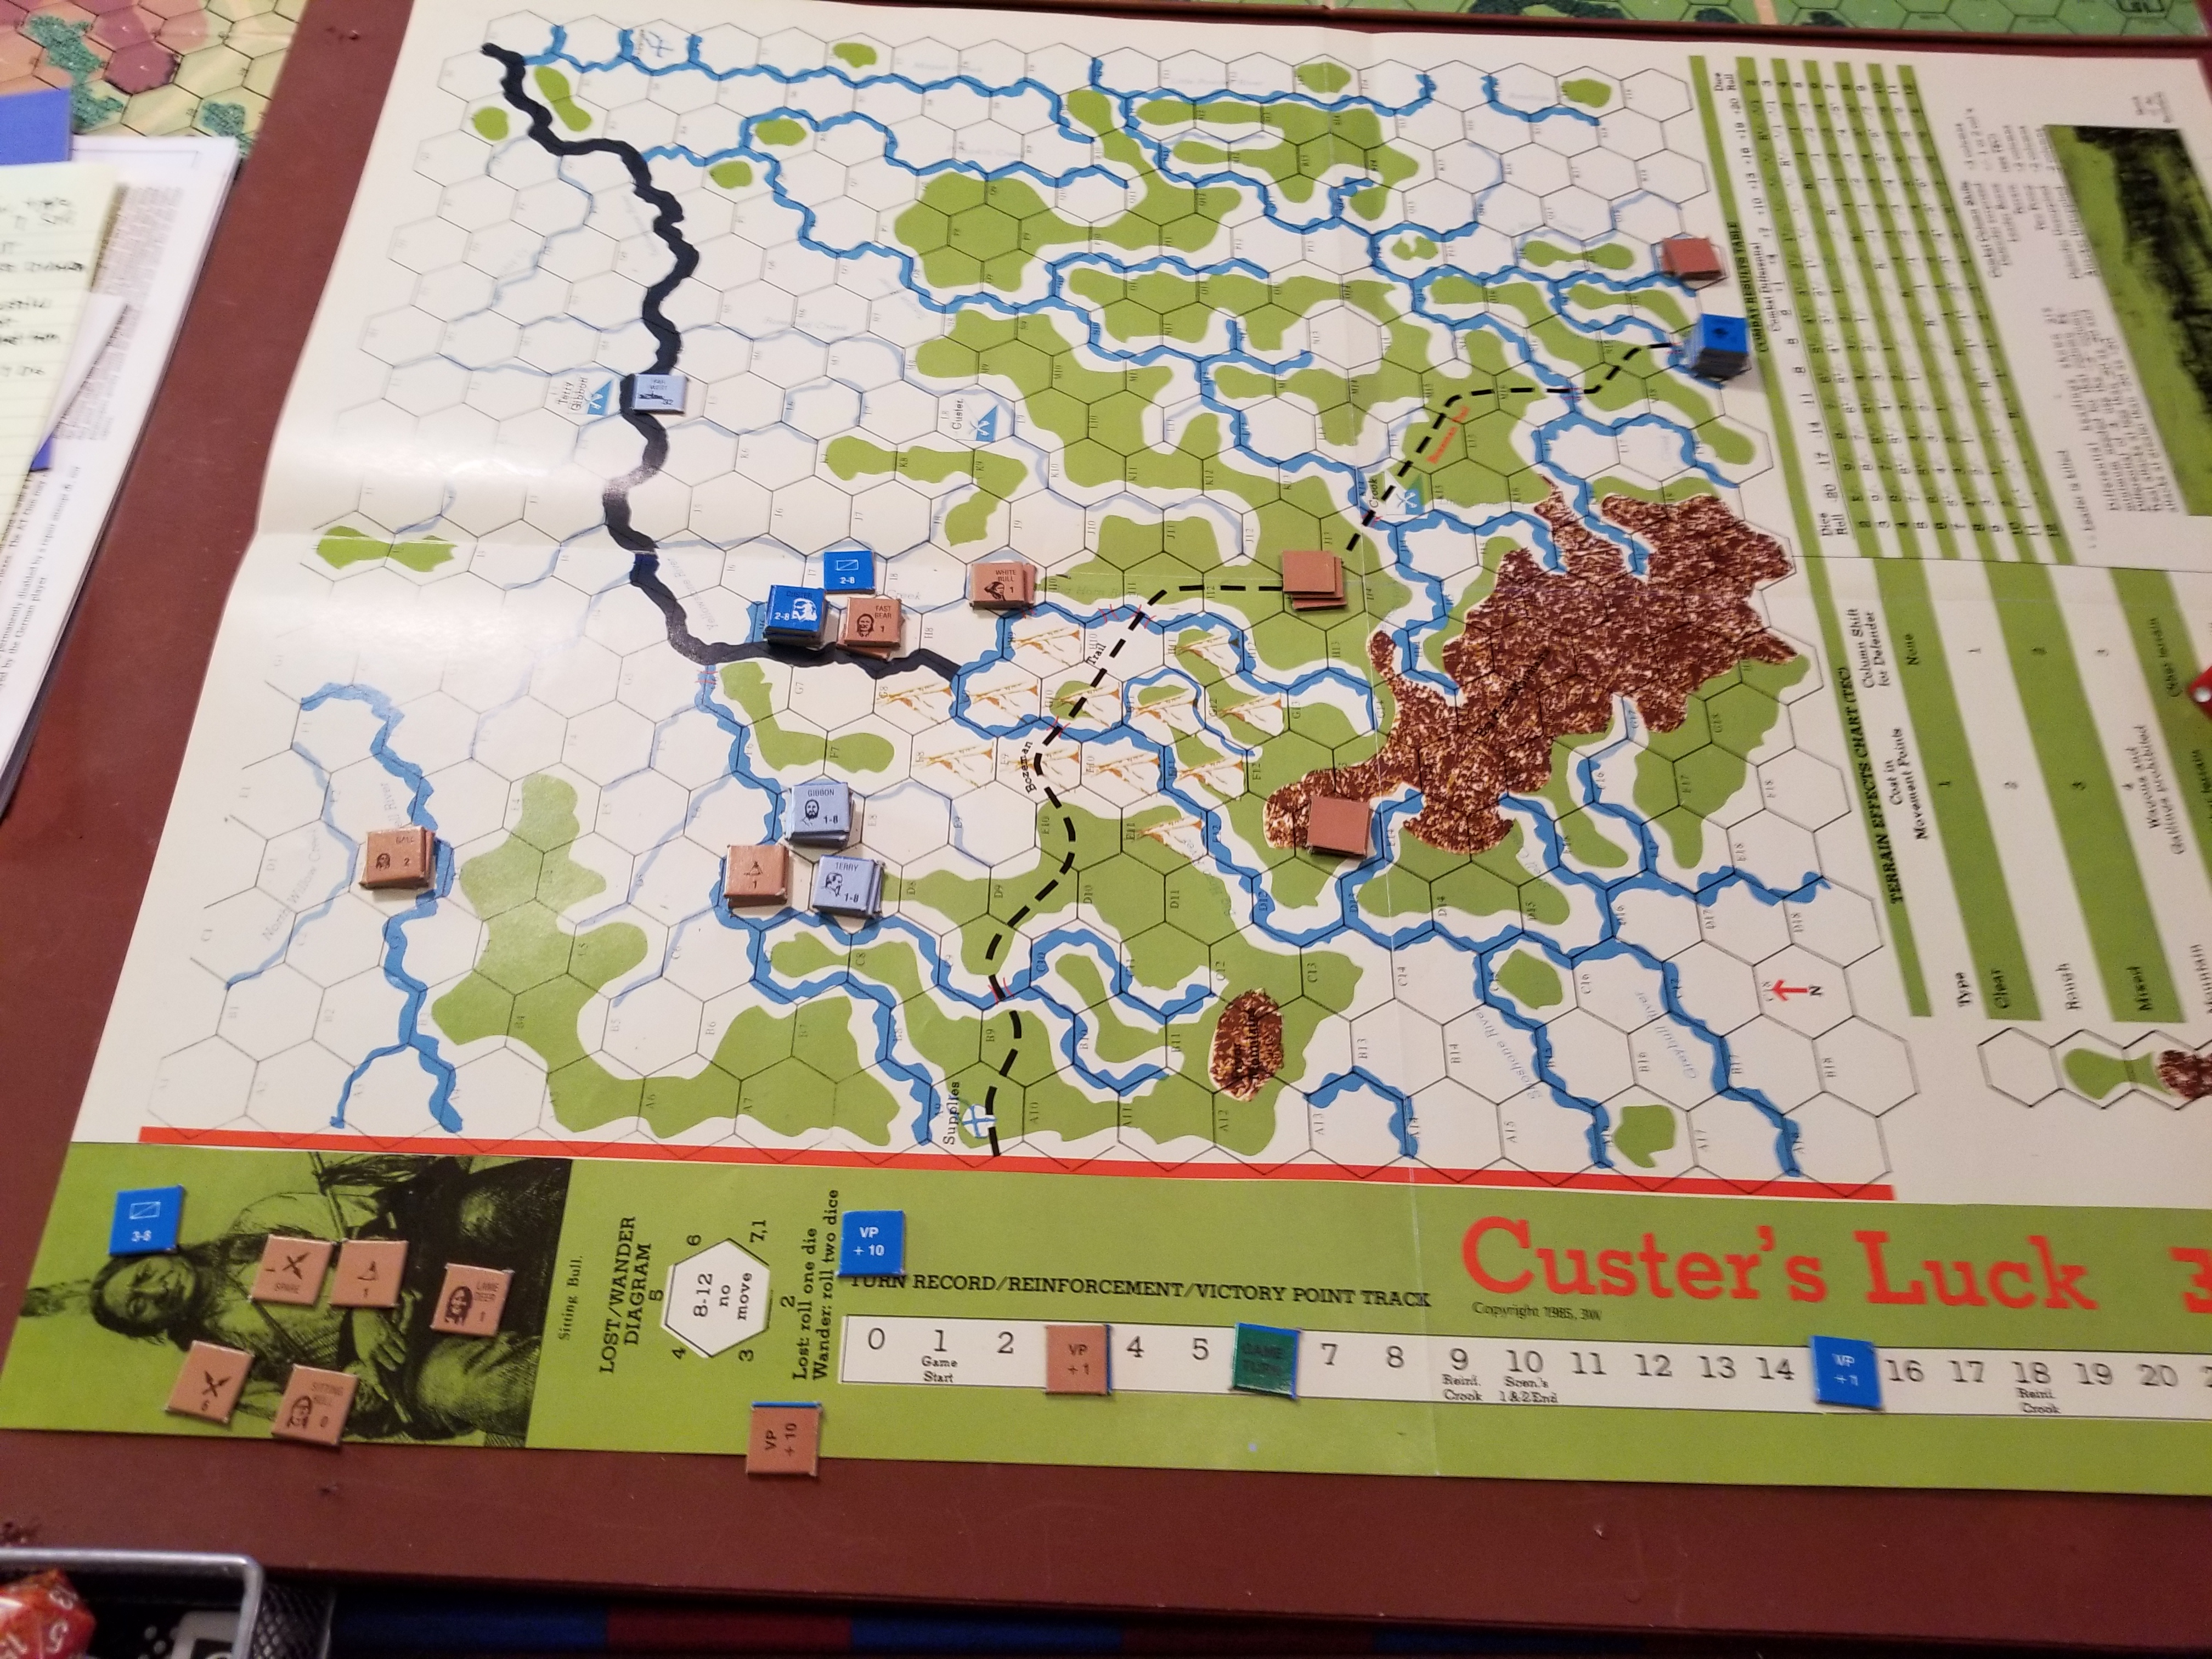
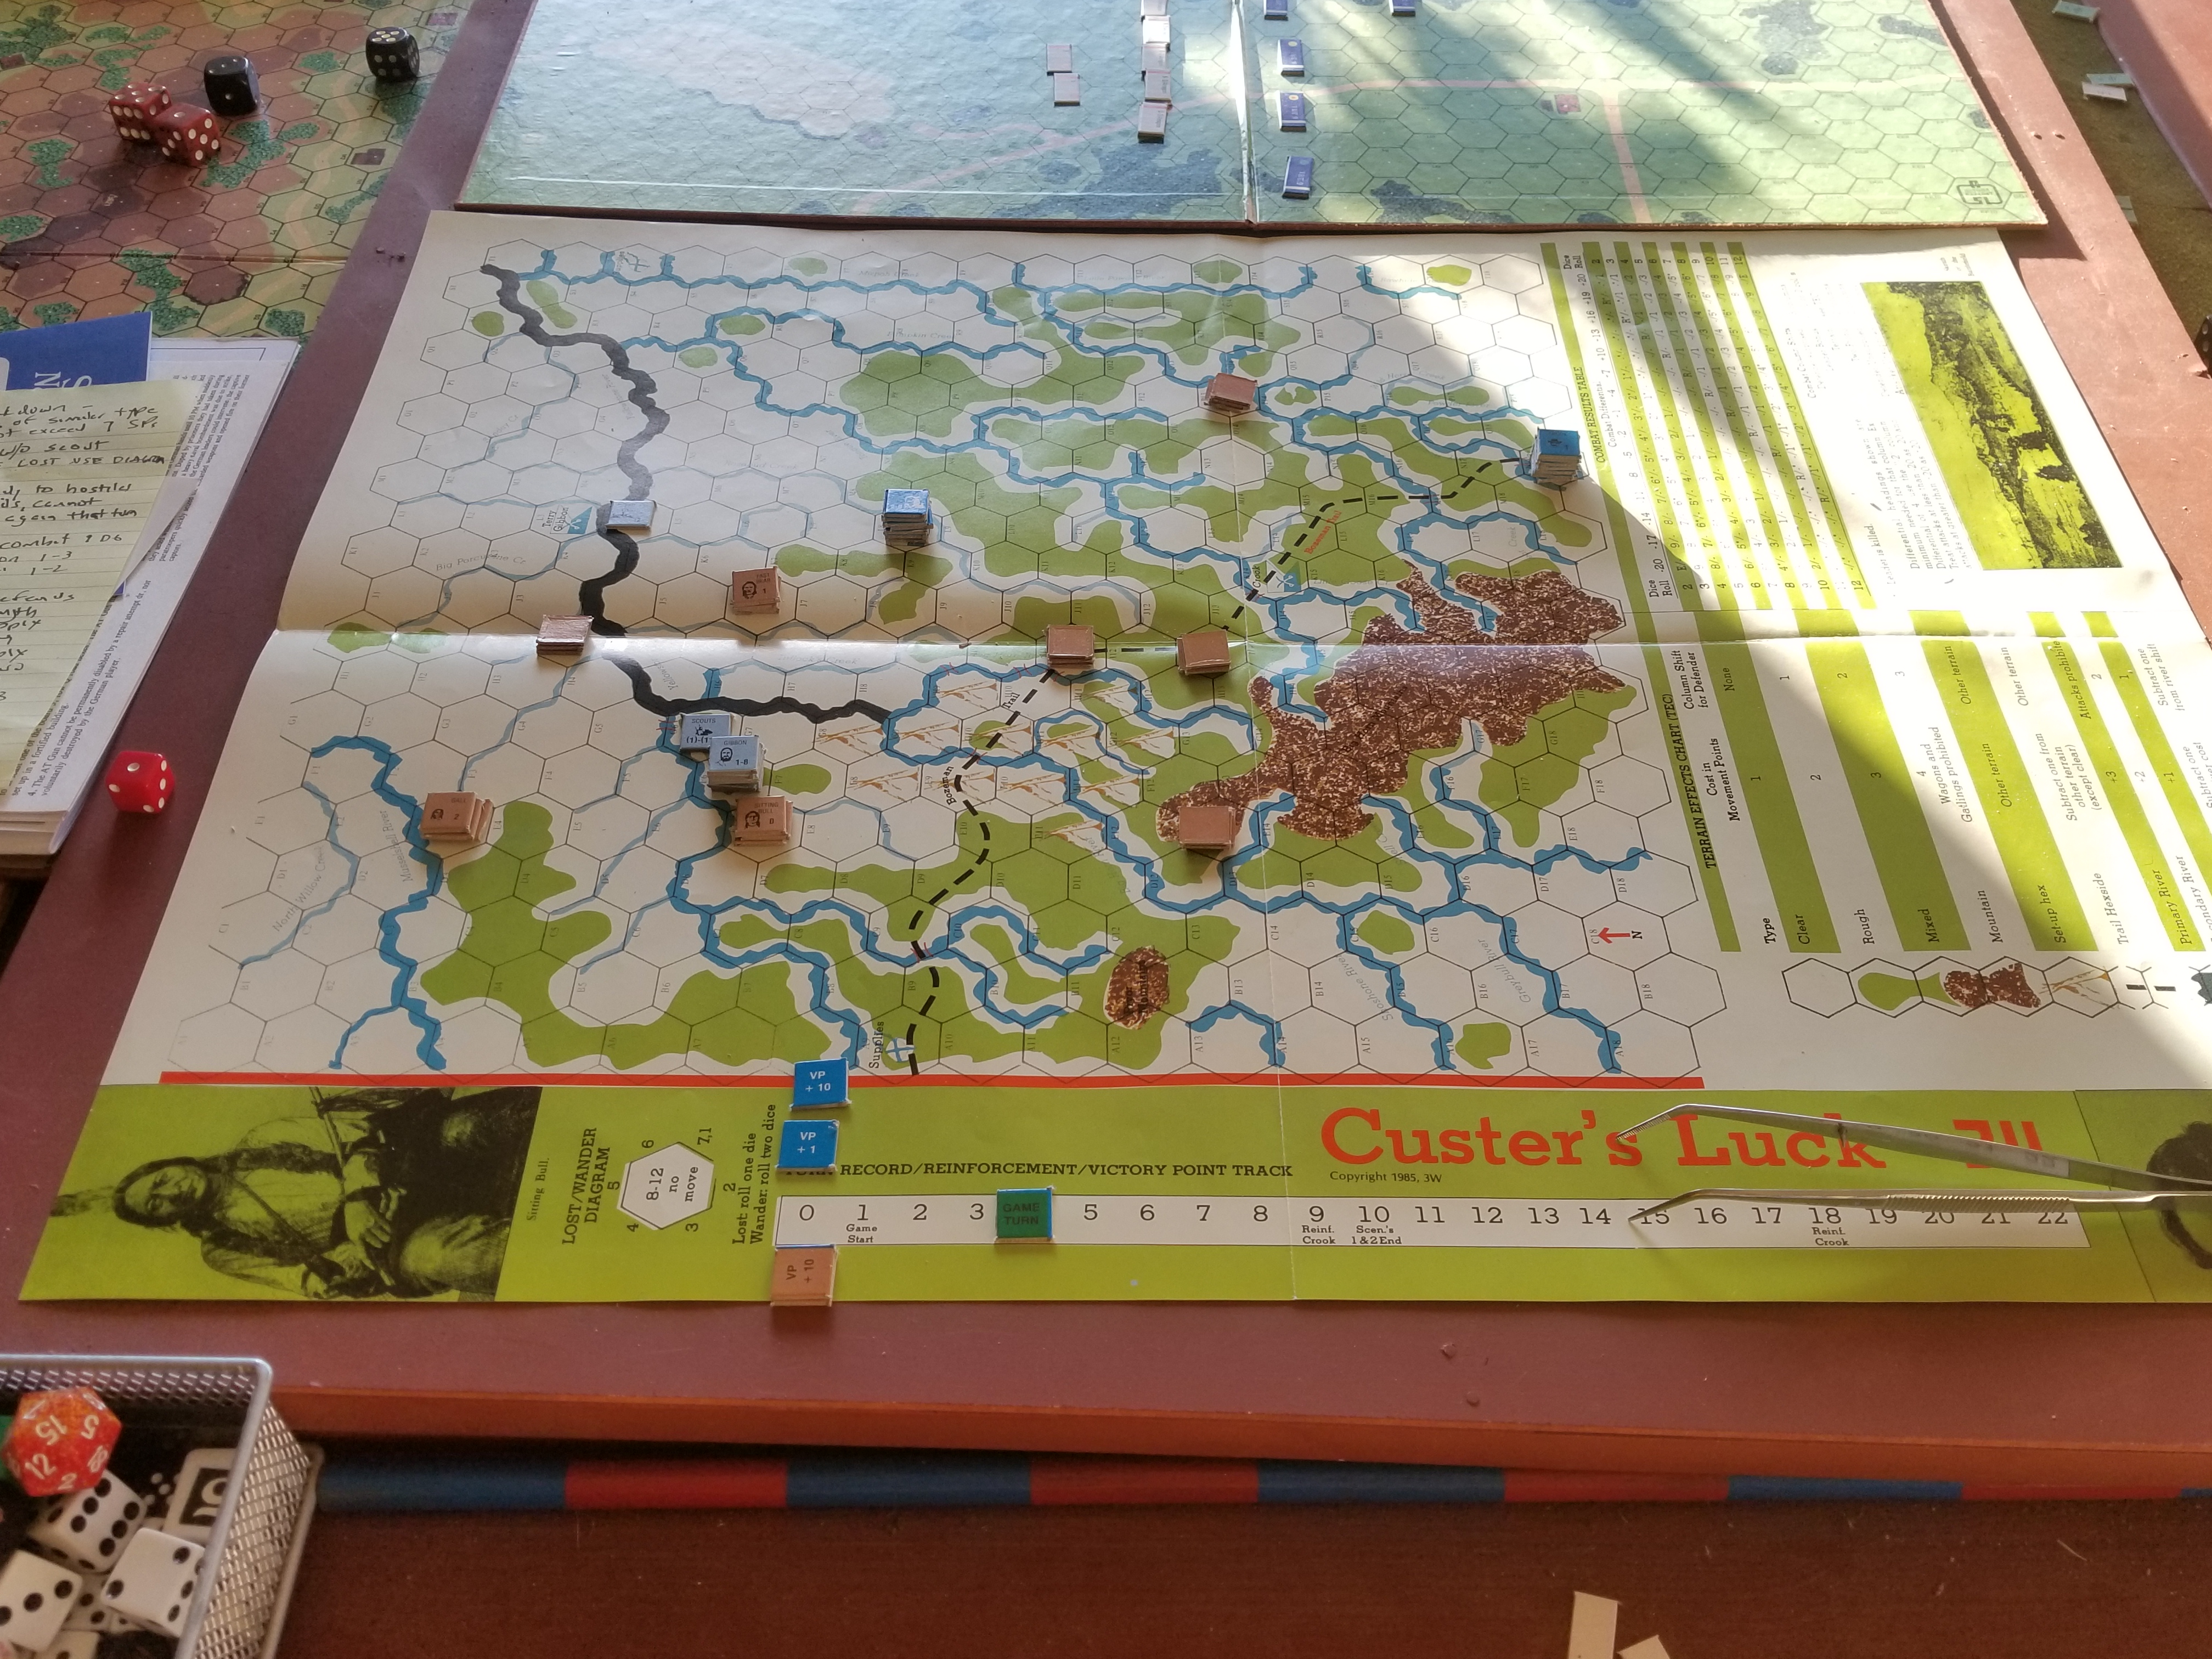
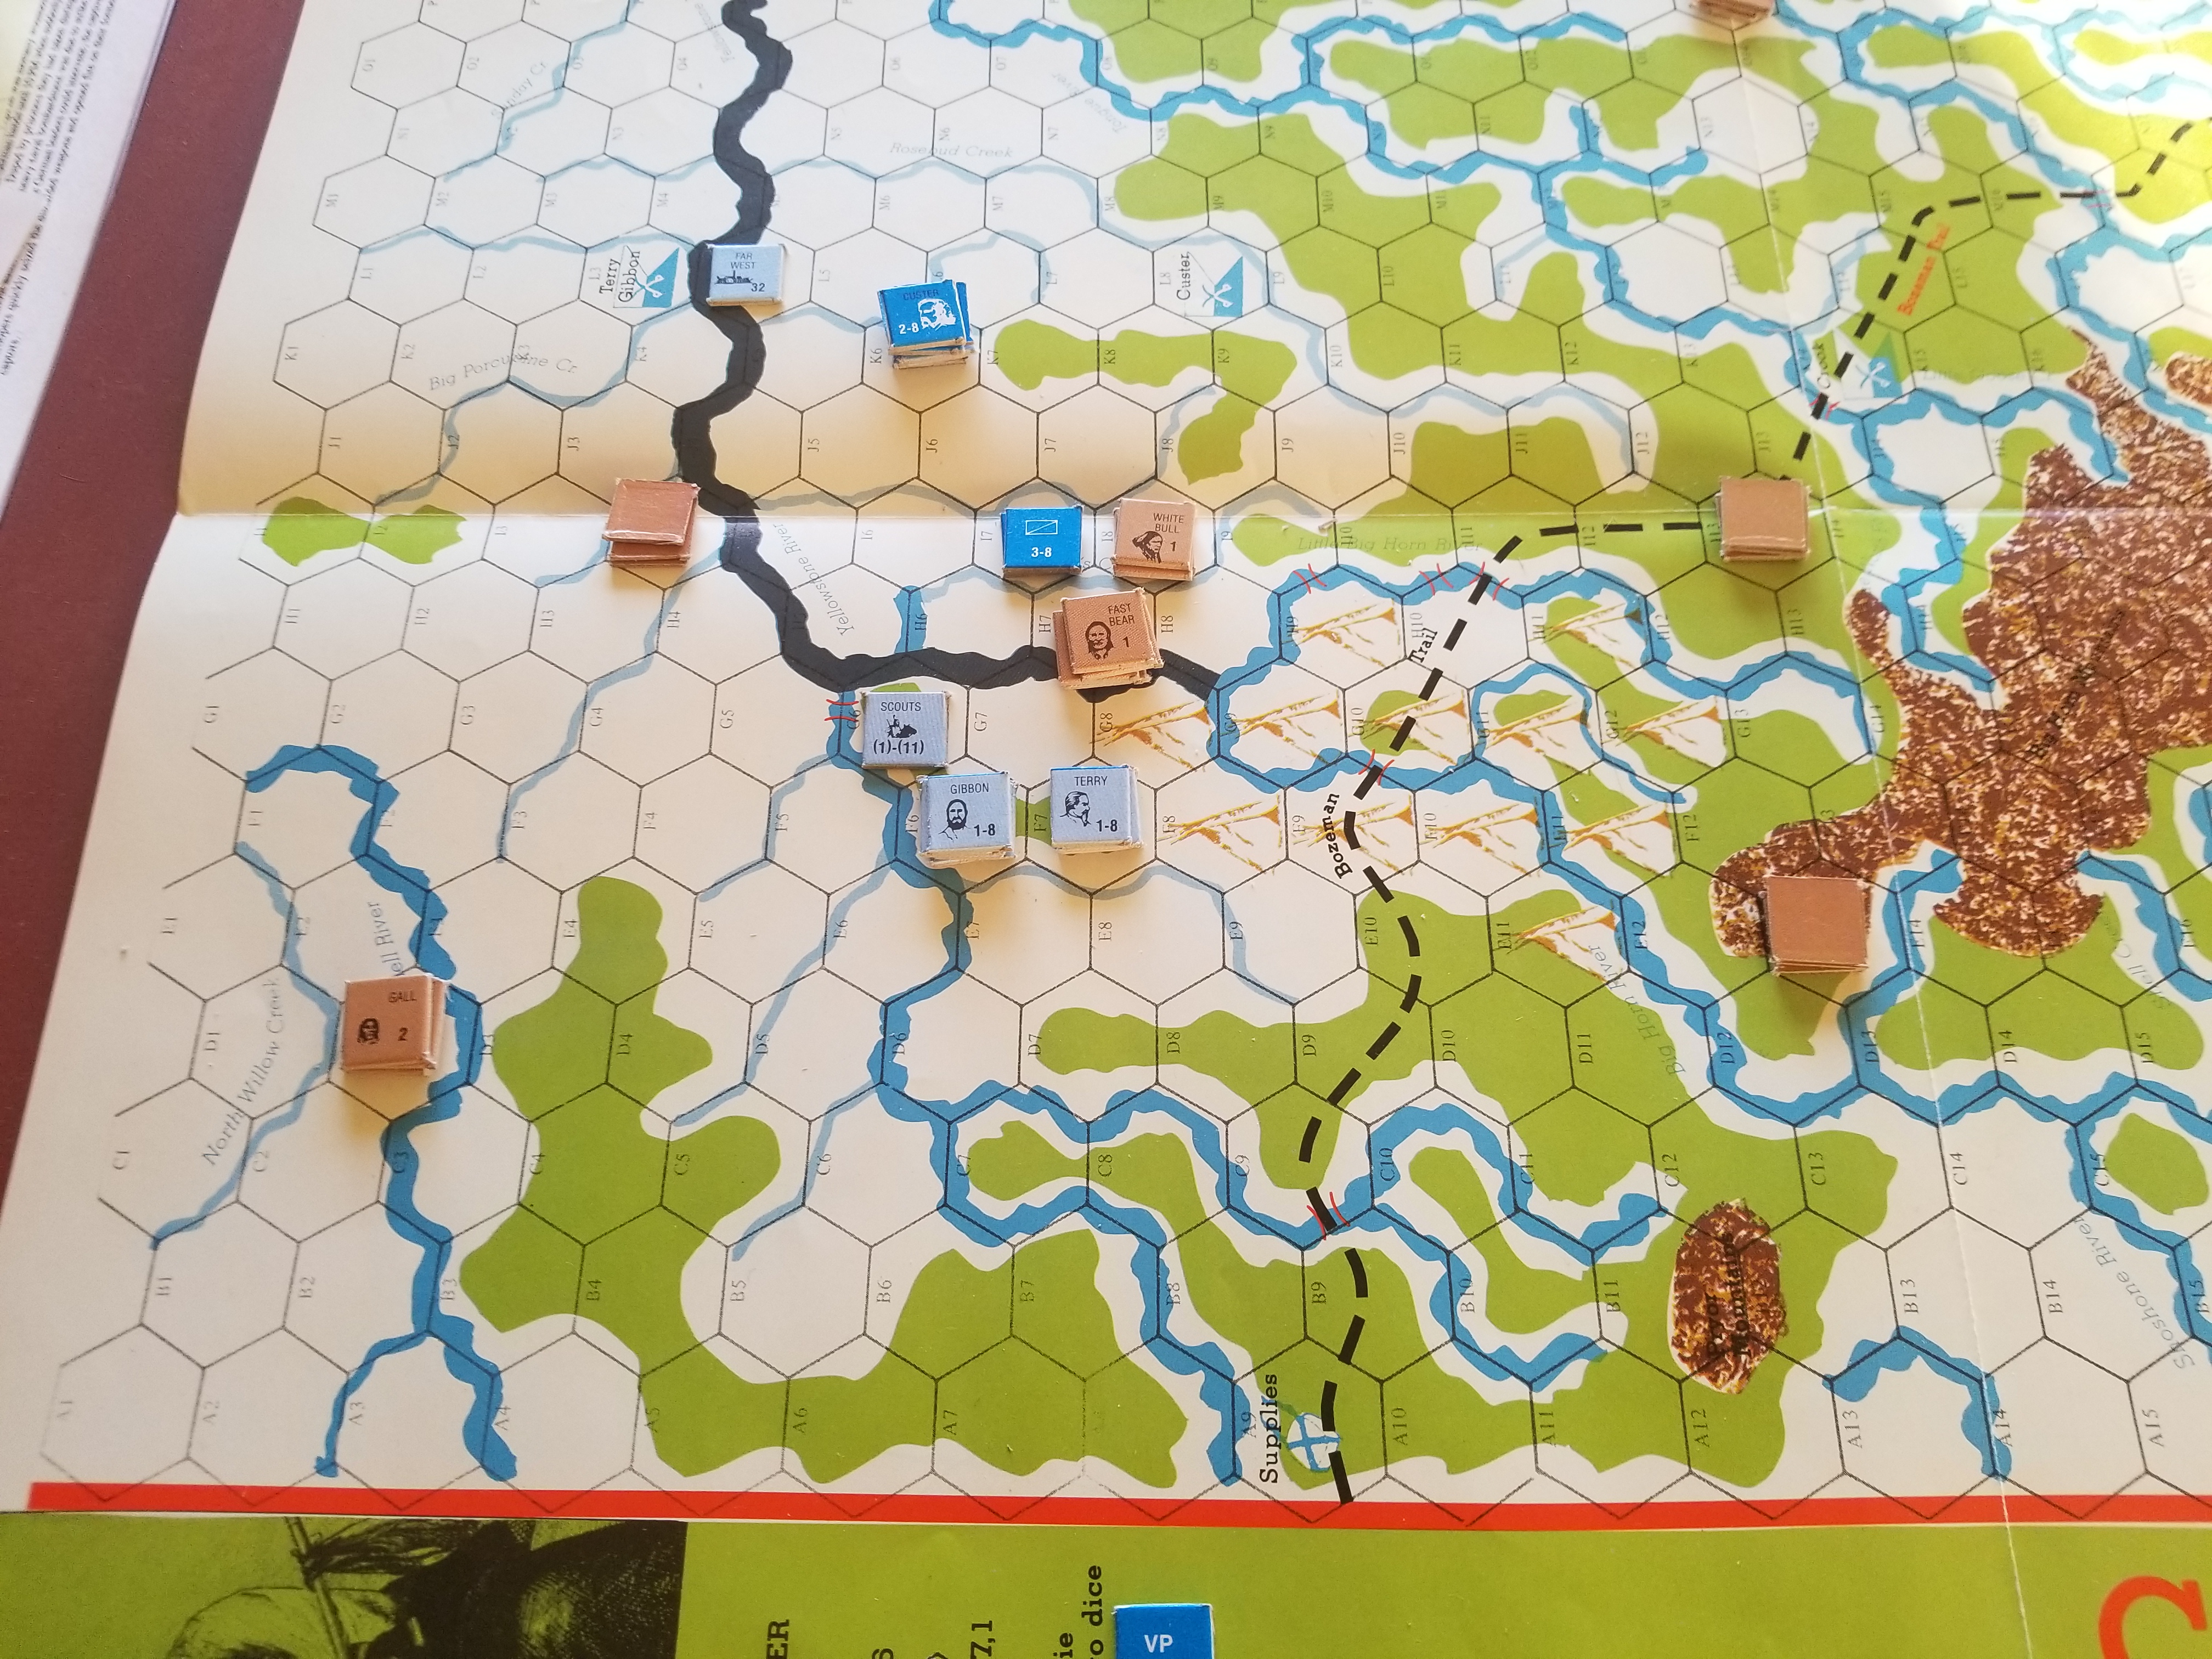
Custer attacks both Fast Bear and White Bull, causing casualties and forcing White Bull to retreat. Which may not be a bad thing.
Terry/Gibbon command keep grinding down their opponents, also killing Lame Deer.
Each command was able to find, maintain contact, use envelopment (in game terms “prong attack”) to attack, and inflict casualties. Doctrine in action (?).
The system’s randomness has created some interesting situations, with plenty of give-and-take. It really is fun, with the “Hostiles” bouncing all over the map.
In Turn 4, Sitting Bull’s weak contingent attacks Terry/Gibbon’s combined arms force despite overwhelming odds.
During Turn 5, Terry/Gibbon maintains contact with Sitting Bull, while Custer envelops Little Bear’s force. Sitting Bull’s force is destroyed, and Little Bear takes casualties.
Later in the turn, Custer is attacked by Sioux drawn like moths to the flame of randomness. One of Custer’s battalions is destroyed.
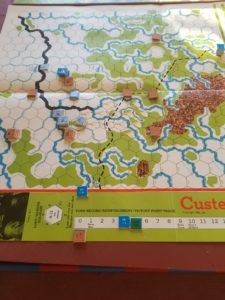
At this point, who knows what the hell will happen. At the end of Turn 5, Army has 9 VPs, Hostiles 3.
1. Concentrate U-Boats. Downside is that ASW becomes more effective.
2. Concentrate in North Atlantic only if Convoy marker is there (Allied ASW typically concentrated in North Atlantic).
3. Keep Donitz in the Sub Pens (didn’t go into this in my initial review), because his presence reduces chances for ASW capability increases.
Author states that BoAT is a difficult game to win. He offers optional rules to help the Germans (see previous post).
The article includes rules clarifications and references an excellent review from WebGrognards.
Finally started pushing cardboard, but immediately ran into problems. Not unanticipated, but one of them brought the session to a halt.
Movement phase difficult because counters are damned fiddly. Movement trays? Bad thought. Cardboard is easy, right?
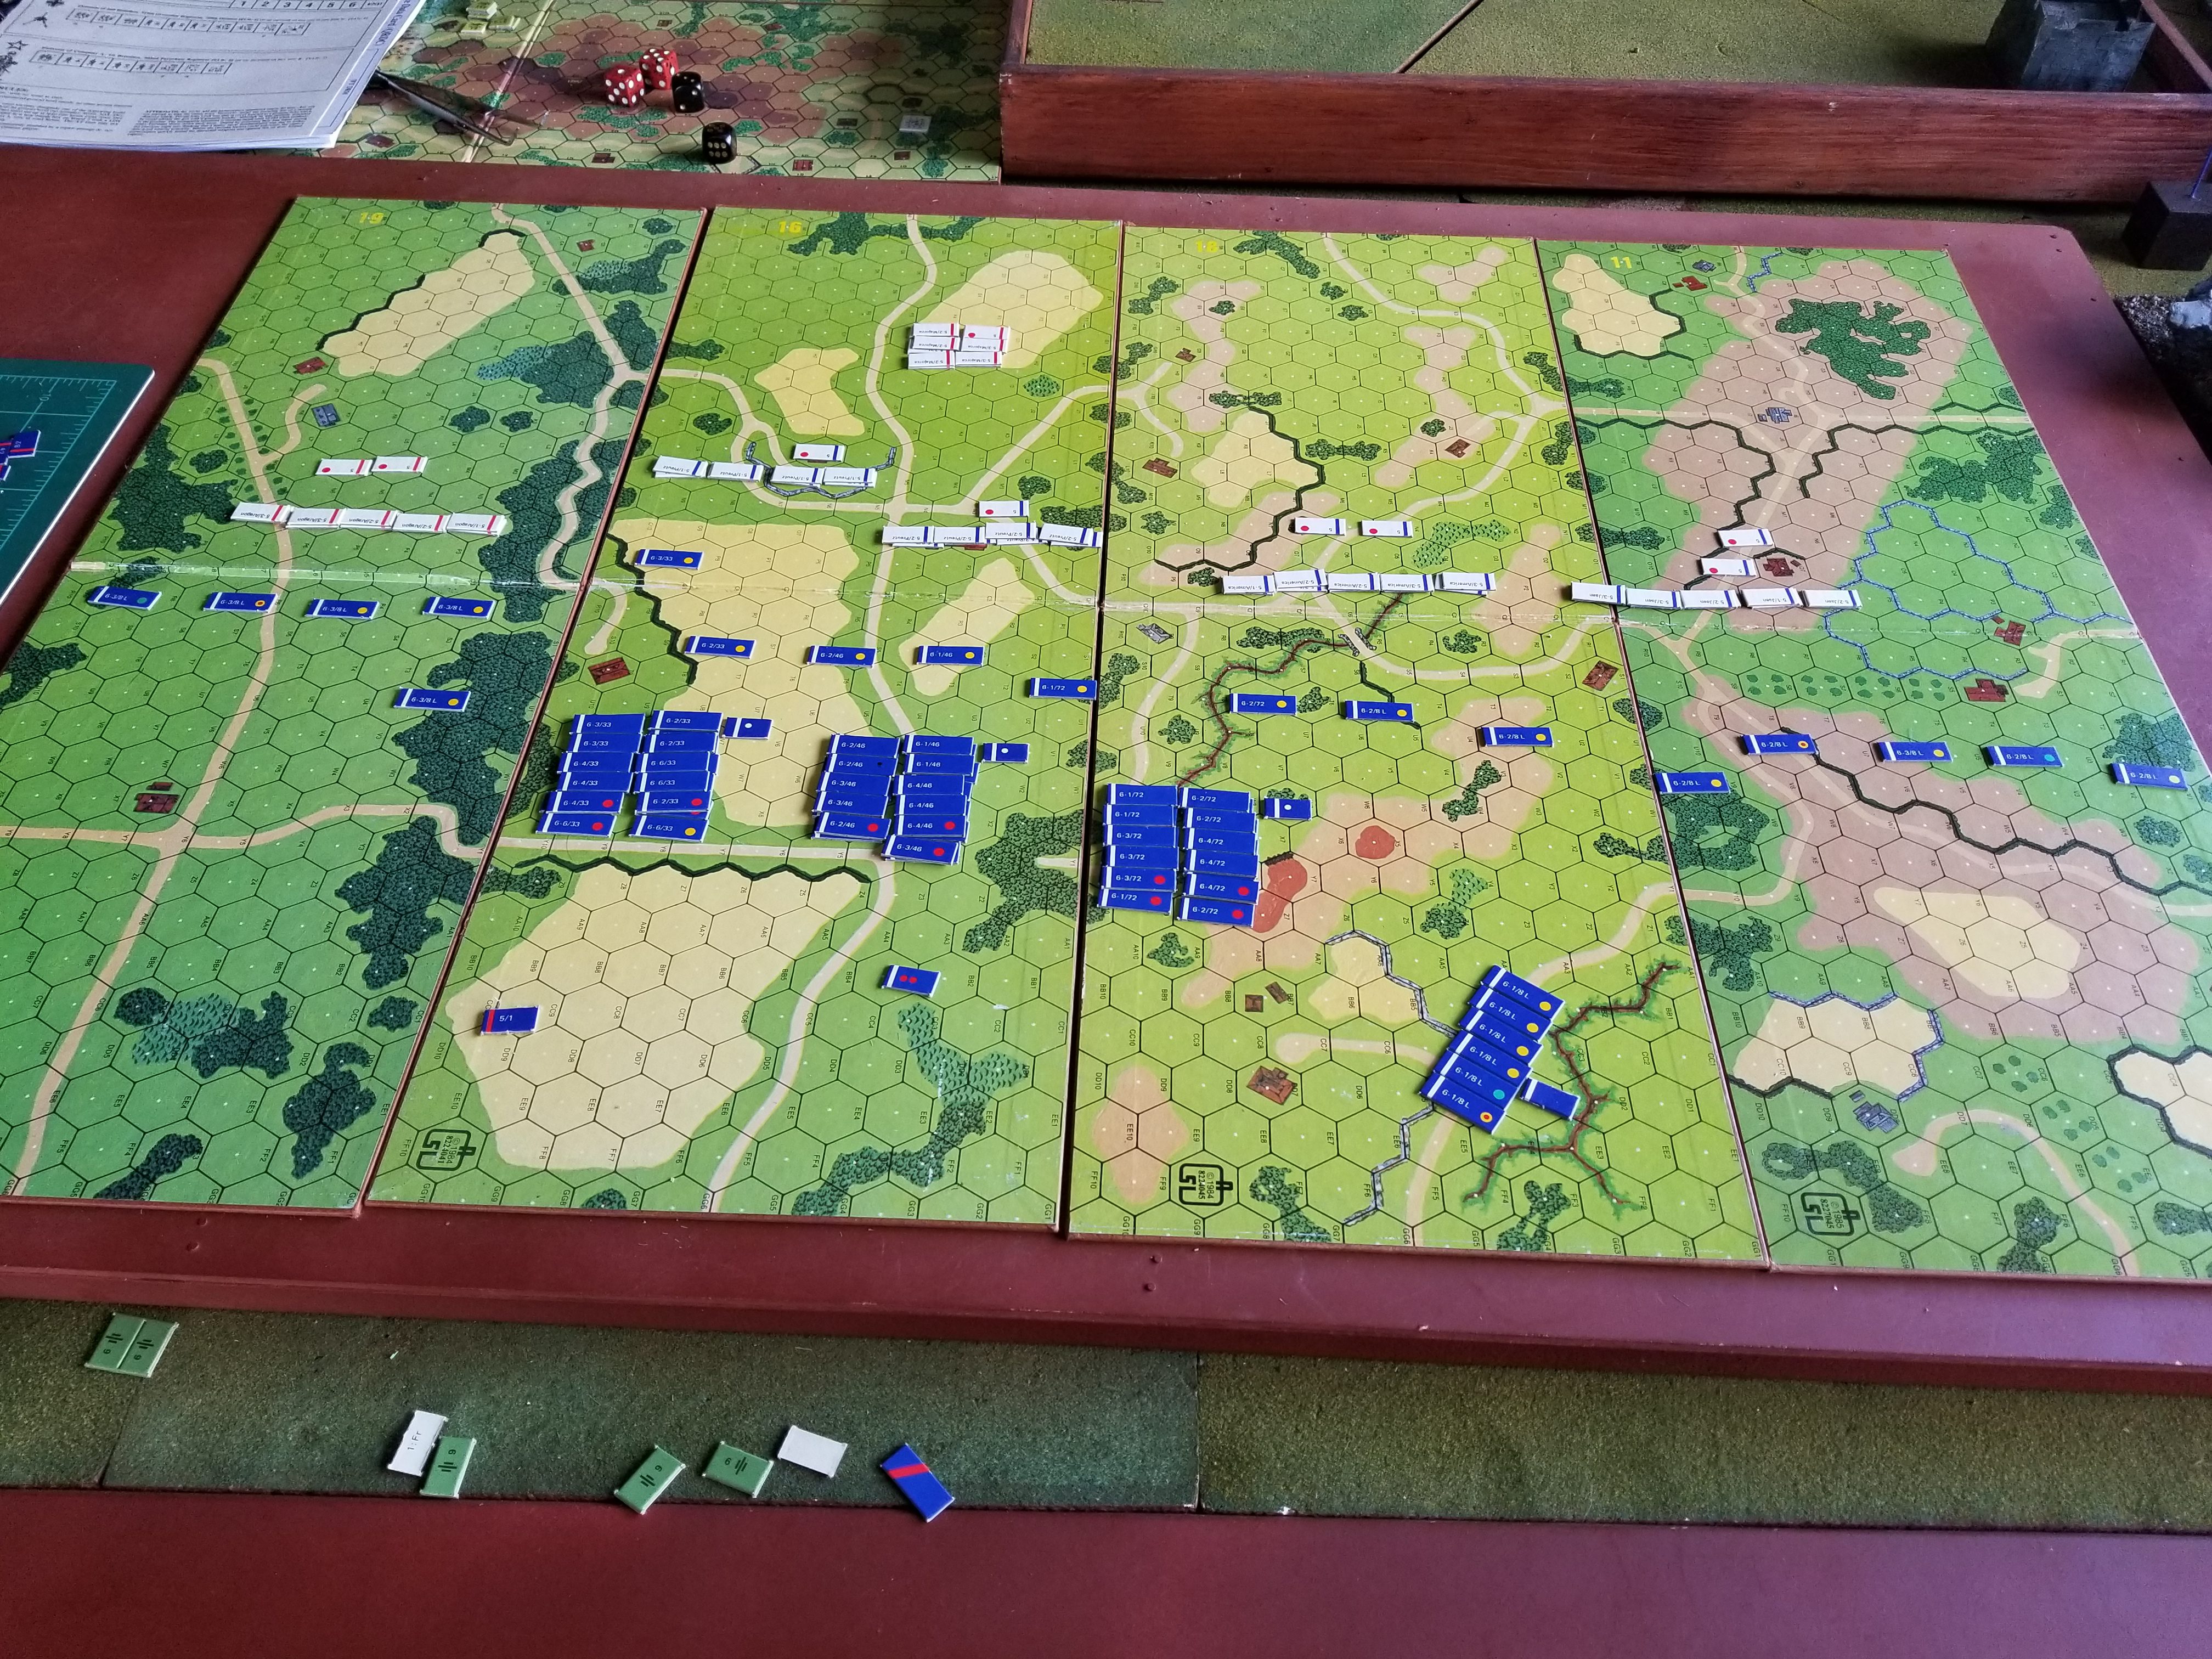
The French advanced with skirmishers front, engaging each Spanish regiment. I do like the way the game looks!
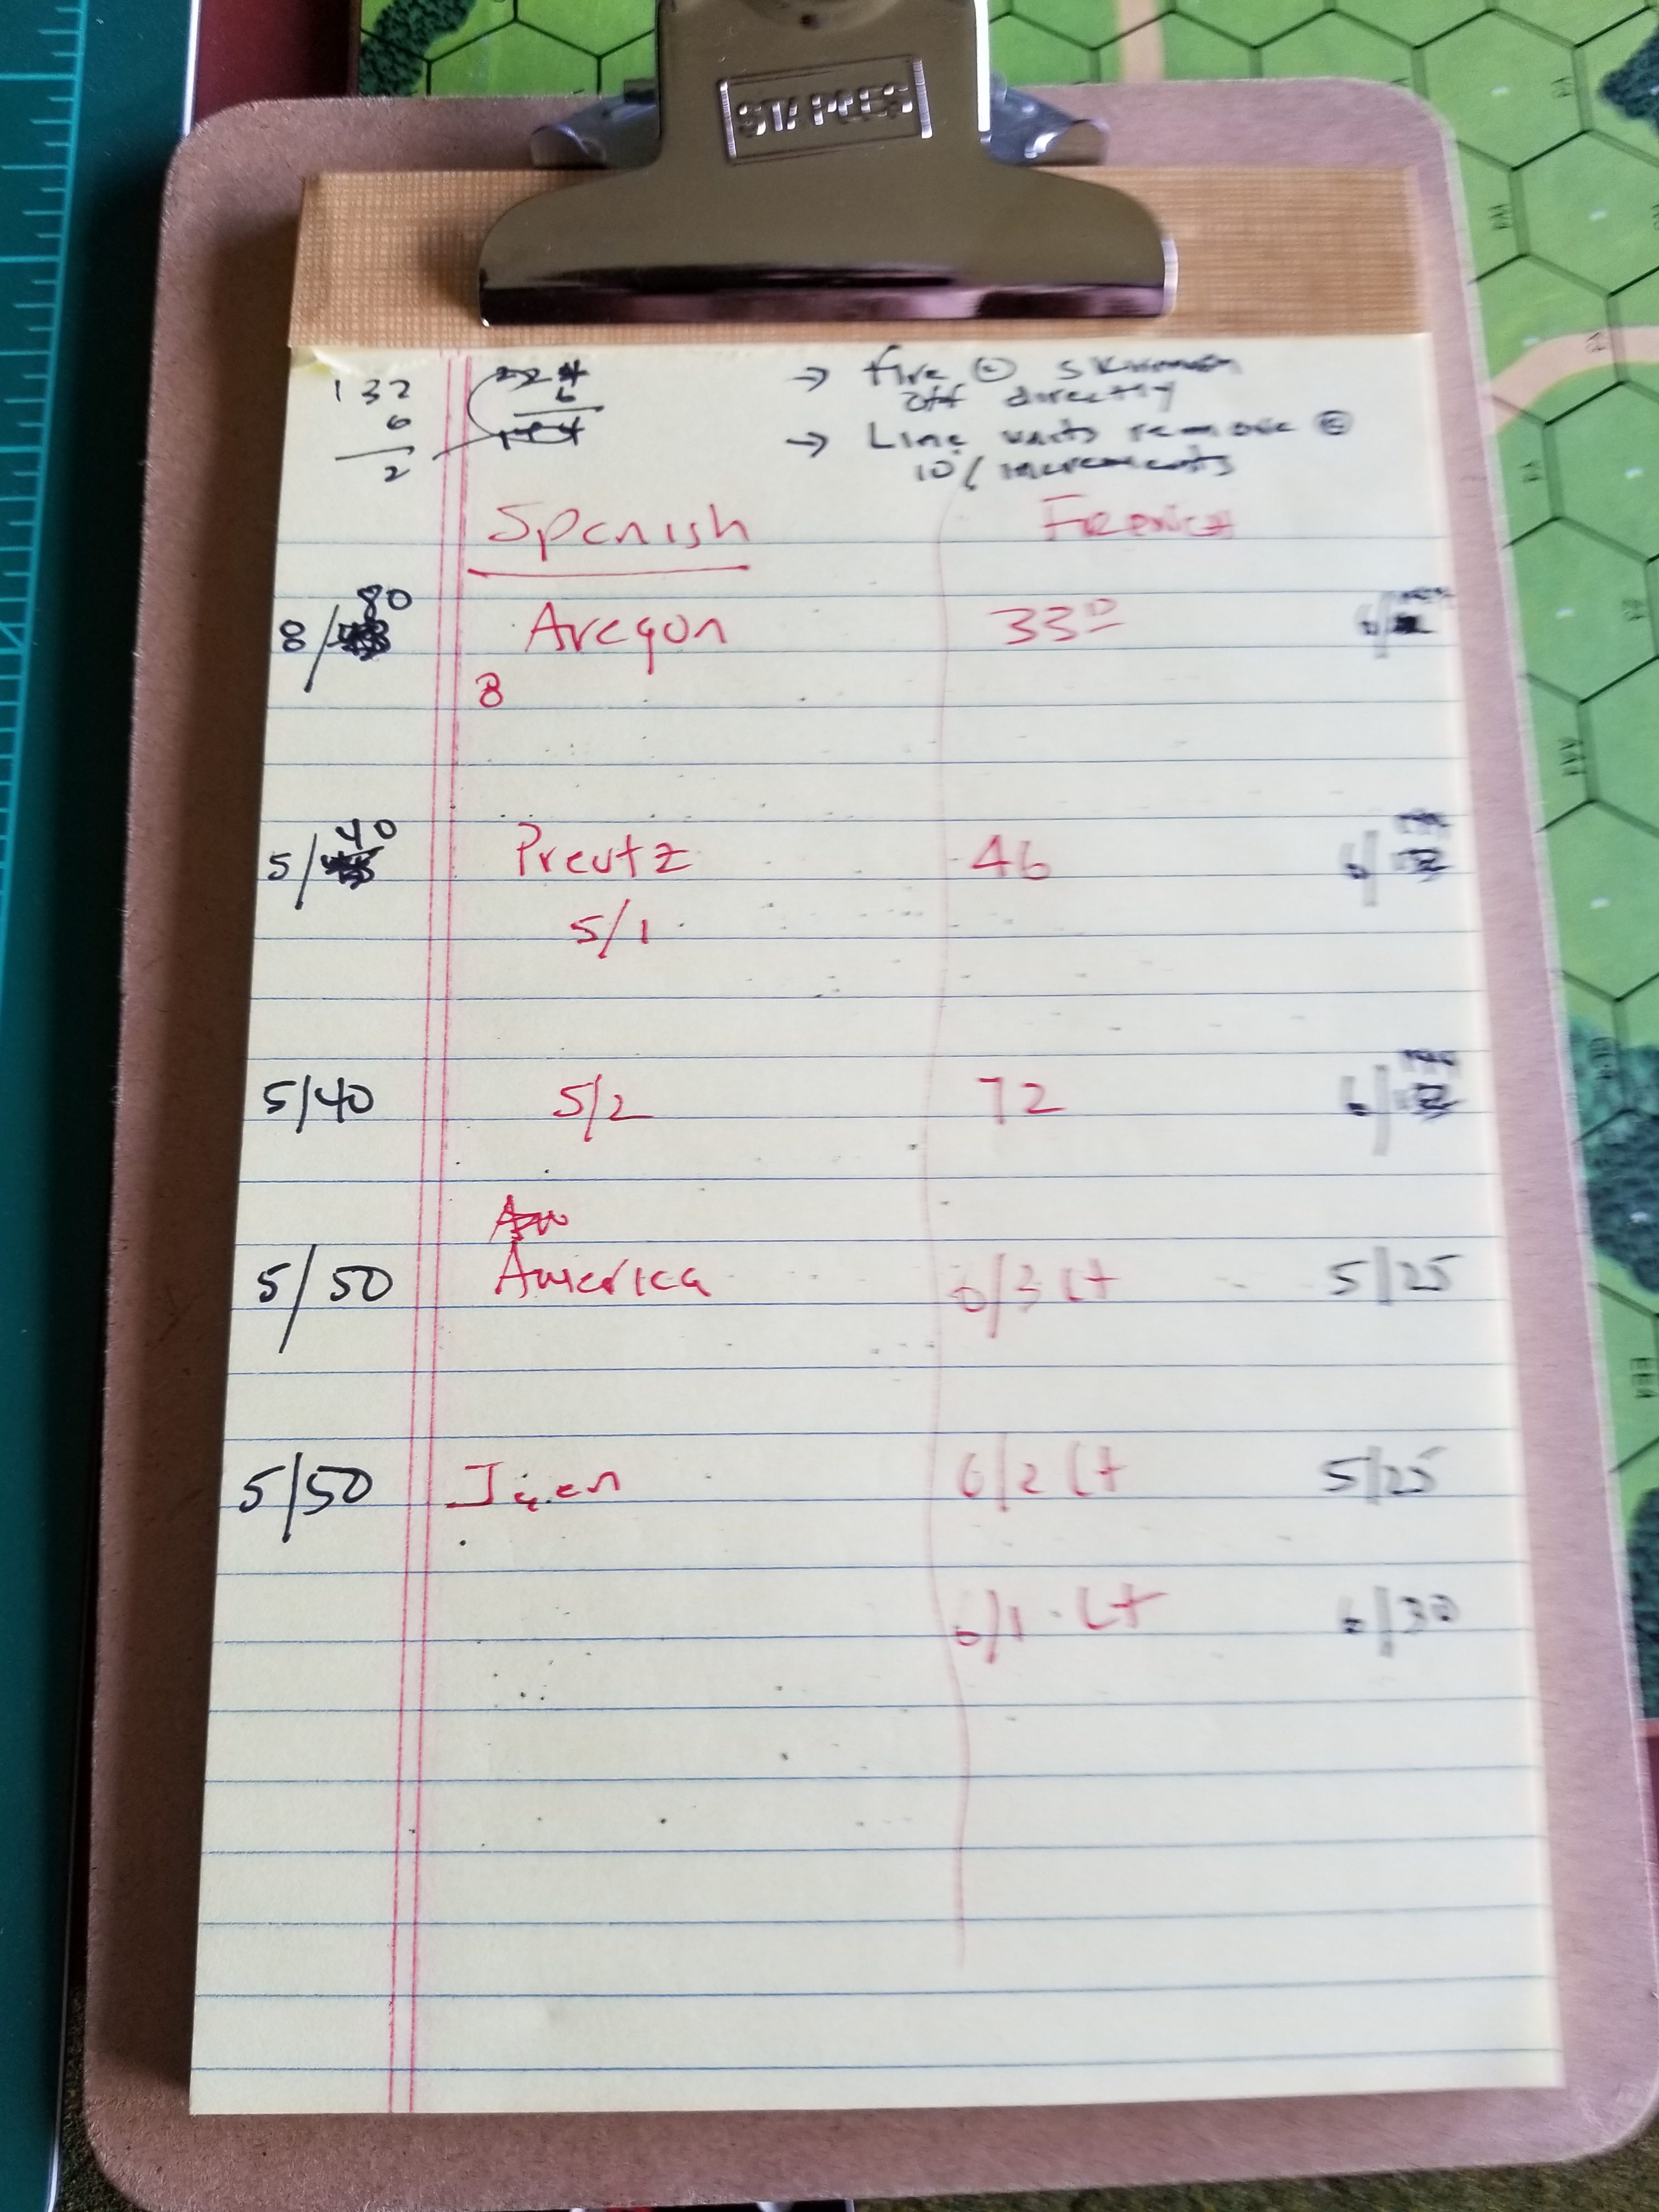
Then, another problem: Casualties. The game calls for a detailed accounting of losses. Makes the fiddiliness of moving regiments pale in comparison. So, in the name of my sanity, decided to assign losses to the entire regiment, removing company counters for each 10 percent loss of the regiment’s total strength. Skirmishing companies will be accounted for individually.
Drafted up a regiment, company strength, total strength worksheet. A picture is shown below.
Crude, but hopefully effective.
While messing around this morning found this link/article over at Web Grognards. Confluence of events?
That CRT is interesting, with the attackers possibly taking losses even on an 8:1!
It seems that a defender would be well advised to defend with at least two factors in each hex. That way the attacker doesn’t get the +1 modifier for a single defending point and runs the risk (in the absence of other modifiers) of taking losses.
Is supply checked at the instant of combat? If that is the case (and I can’t check since my copy of the rules got put back into the box and is now back in Bend…) surrounding defenders becomes even more important. I would think, given the CRT, it wouldn’t be hard to surround defenders….
That game does not reward defending! The infantry units defend much worse than they attack…I wonder if it would be worthwhile for the Poles to continue to attack in the North. I had thought about making a couple of spoiling attacks against weak units, but I didn’t want to trigger Russian reaction and extra reinforcements.
You did a good job with the Konarmiya. I’m not sure how that would have played out…I was hoping that you would suffer some attrition that would prevent them from rolling up my southern flank and I was directing all of my reinforcements and replacements there, but who knows if that would have been enough to stop them…
I had thought about moving a unit next to the units in the Konarmiya to deprive them of the charge bonus, but that felt too gamy…
Over to Portland for Tim’s birthday and some wargaming at Guardian Games.
Fun place. You can game, drink beer, and when it’s your opponent’s turn, look at the inventory. It’s not a wargame store, but they do have some games, along with Flames of War miniatures.
Lots of diverse Portlandians playing a wide variety of games. However, the fellow next to us playing D&D using different voices for each character was a bit difficult to handle.
Thank Goodness The D&D Game Is Over
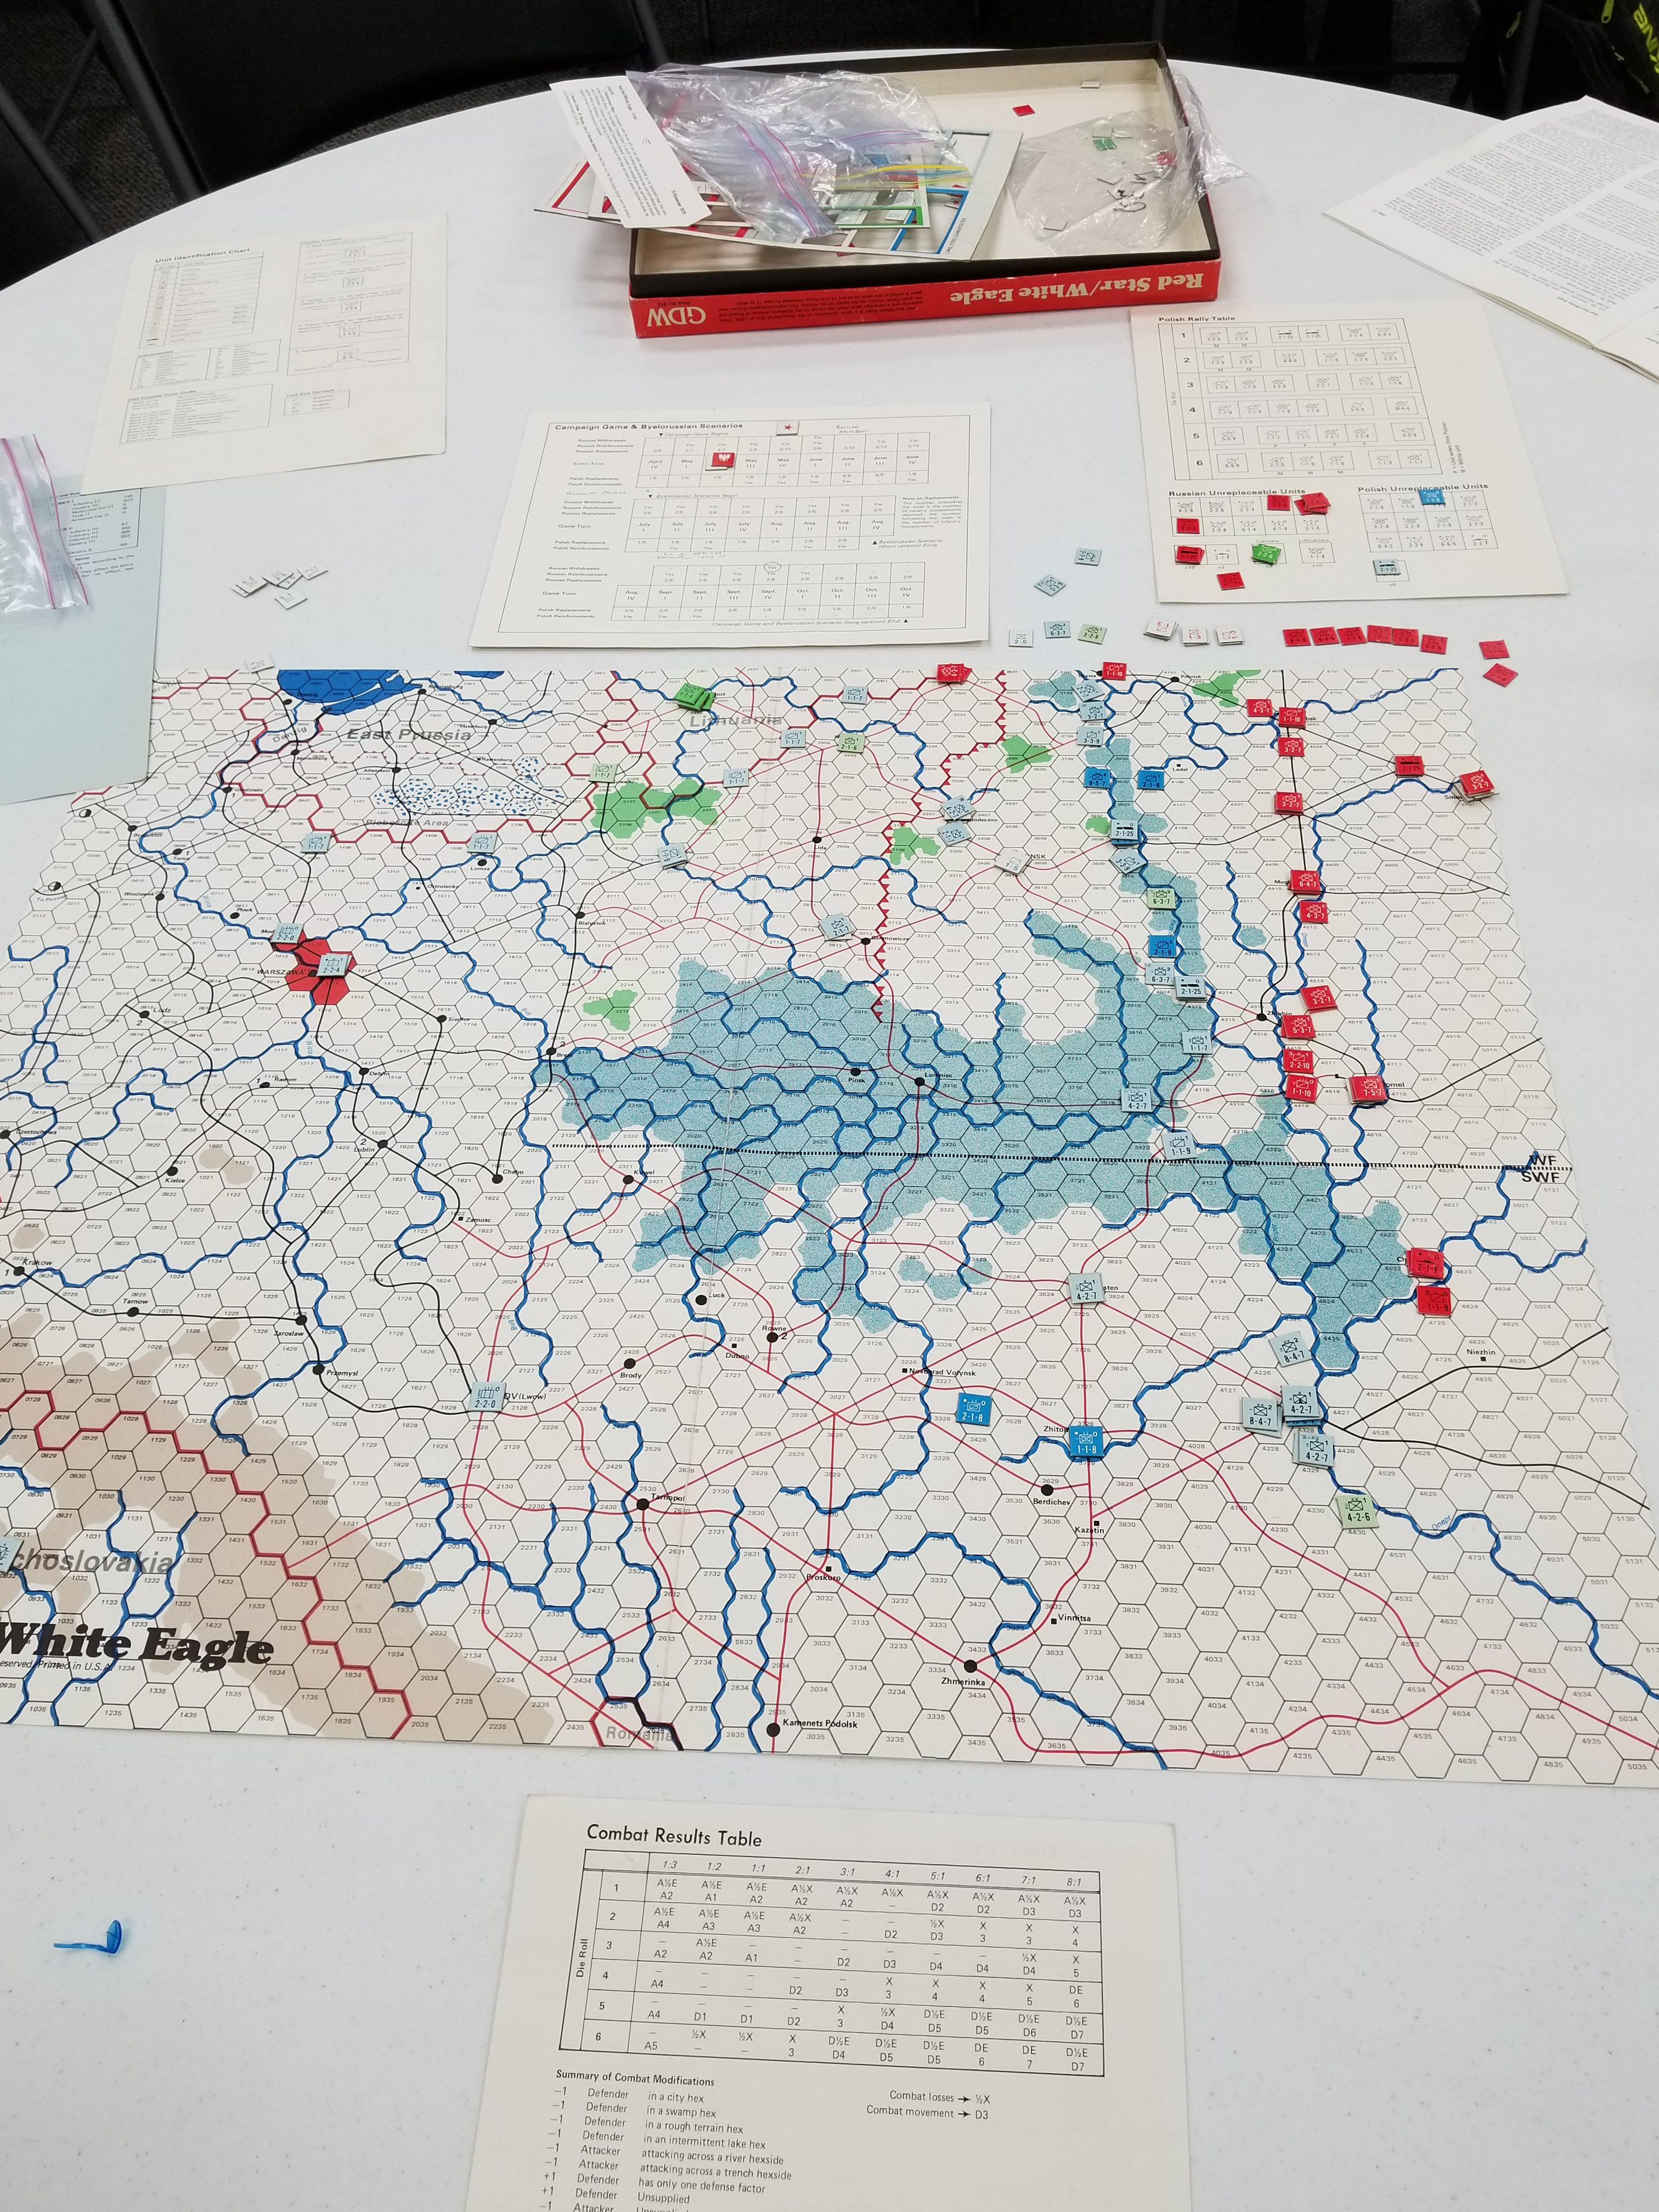
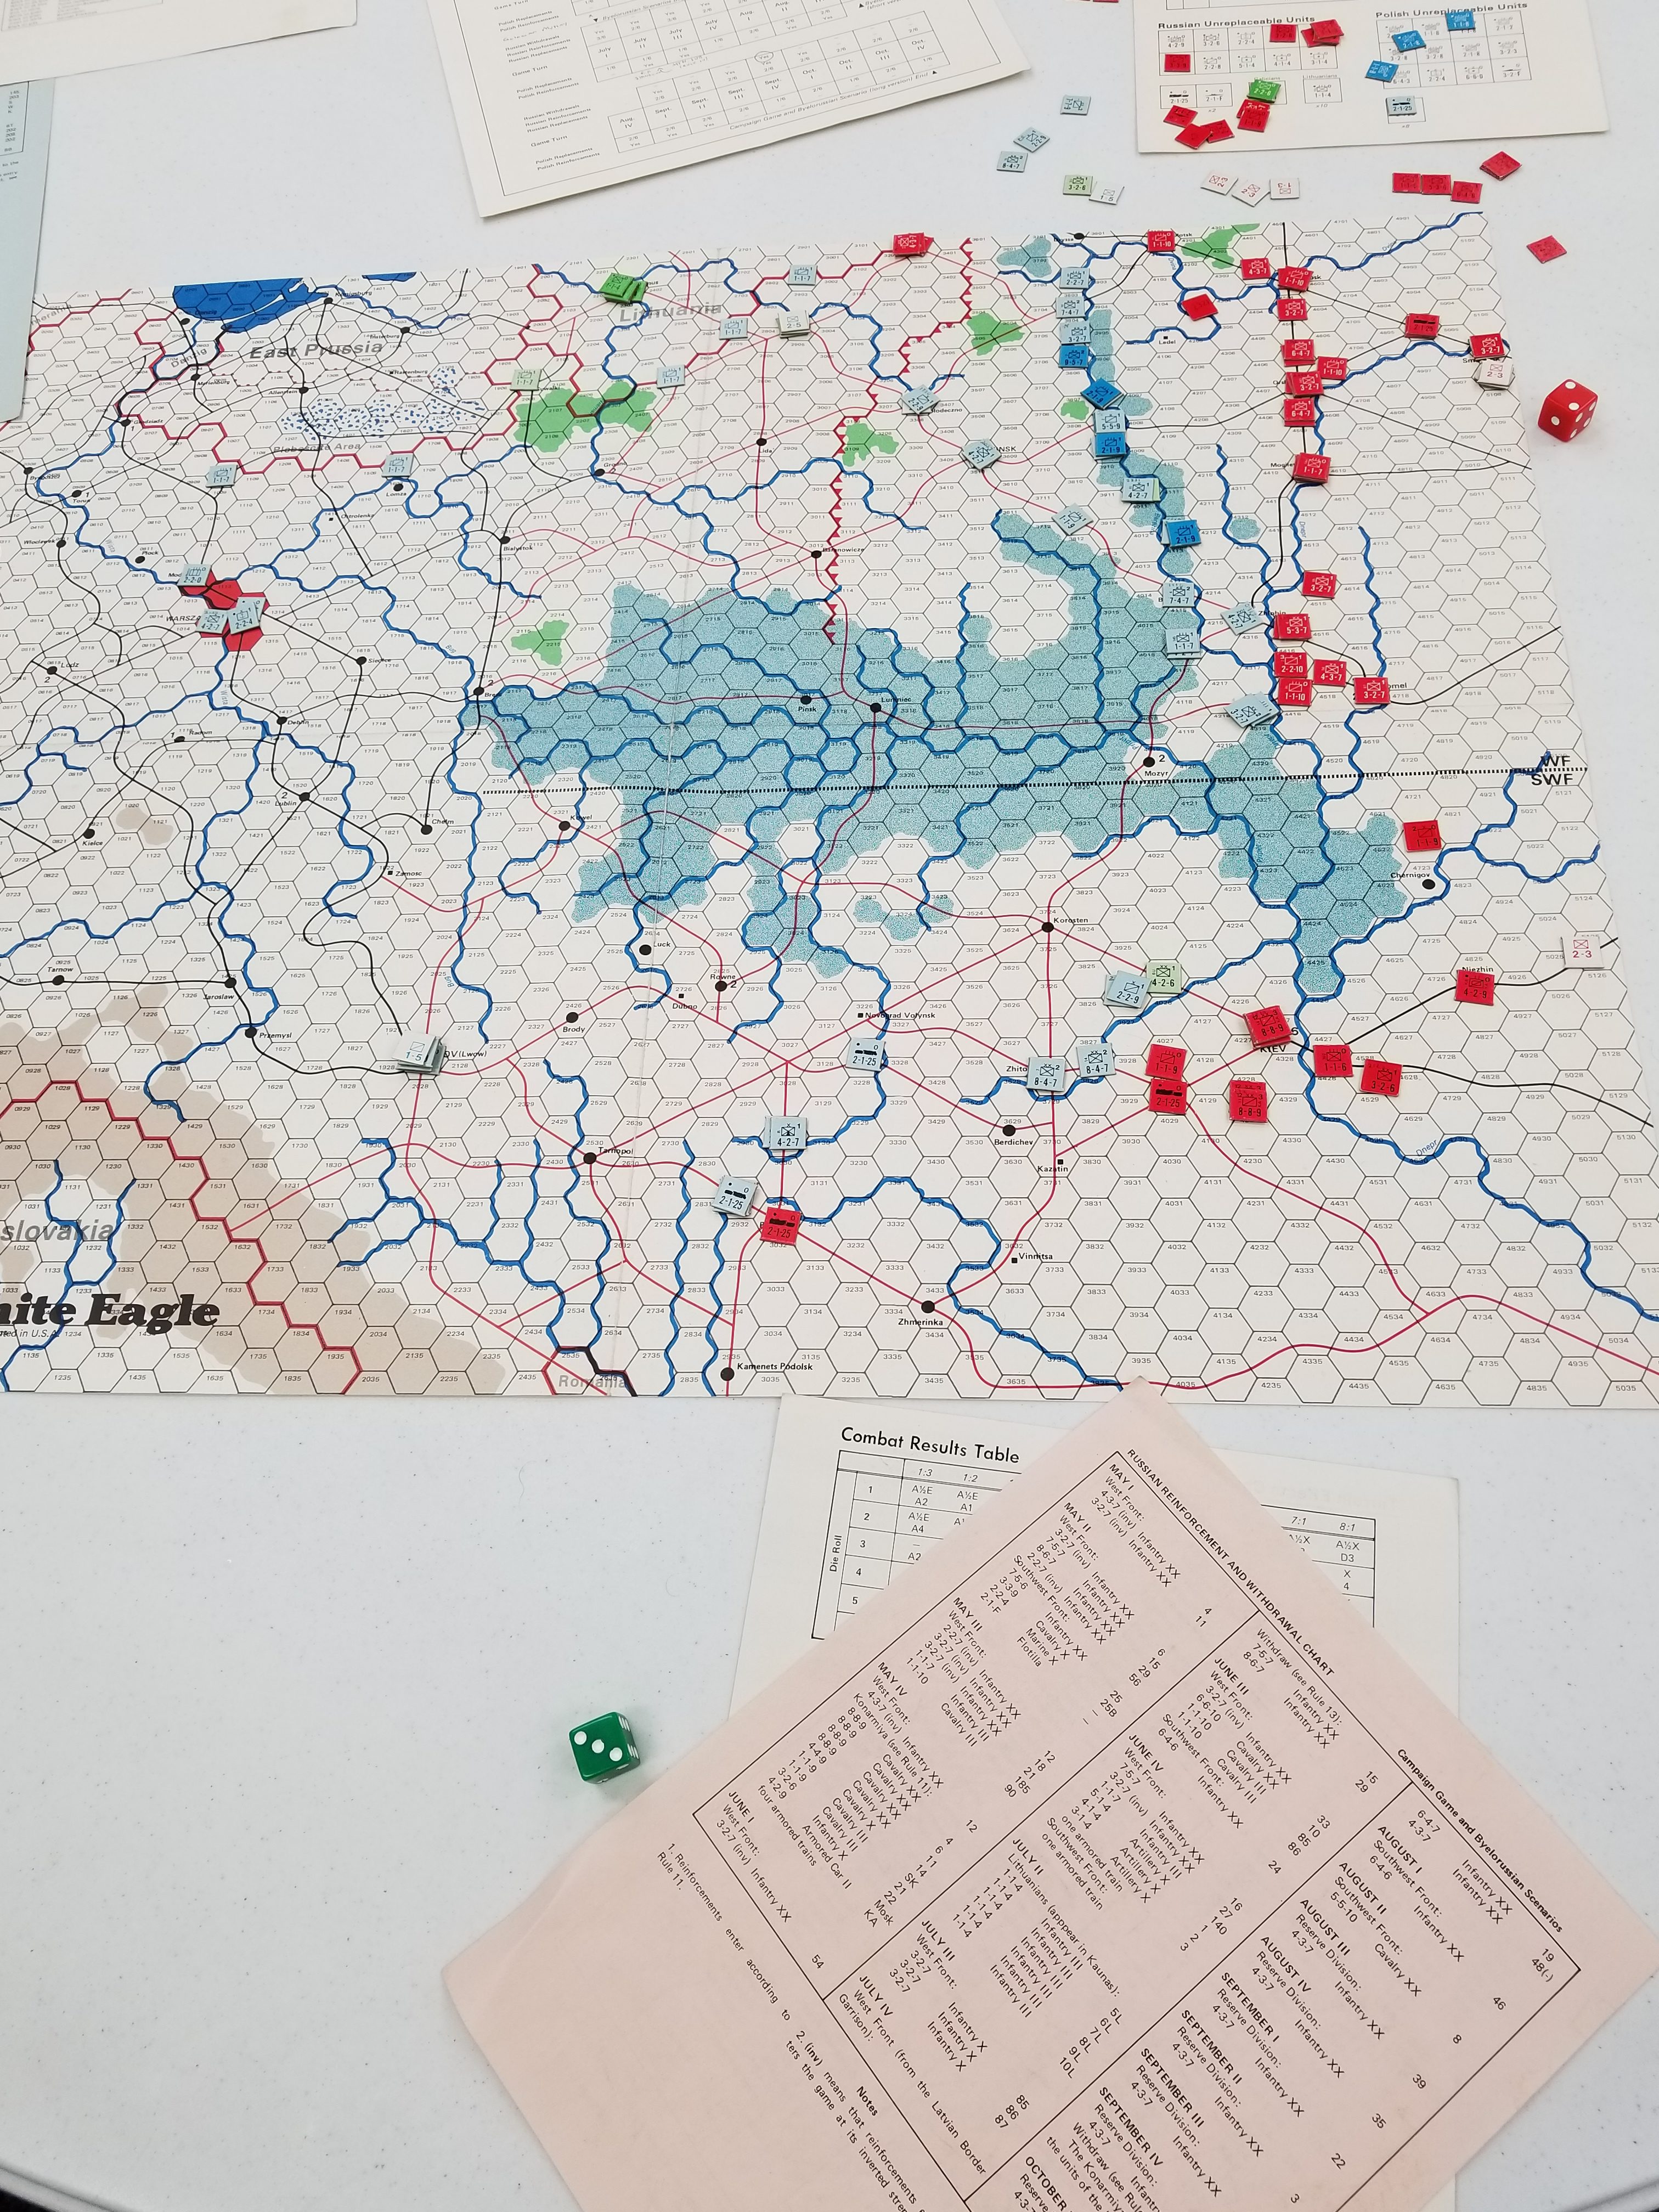
Played Red Star/White Eagle, an old GDW Russo-Polish War game. Mechanics similar to Europa, but with period chrome. An earlier session attained legendary status due to a rules gaffe changing it from a fluid, fast and fun game to a static, boring slogging match. We misinterpreted the CRT. I’ll leave it at that.
That CRT is bloody. Most casualty results also require retreats of several hexes, with opponent able to pursue. There are no outright ZOC kills, but many units have a intrinsic “delay” factor, forcing a retreating unit that pass by them to roll for casualties on a separate table. Literally double jeopardy.
Tim played the Poles (blue counters).
Situation After Game Turn 3
It’s a big map with relatively low counter density. The Soviets have two armies, which cannot cooperate, located in the north and south, respectively. The map’s center is dominated by marshy terrain, significantly reducing movement, with rivers creating east-west compartments. As you can see, the mandated initial set-up for the campaign game places both side’s units facing each other in the East. Victory is determined by city occupation.
Both Soviet and Polish armies are mobile, with most units having much higher attack than defense factors. Mobility is assisted by rail networks.
Each side receives significant replacements. These factors are represented by special counters which must be in the same hex as an active counter during the reinforcement and replacement phase of a game turn. So, some planning and management is required to reinforce reduced strength units.
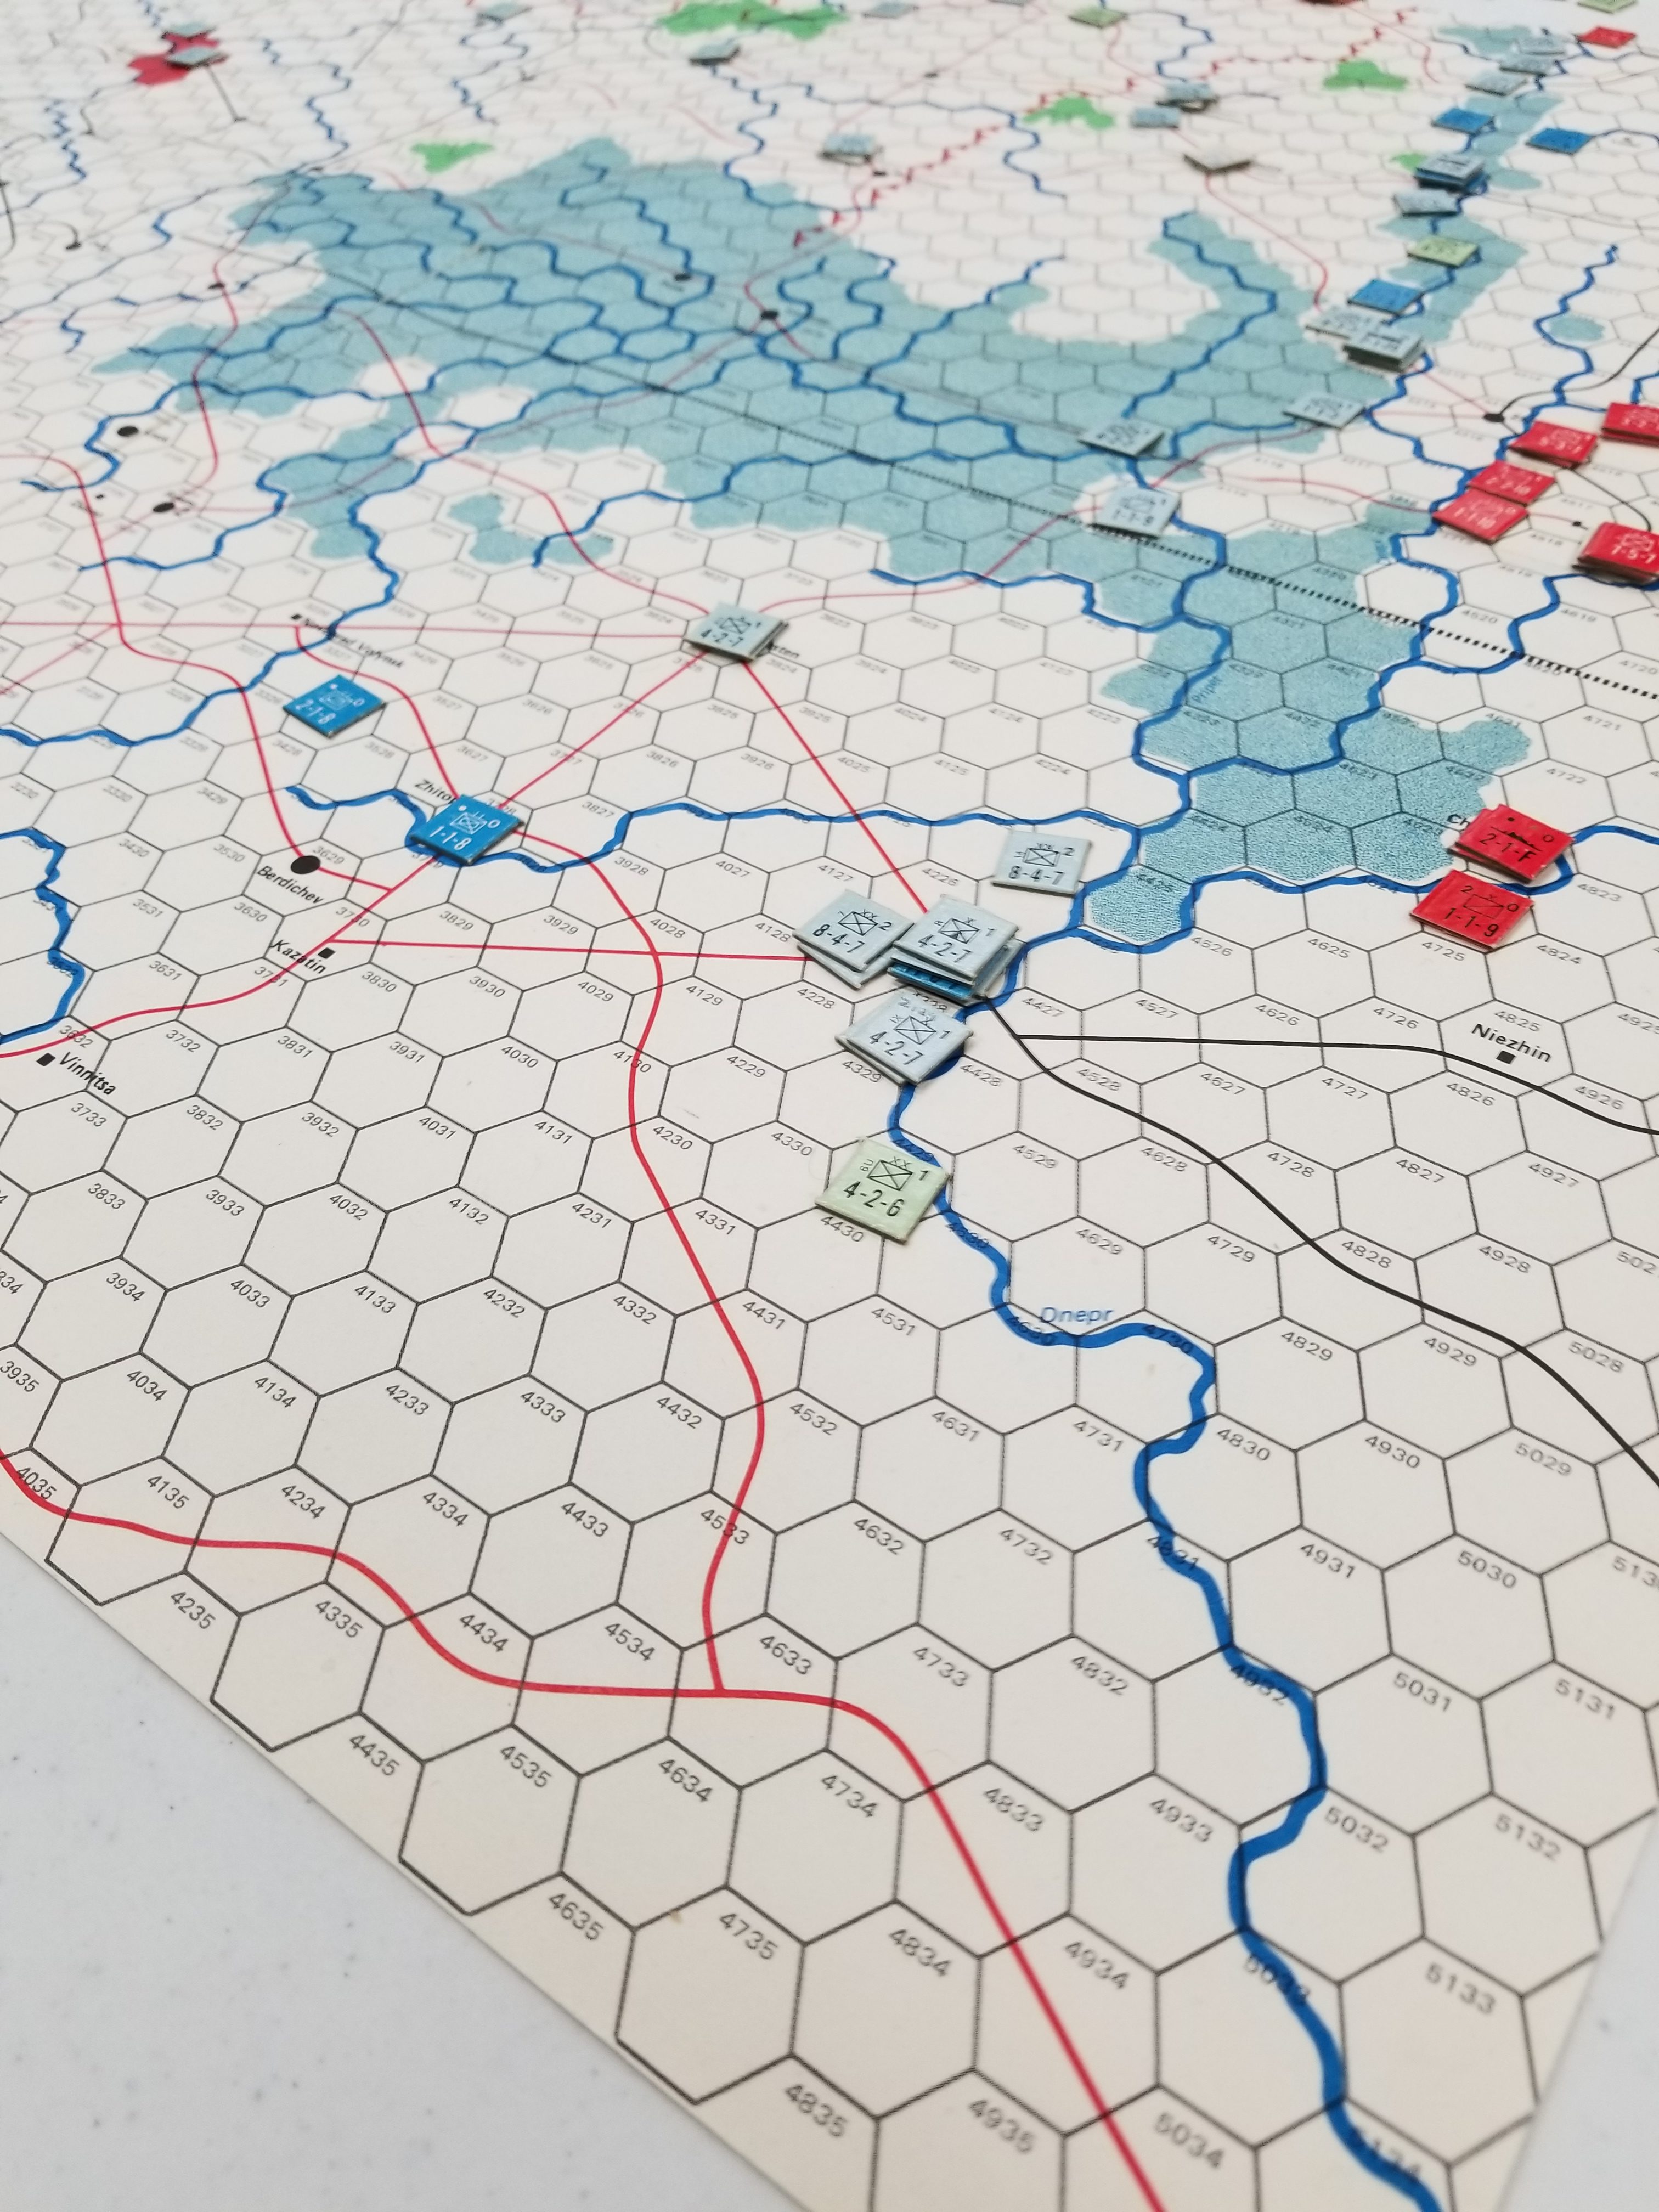
The northern Polish and Soviet units have limited movement and attack options for the first three turns, so early action occurs in the south. Also, the Polish player must capture Kiev early, or lose his Ukrainian troops. Tim attained this objective and gained 6 victory points.
Poles Take Kiev
By Turn 4, both sides are free of movement restrictions and by Turn 6, the Soviets have received the Konarmiya reinforcements. This is a corps of cavalry and mechanized units, with extremely high attack factors and a charge bonus. To gain this bonus, the unit(s) must begin their movement outside a Polish ZOC.
I pushed my Konarmiya south of Kiev, maintaining sufficient distance from Tim’s Poles. I was afraid that Tim would “ZOC up” the Konarmiya with low strength units to reduce my combat effectiveness.
Russians Counterattack Kiev
The attack was successful, but it was time for a big Italian dinner. Just when it was getting interesting.
In summary, this is a fun and challenging game. We will play it again when we meet this summer. No food until game finished!
Thrashing now. Trying to reconcile the game system with reading Napoleonic tactics. Disconnect with battalion/regiment frontages and depths. Of course, all of these book dictates are conjectural, based on manuals, pundits, and the revisionist interpretations of manuals and pundits.
One hex in Squad Leader is 40 meters or just over 43 yards. The hex width is 3/4 inch. Counter frontages in System 7 are one inch equals 40 yards. Battalion frontages were 75 yards. Not a match, but close enough.
The real problem appeared to be a company counter depth of 5/16 inches or roughly 14 yards in scale. According to my interpretation of a Chandler, a six company battalion advancing in column would have an overall depth of 15 yards. This is problematic, especially since according the rules, maximum stacking is two companies, which leaves a depth of 42 yards per battalion if attacking with two companies abreast. All of that just doesn’t make sense and at this point I was dizzy.
Somehow came to my senses, looked a few more resources, had a pop…..ahhhhhh…the depth was 15 yards per company or 45 yards.
I like this game……I really do. But, for some damn reason I found it hard to start pushing the counters.
Some games you just can’t wait to get to the table and play the next turn. Examples? Can’t roll that one over in my brain right now, have to focus on SOA.
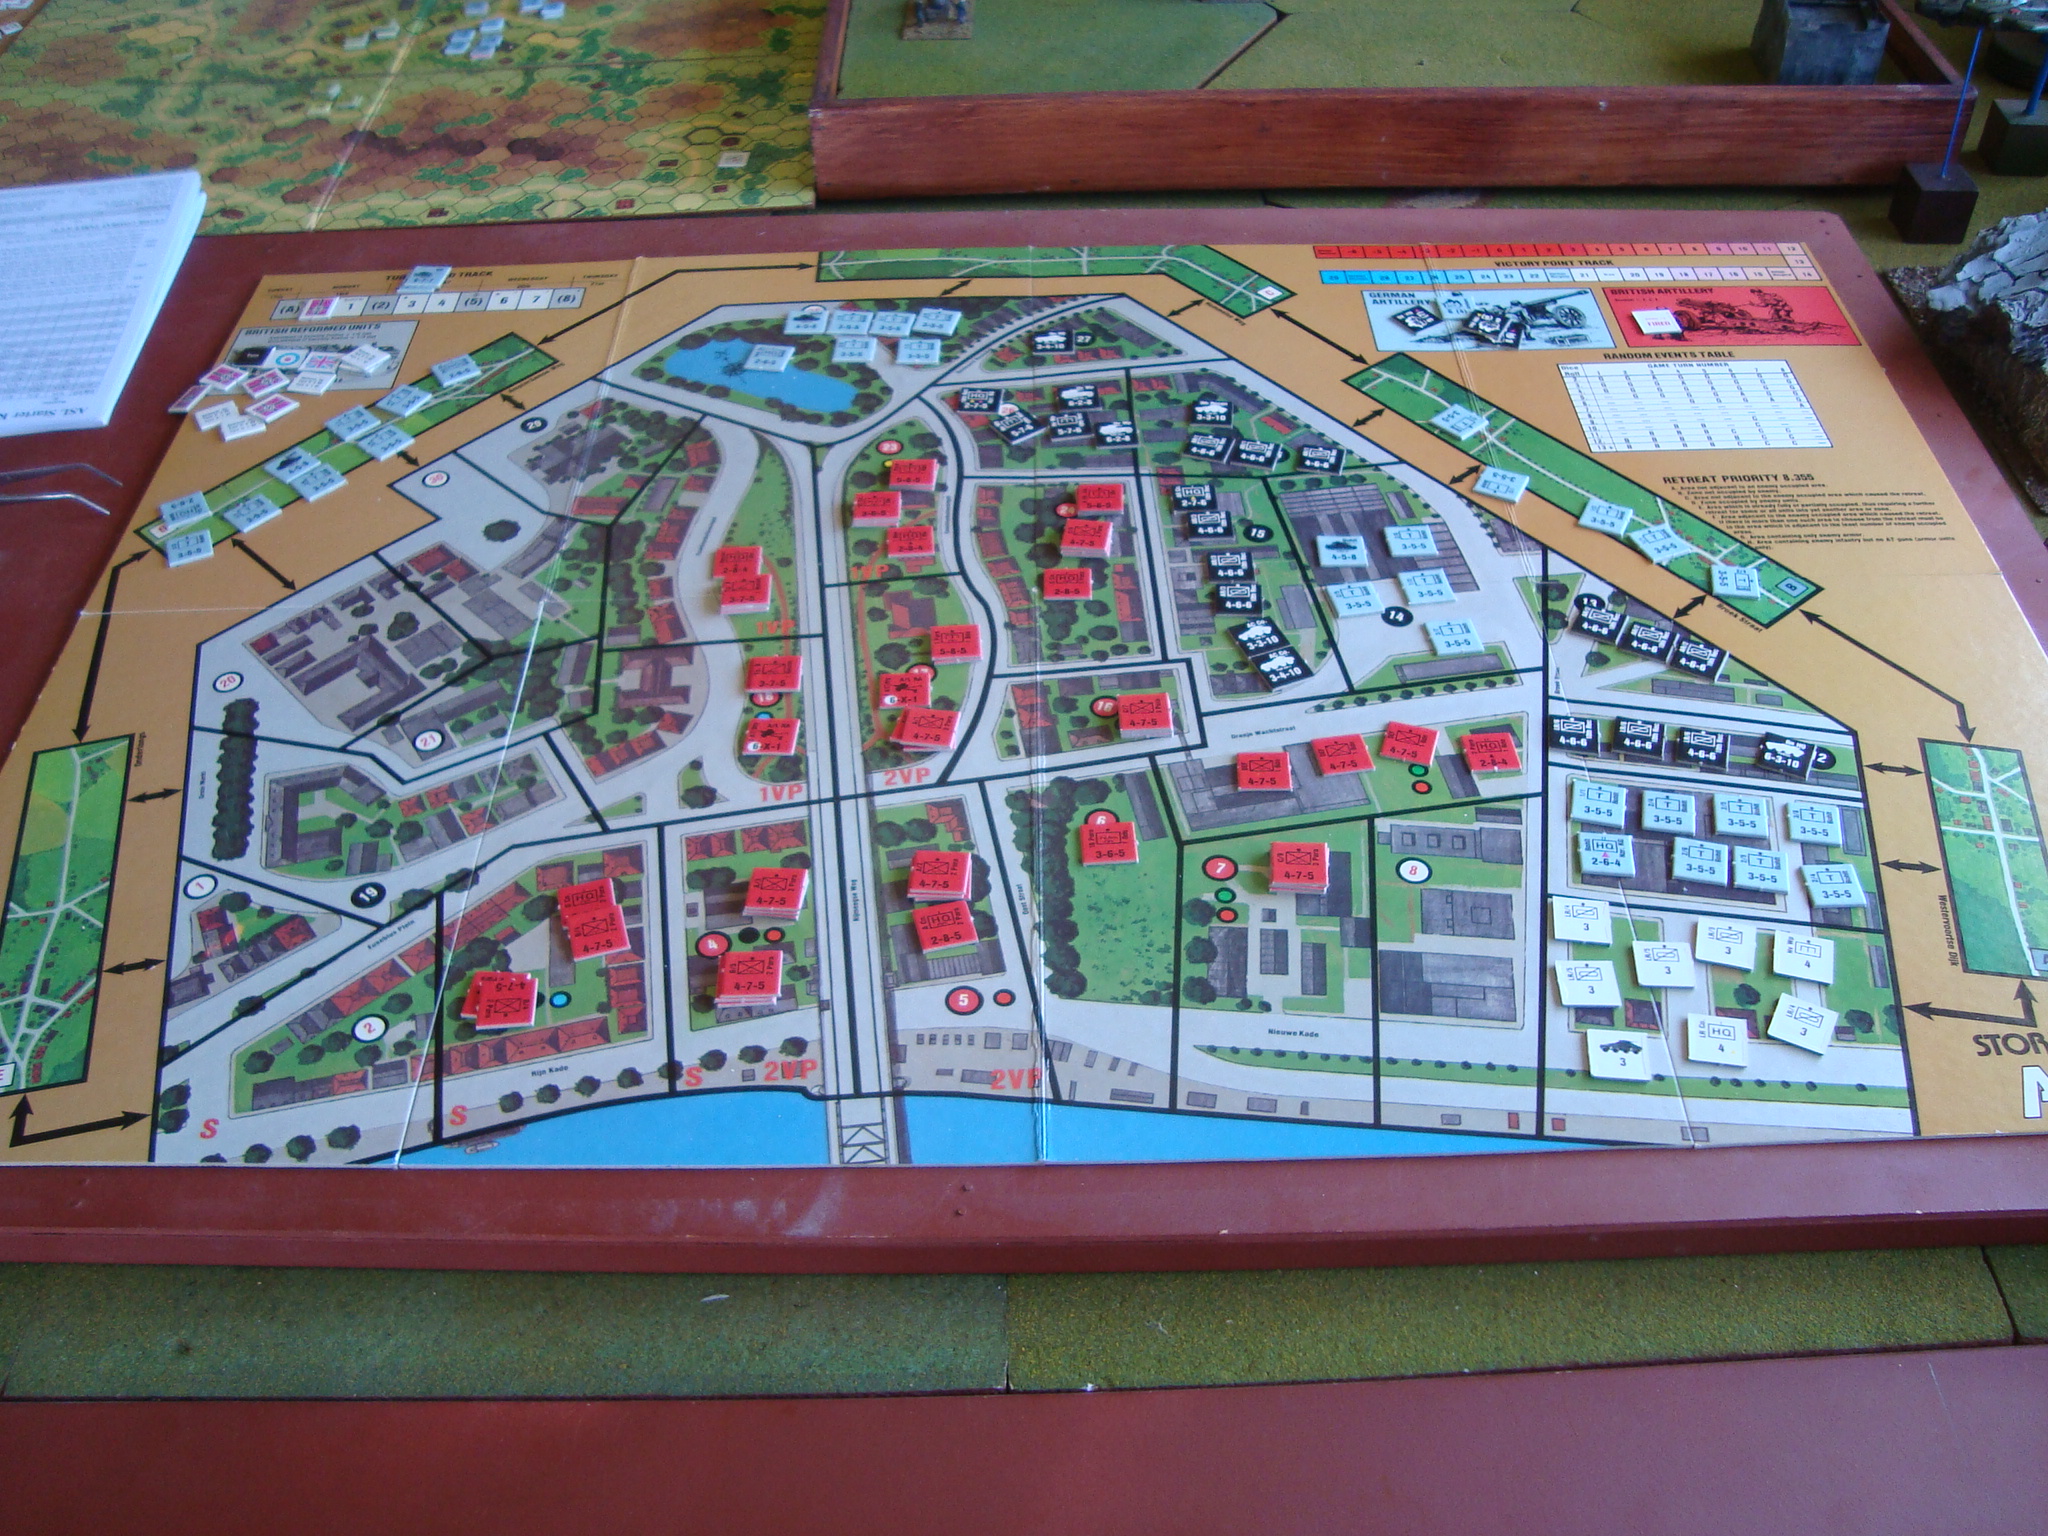
A highly regarded game that has spawned a number of “Storm Over” games. Great area movement map, big counters (no tweezers needed), rules are……hmmmm, well maybe it’s just my learning style. Perhaps the problem is the chrome with tanks, reformed units, bren carriers, and setting fires. This play aide found over at Boardgamegeek was very helpful.
I really like the impulse turn system involving individual sectors, and units becoming more vulnerable after they have either moved or fired. This leads to a cat-and-mouse tactics (at least in my first play). You don’t want to move/shoot a unit that would be “flipped” to a committed status with a lower combat/defense strength with a full-strength enemy adjacent to your area. On the other hand, an area can only be fired on once a turn, so one has to maximize an opportunity to attrit an opponent.
Close-combat is a separate phase with all committed units flipped to their active side, engaging in new combats with any enemies in their sector.
Outcomes are dice-tastic, but generally reasonable. Lots of counter-punching (no pun intended) with one side reacting to their opponents preceding move.
Maybe what I like is the problem; yes isn’t that the way of the world. Constant back and forth with no respite for the solo player. It would be really fun FTF, especially with RAW restricting the time a player has for each impulse.
In my first try I relied on the British set-up used in the Avalon Hill General. My German tactics were relatively ham fisted, blasting away at British units, with results less than optimal. Pretty sure the Brits will prevail.
But, we’ll never know. Time to take it down and make way for System 700. However, this quality game will be back on the table sooner rather than later.
Maybe I can talk Tim into playing……
By The General Set-Up. Very Nice Looking Components.
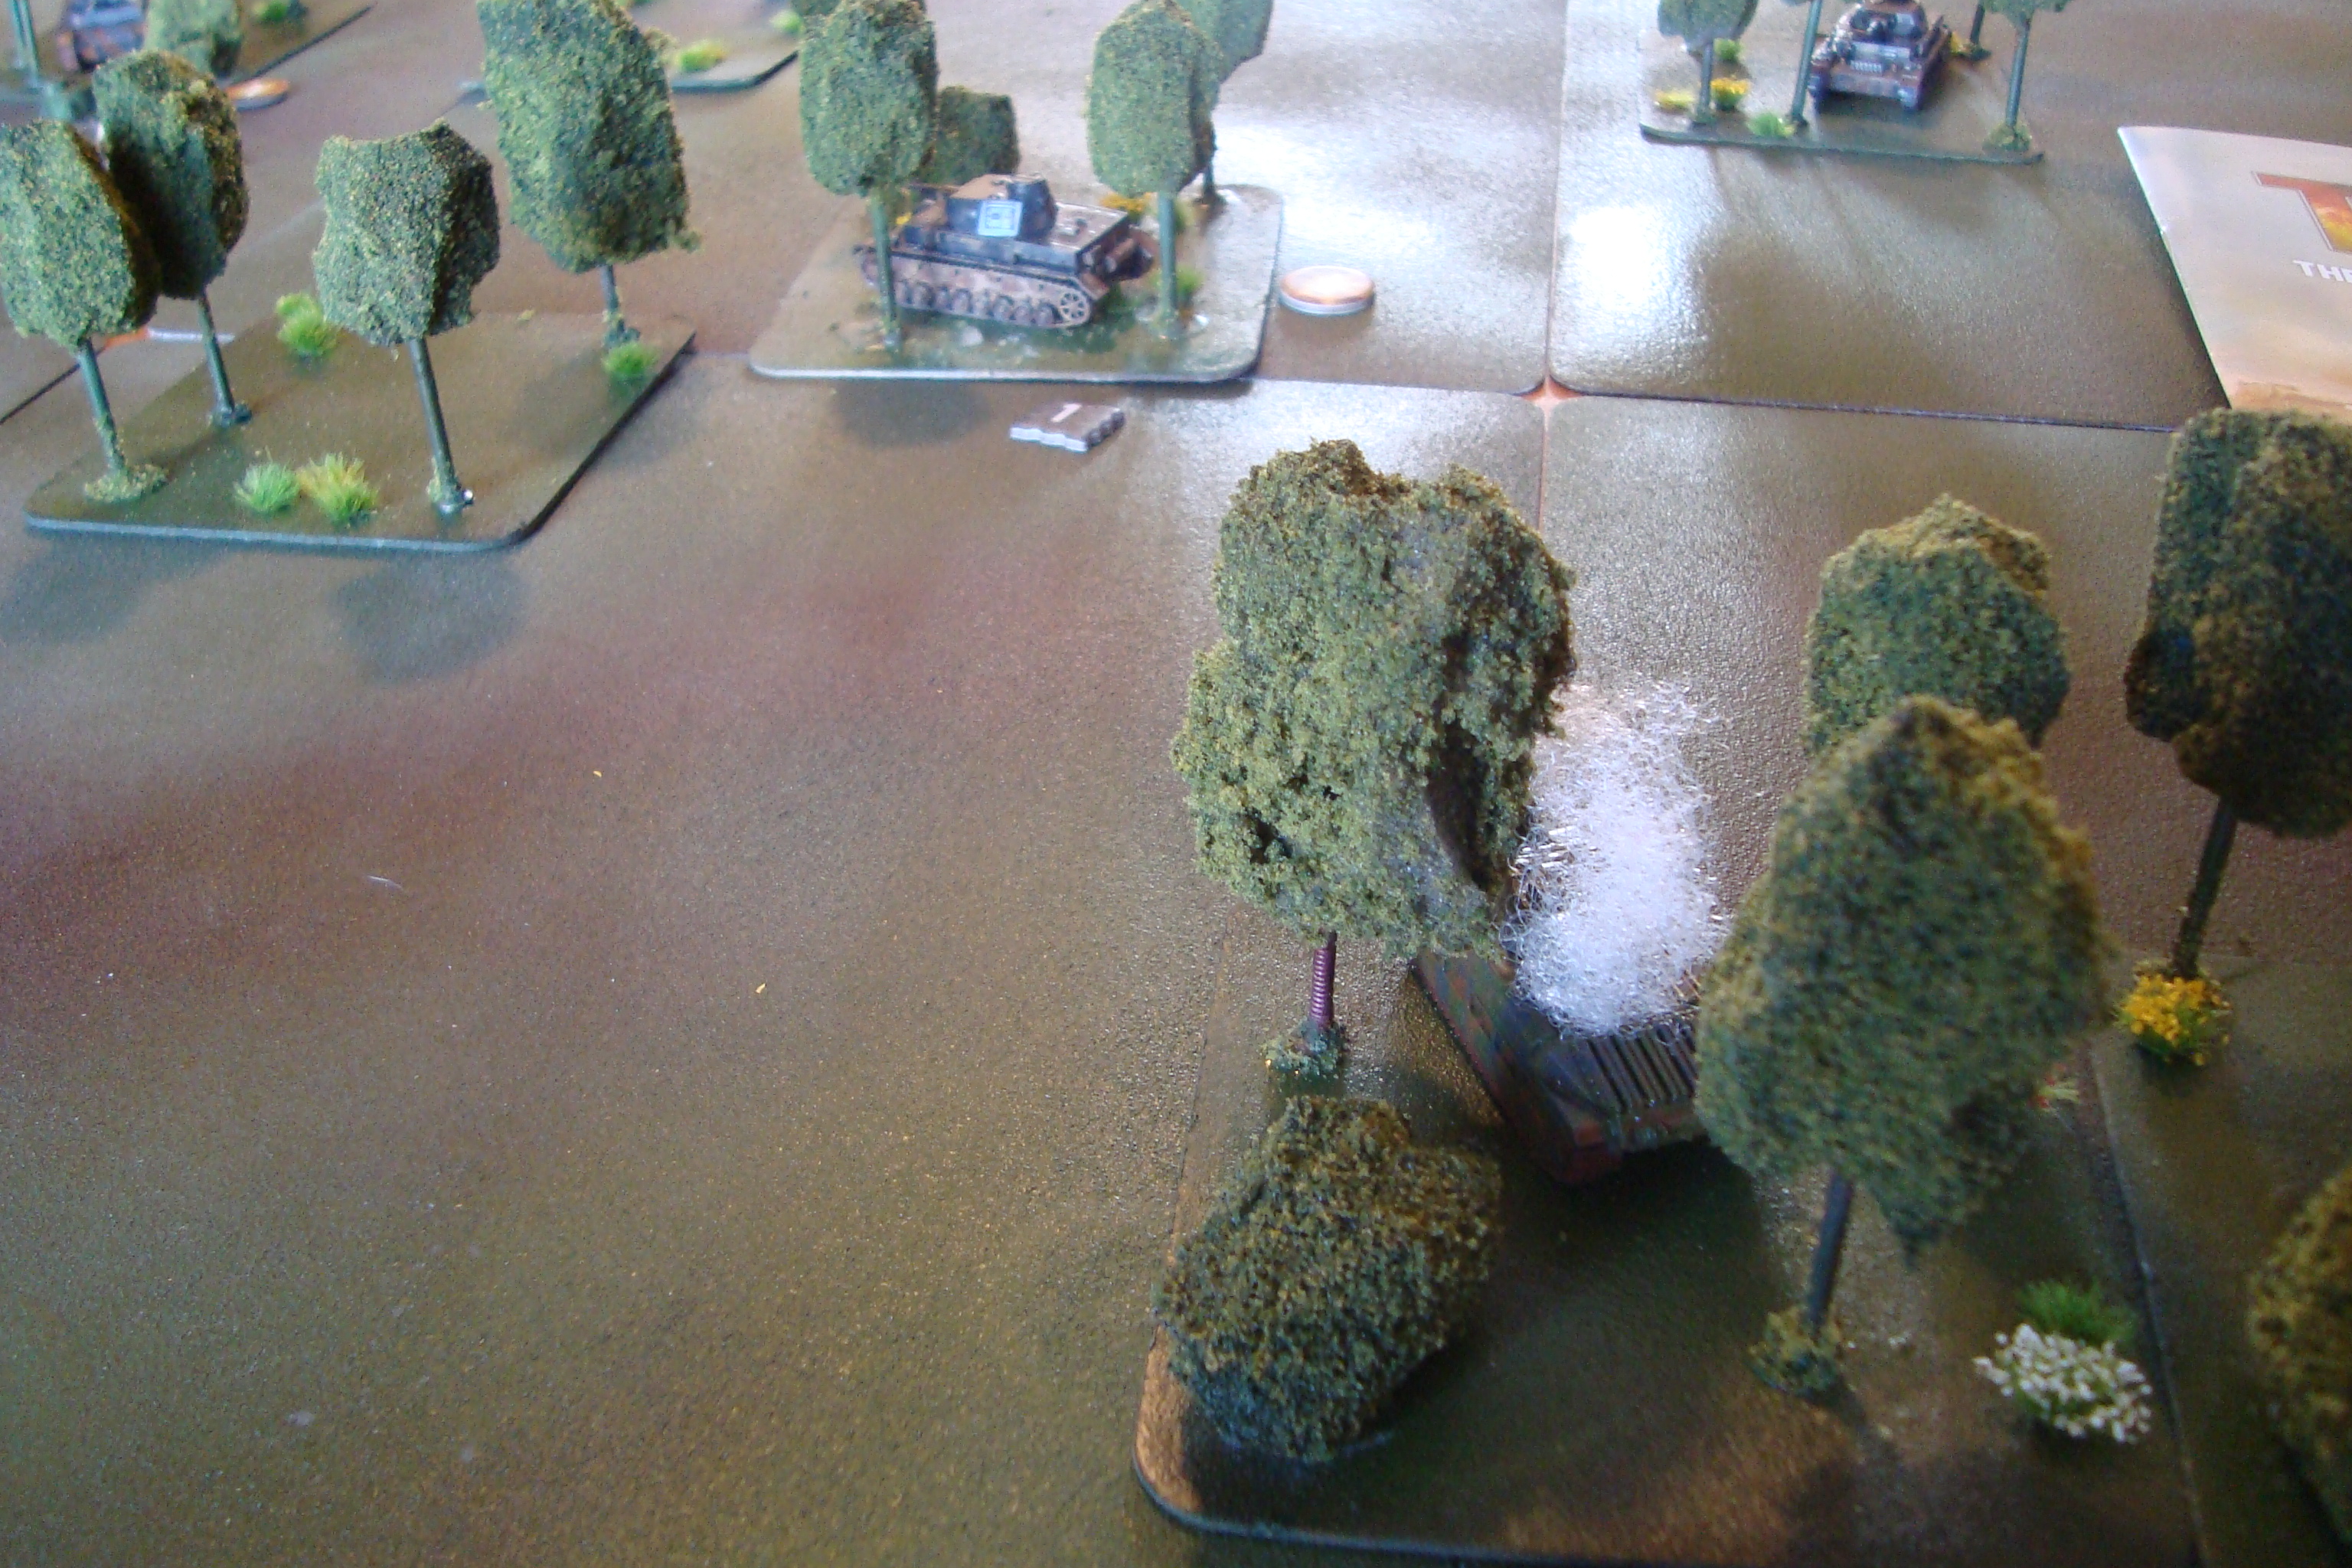
Had too much fun yesterday with another session of Tanks.
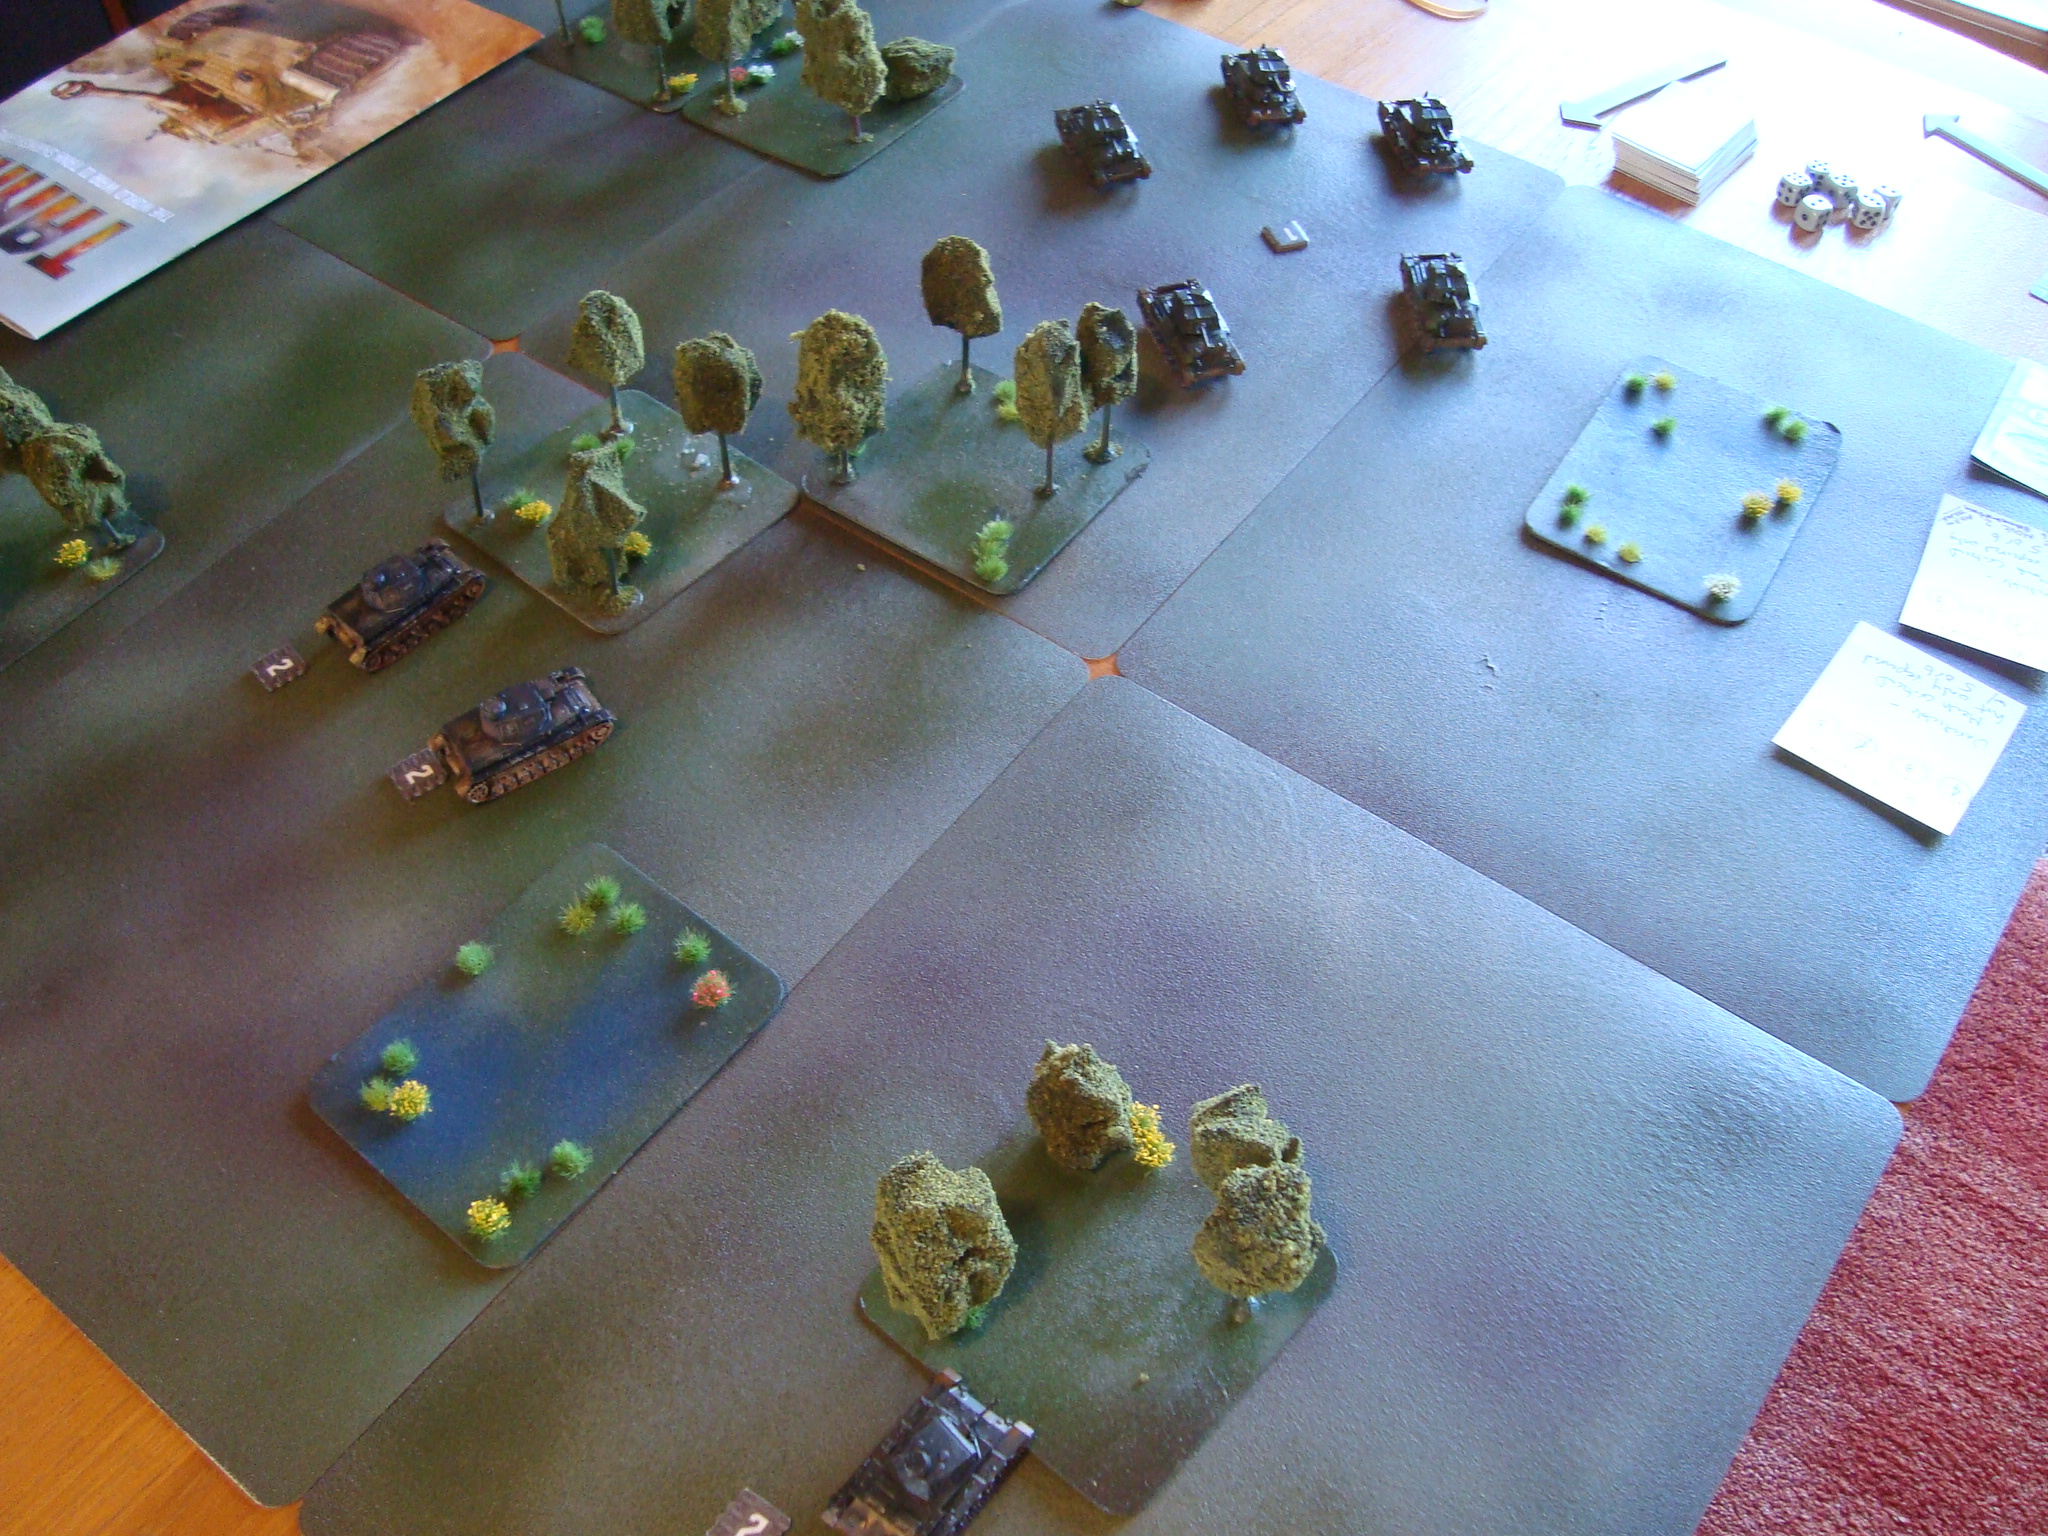
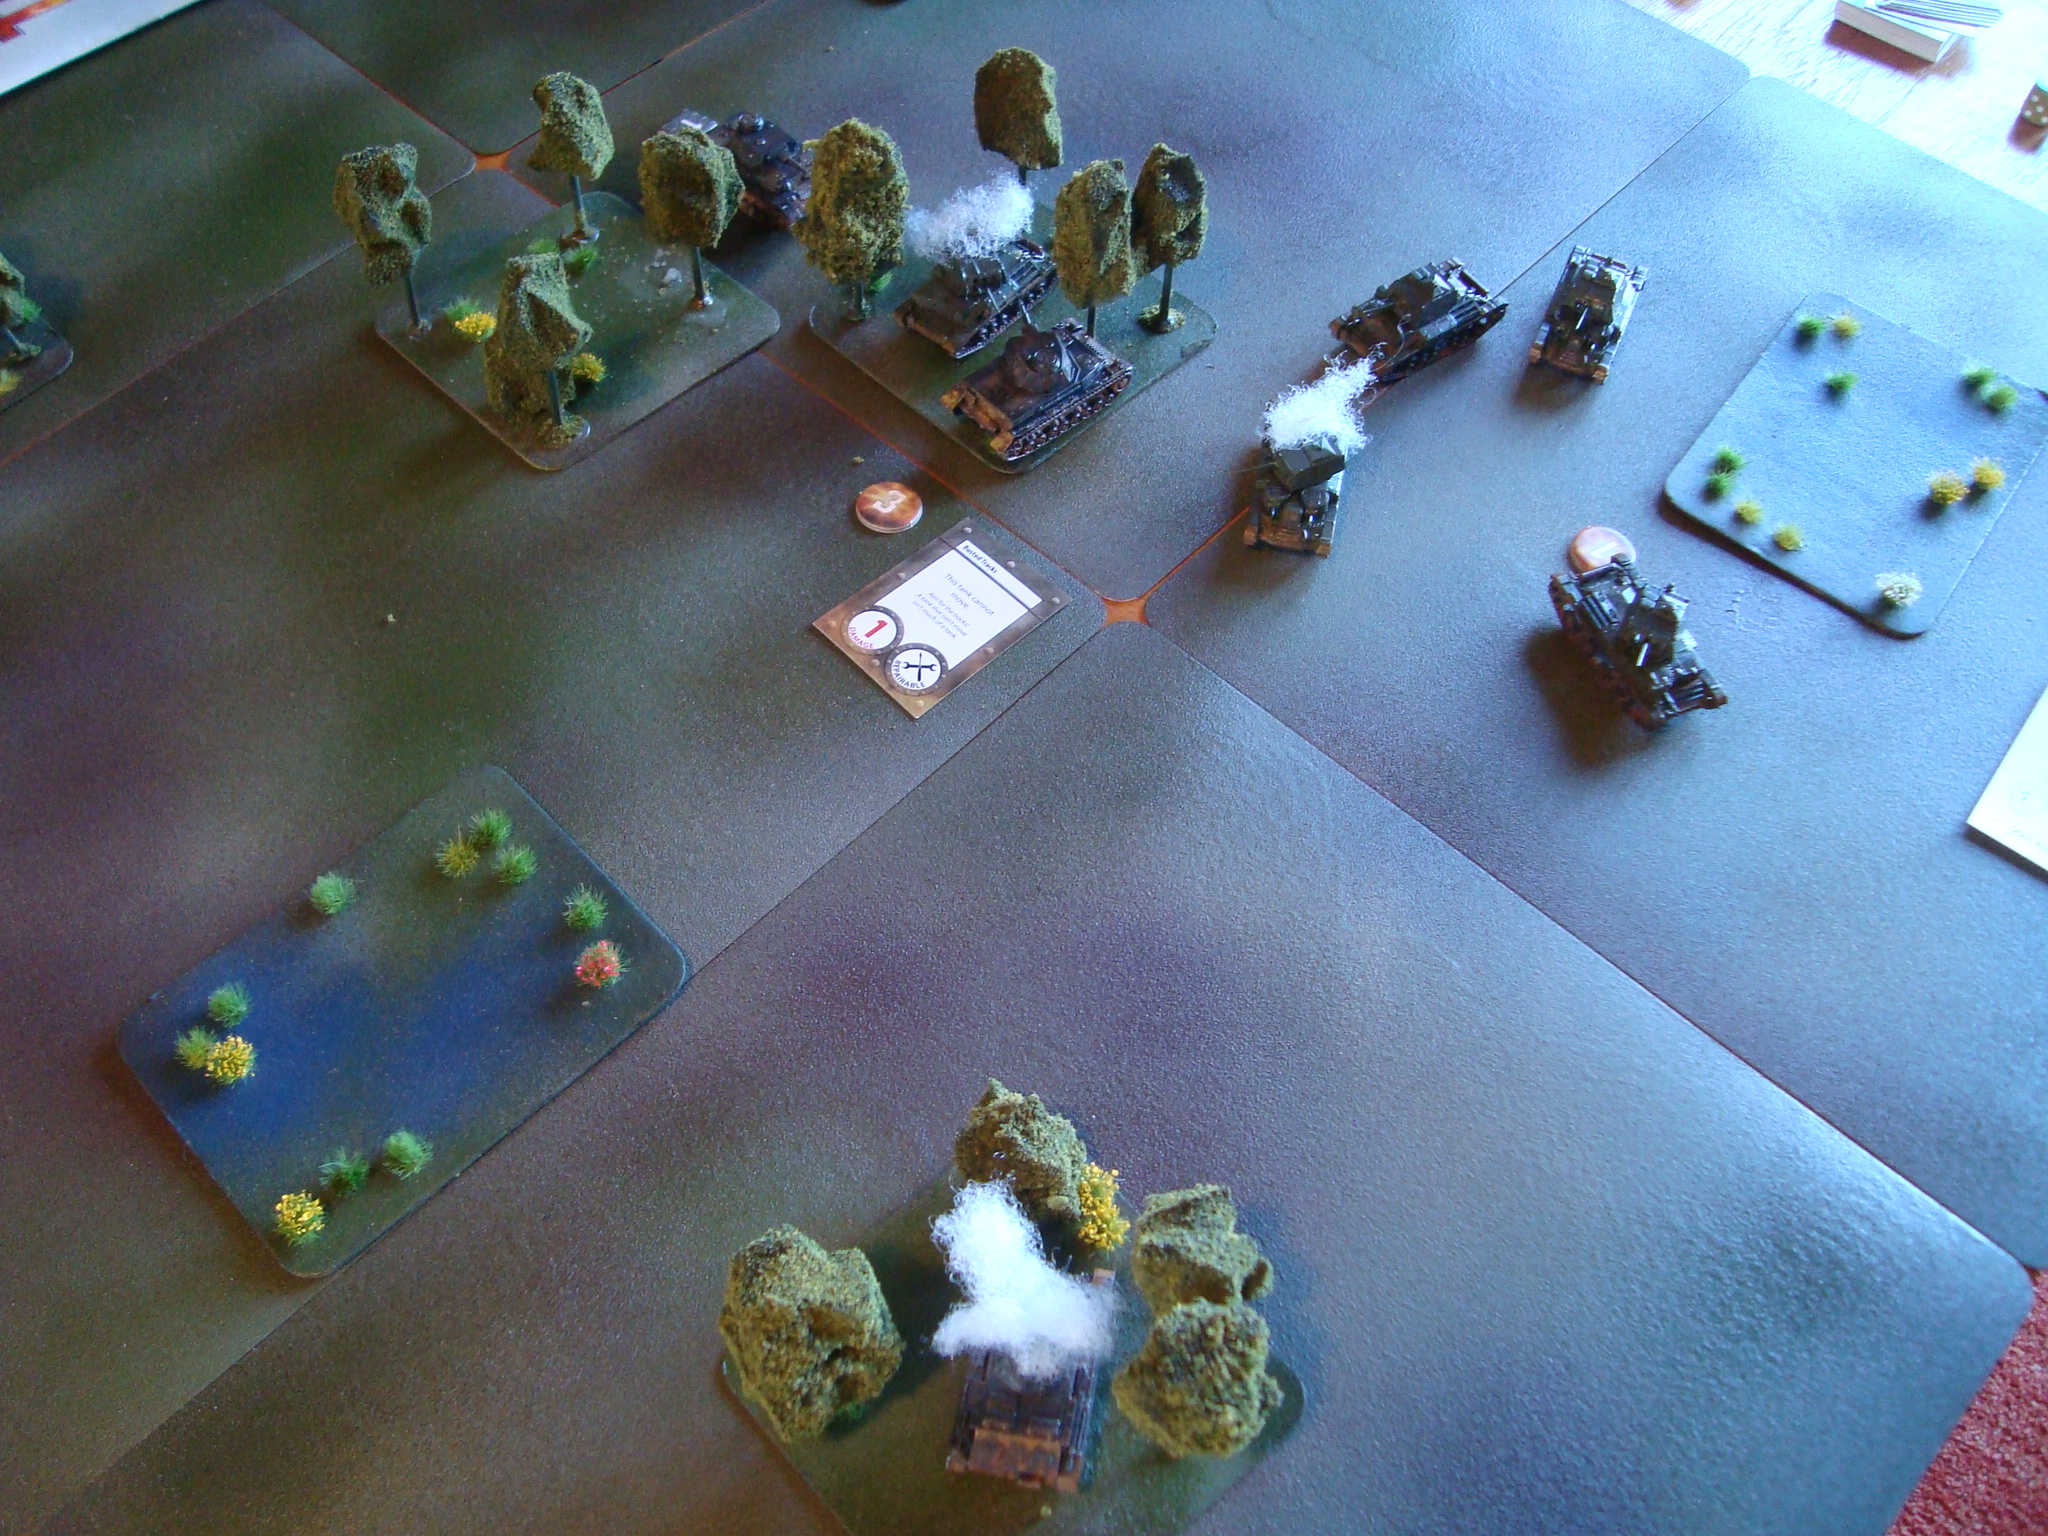
This time it was the A-9s and A-10s (Cruisers) versus the Germans. And, this was a wild one.
The Cruisers formed a box formation, veering to the West in an attempt to exit the map. The Germans used their “Blitzkrieg” ability (can use the repair phase to make extra move, for a total of 3 moves in a turn), to get into the copses and prepare for stationary fire under cover.
The British engaged immediately, and managed to knock out the Mk III, as well as getting into a multi-tank and point-blank duel with a Mk IV. After knocking out the Mk IV, the remaining British threw caution to the winds and took multiple moves, risking breakdown on a die roll of 6.
One Cruiser broke down, but the others were able to move off the board.
Cruisers Advance. Panzers will use their “Blitzkrieg” move to get into the woods.Gunfight At Close RangeMkIII Knocked Out. Cruisers Maneuver Past A Burning A-9. While An A-10 Brews Up In The Copse. The Mk IV Will Get Theirs In The Next Turn.
That’s it for Tanks (for awhile). Next up….Storm Over Arnhem.
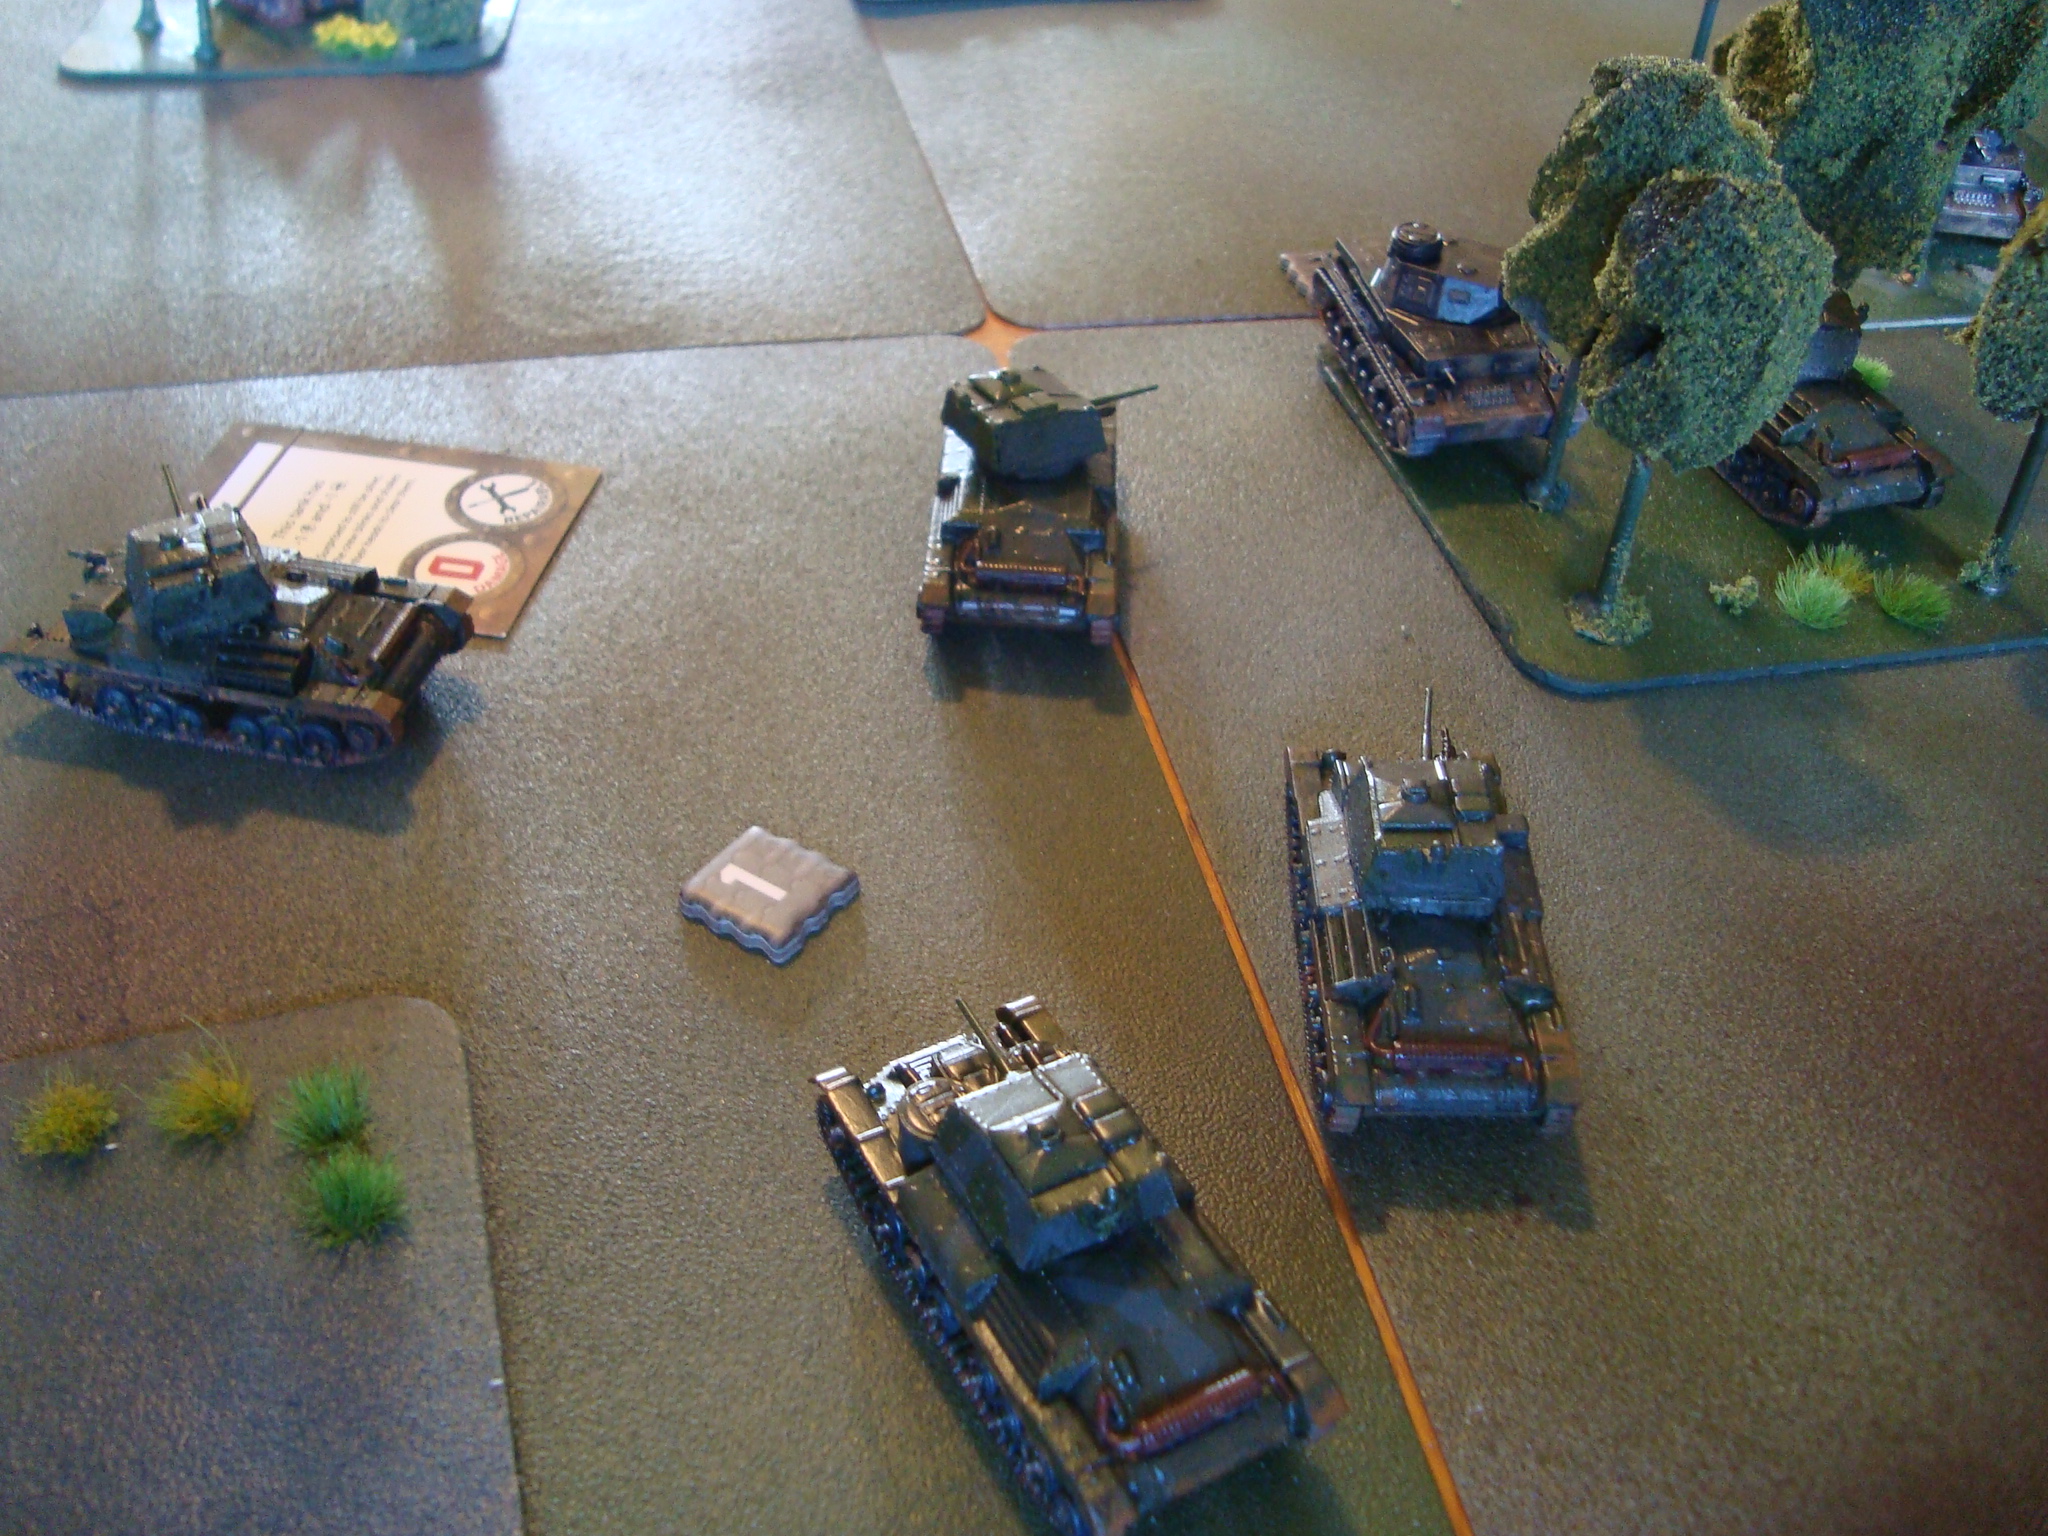
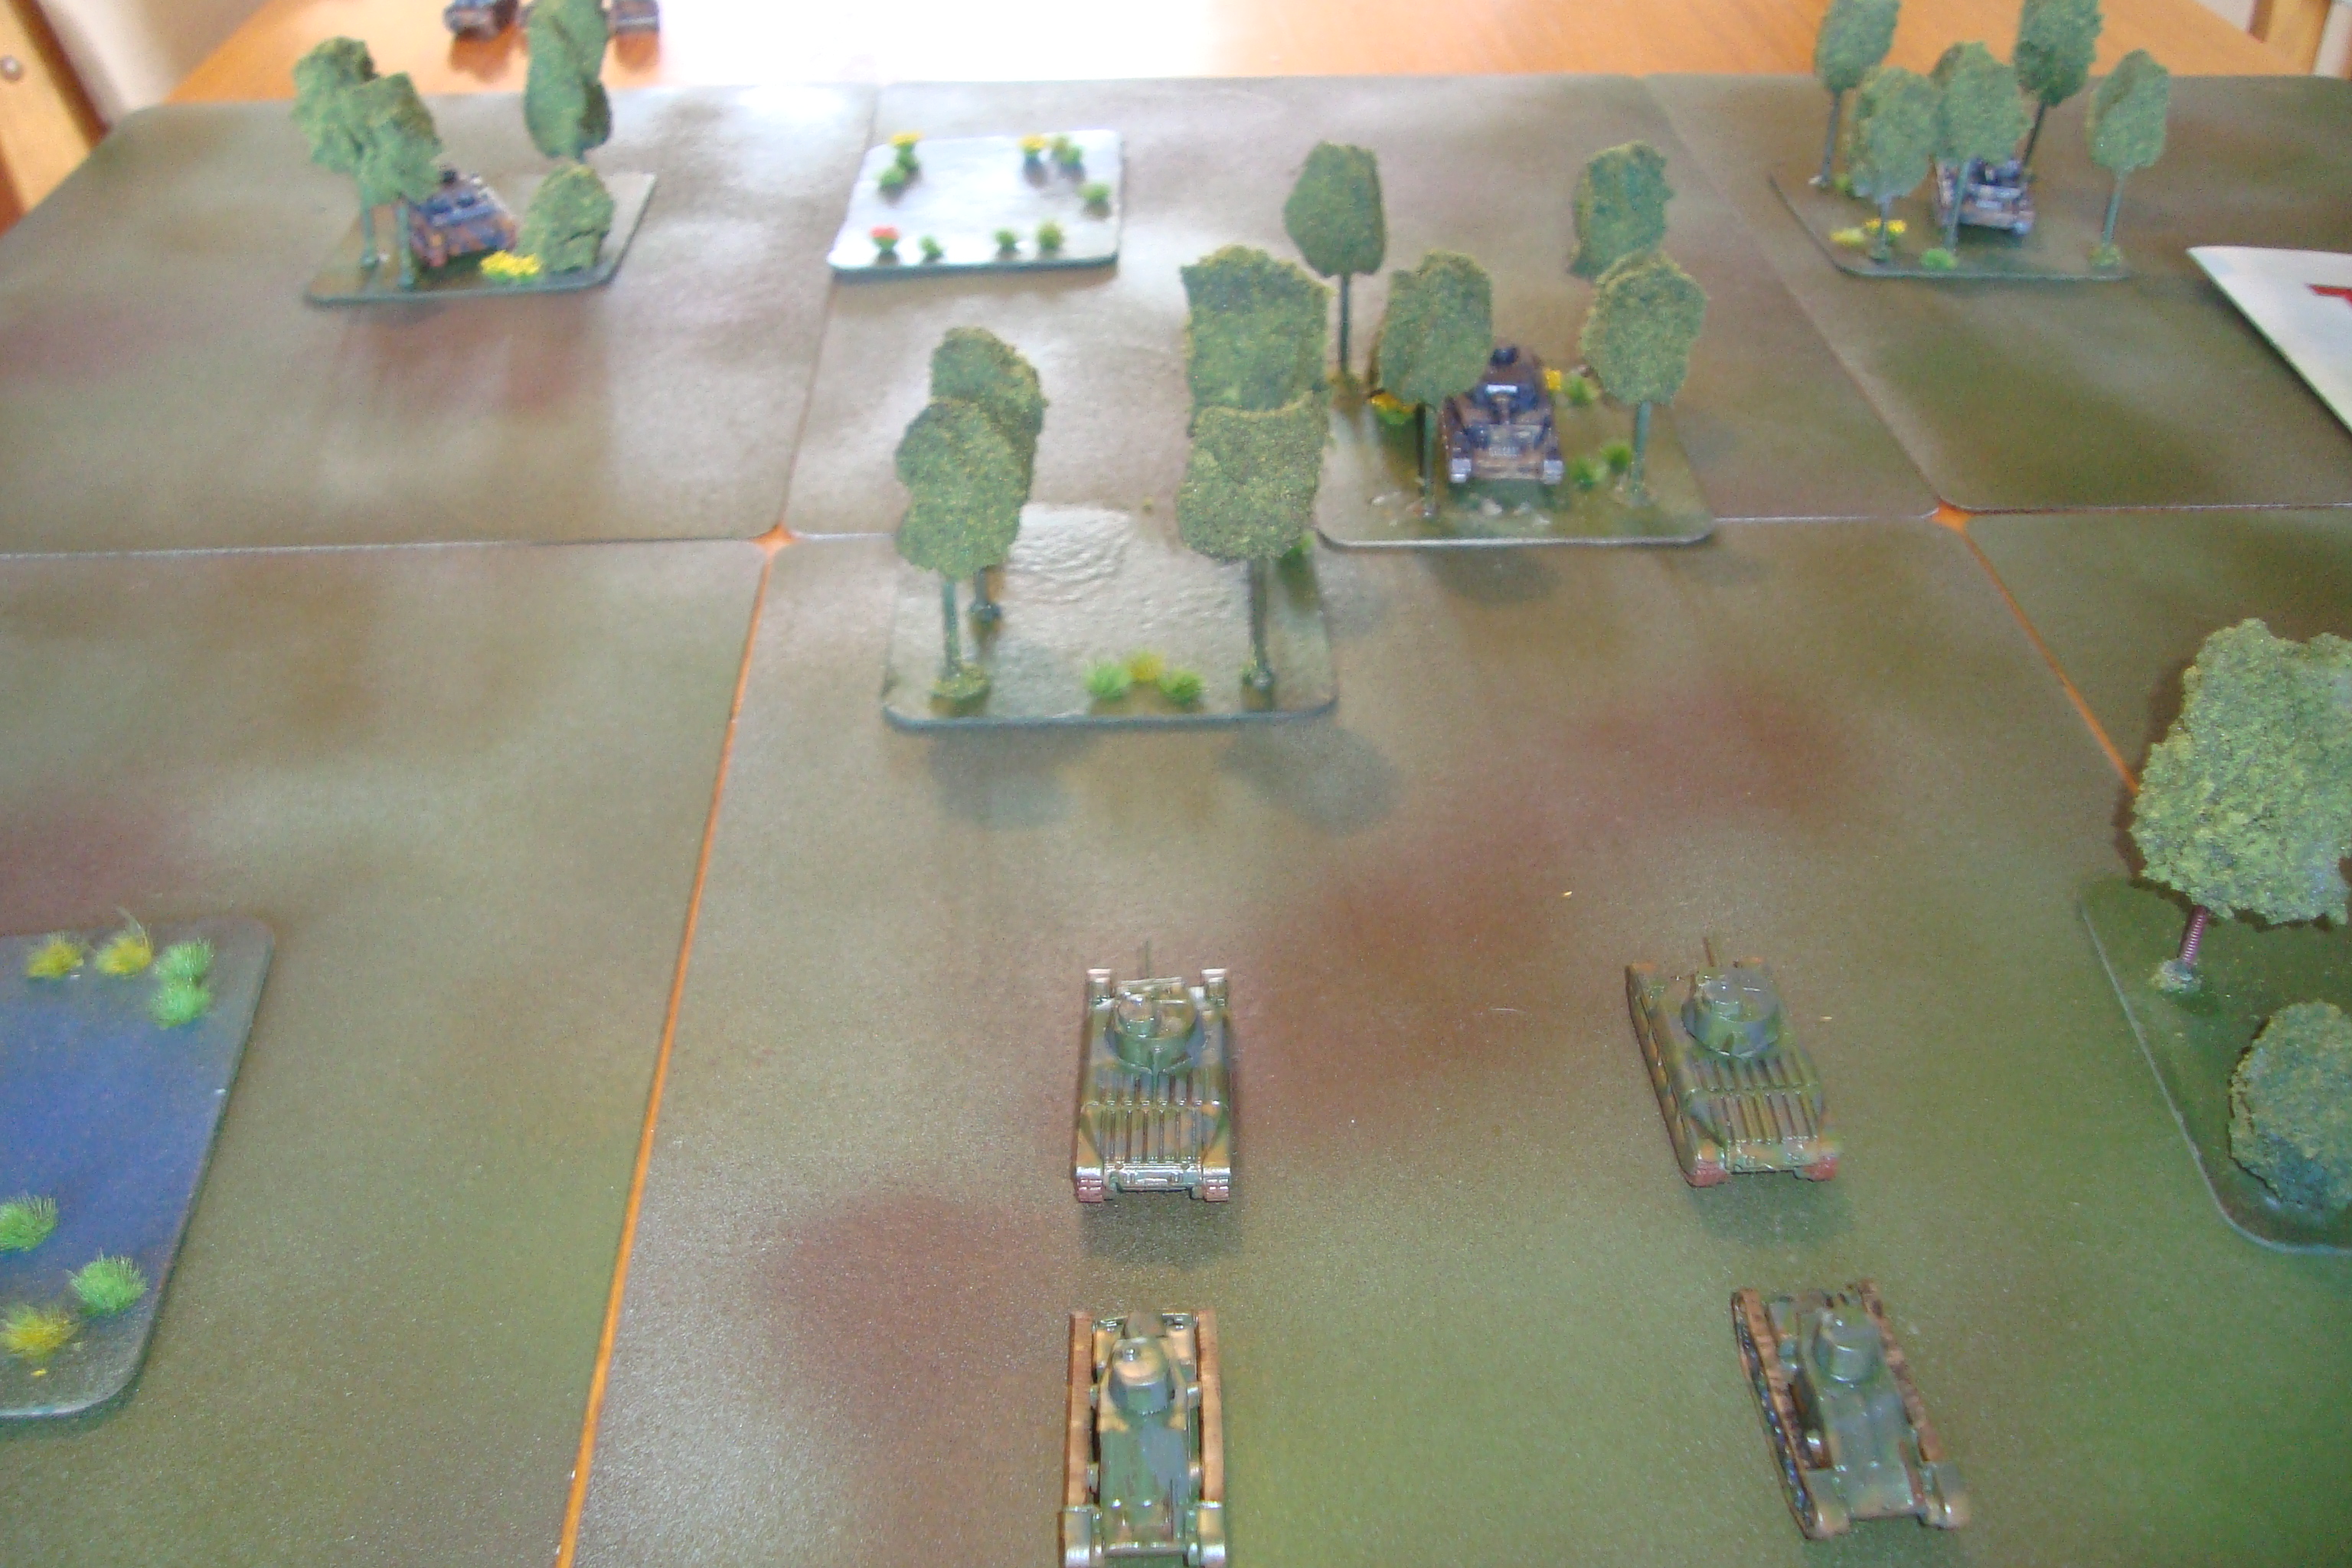
Pitted the Matildas against two Pz IVs (short) and a PZ III (short).
This time, the Germans opted to head for the copses, allowing for some stationary firing (can re-roll firing dice), as well as a modifier for cover.
The Matildas stuck to their earlier plan, with the Mk IIs providing cover for the Mk Is.
This time, the heavier guns of the Panzers brewed up one Mk II. However, the other pair of Matildas threw caution to the winds and risked breakdown (die roll of 6) by moving two bounds in a turn.
Fortune was with the Matildas as their armor and luck allowed them to bypass the Germans and move off the board to engage the now exposed Wermacht infantry units.
Panzers Take Up Stationary Firing Positions Ready To Engage Advancing BritishMatilda Mk II BurnsDespite Three Hits, Matilda Mk II Braves Point Blank Fire.