Category Archives: Sessions

Last Stand

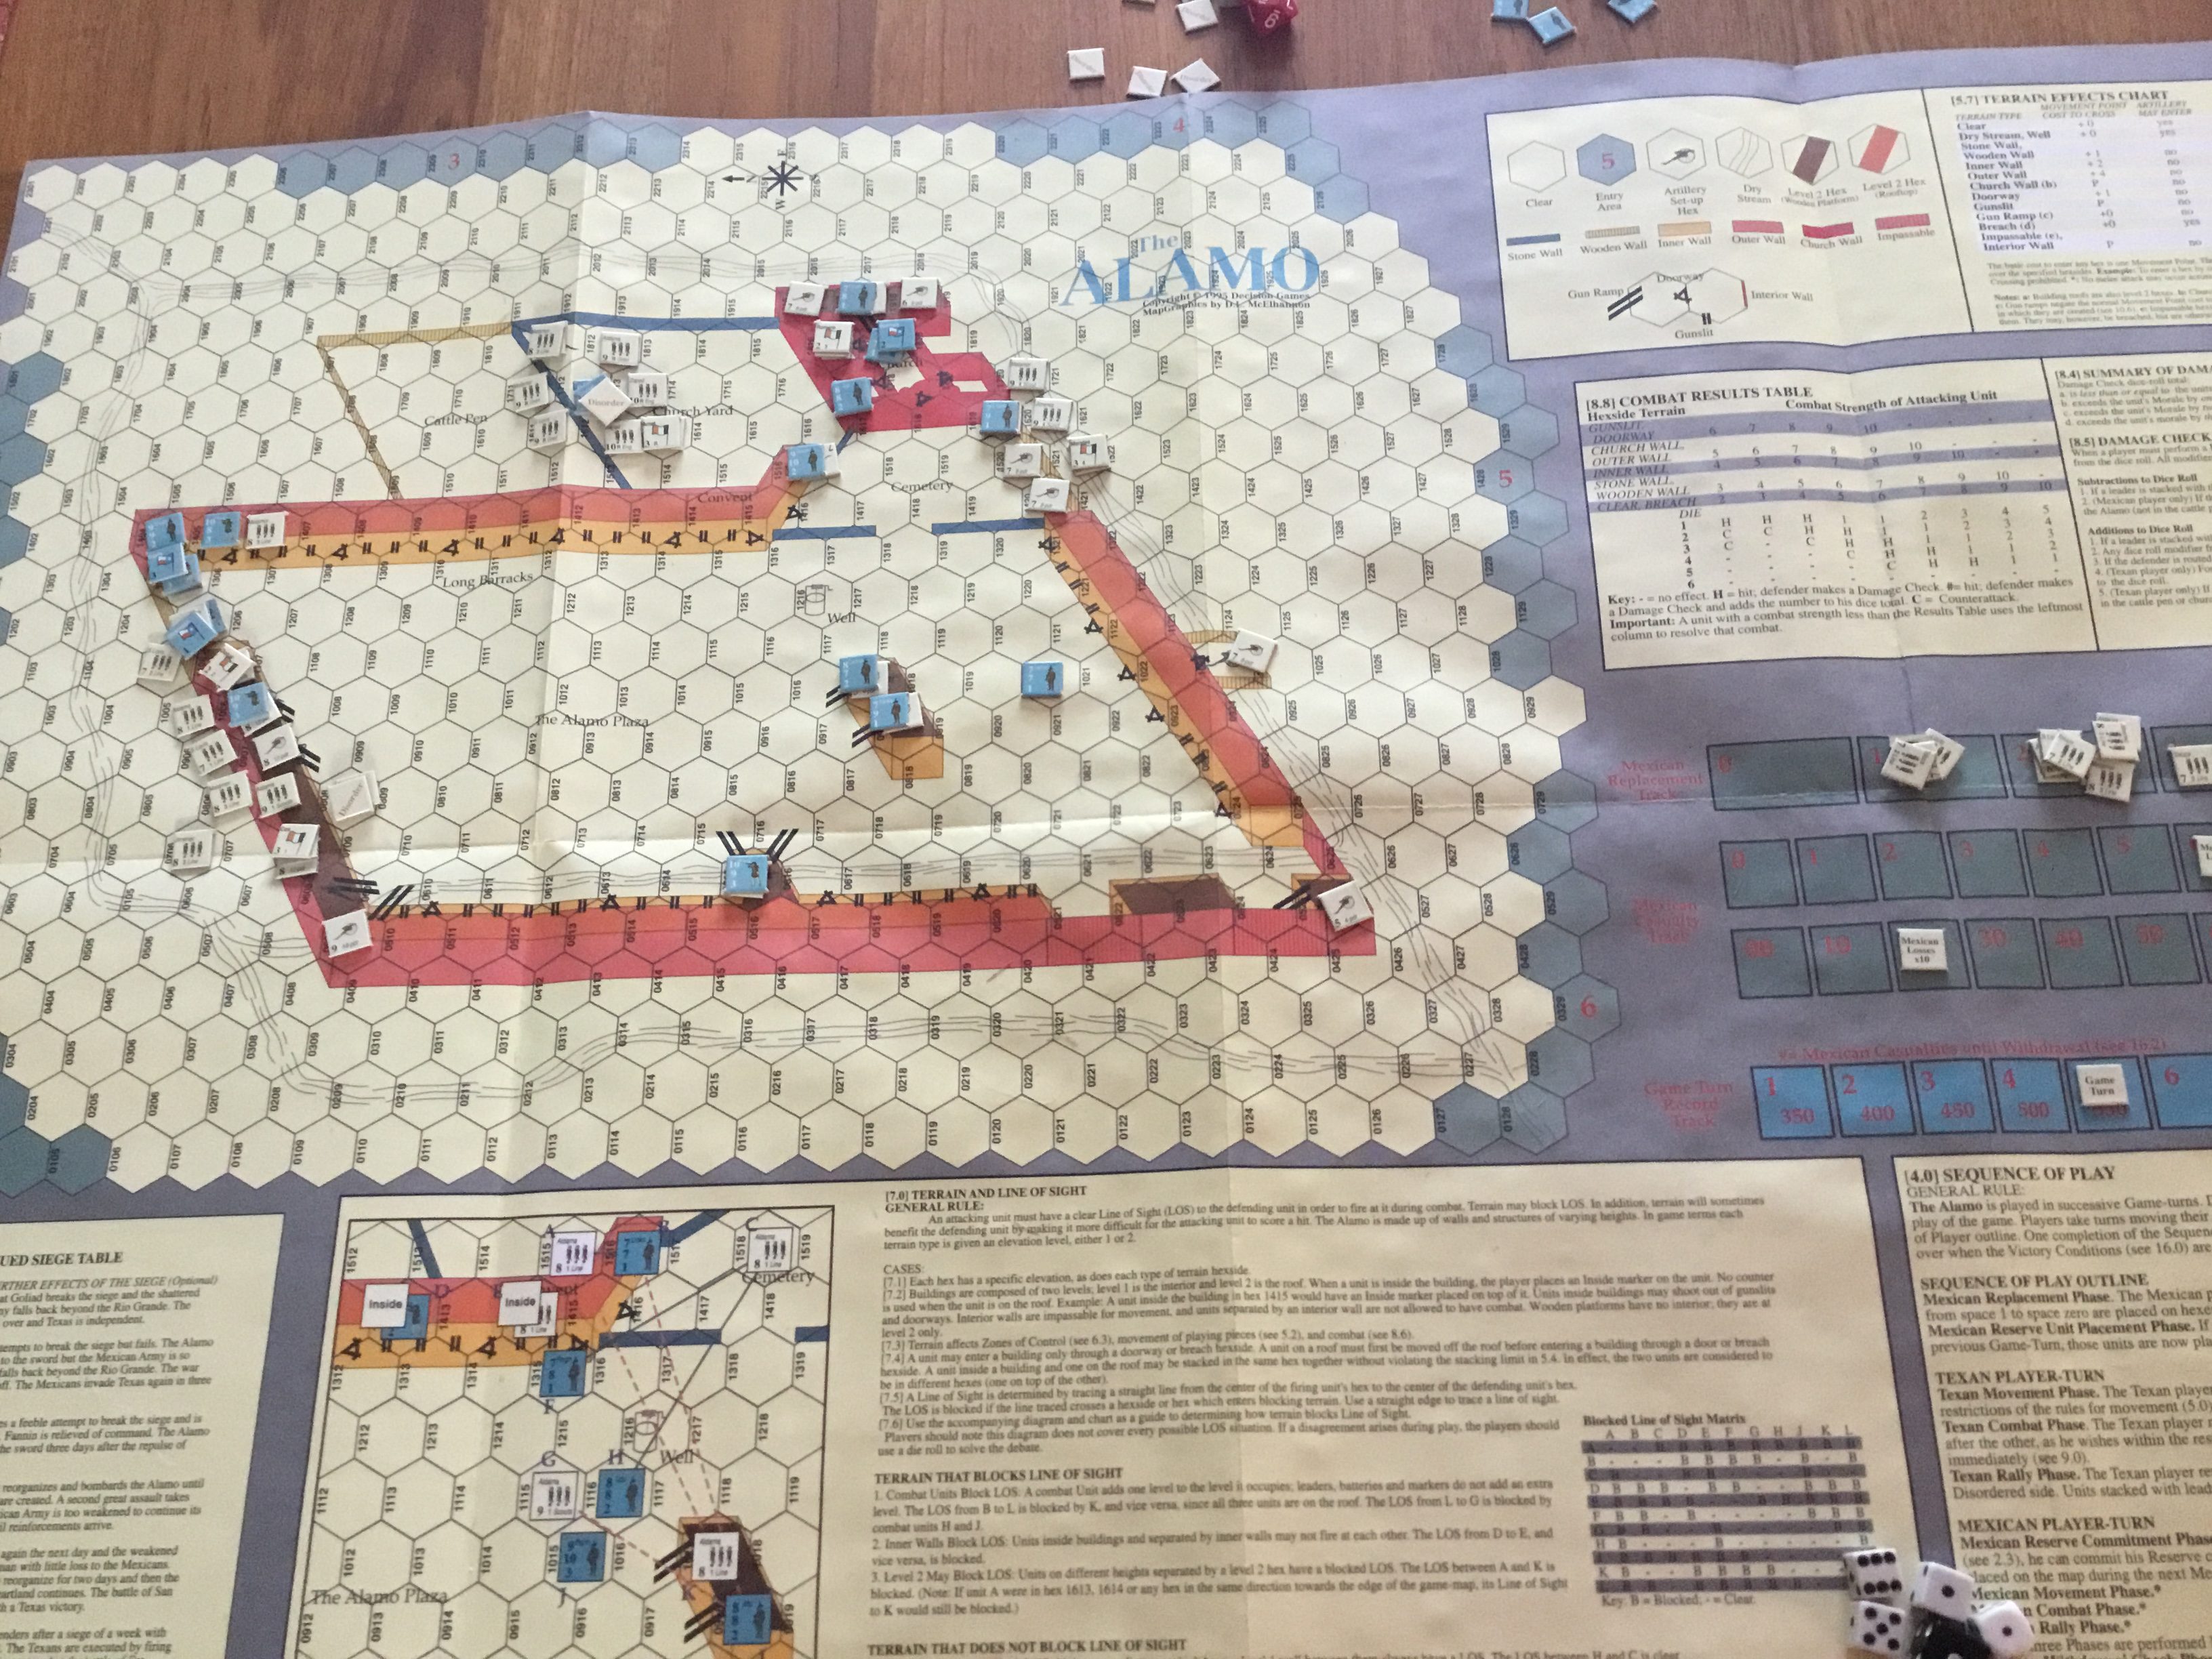
Finished up the fourth turn of The Alamo:  Victory in Death.

Figured out the casualty rules that had baffled me.  Silly me, just read the rules and interpret them literally.  Things will work out.

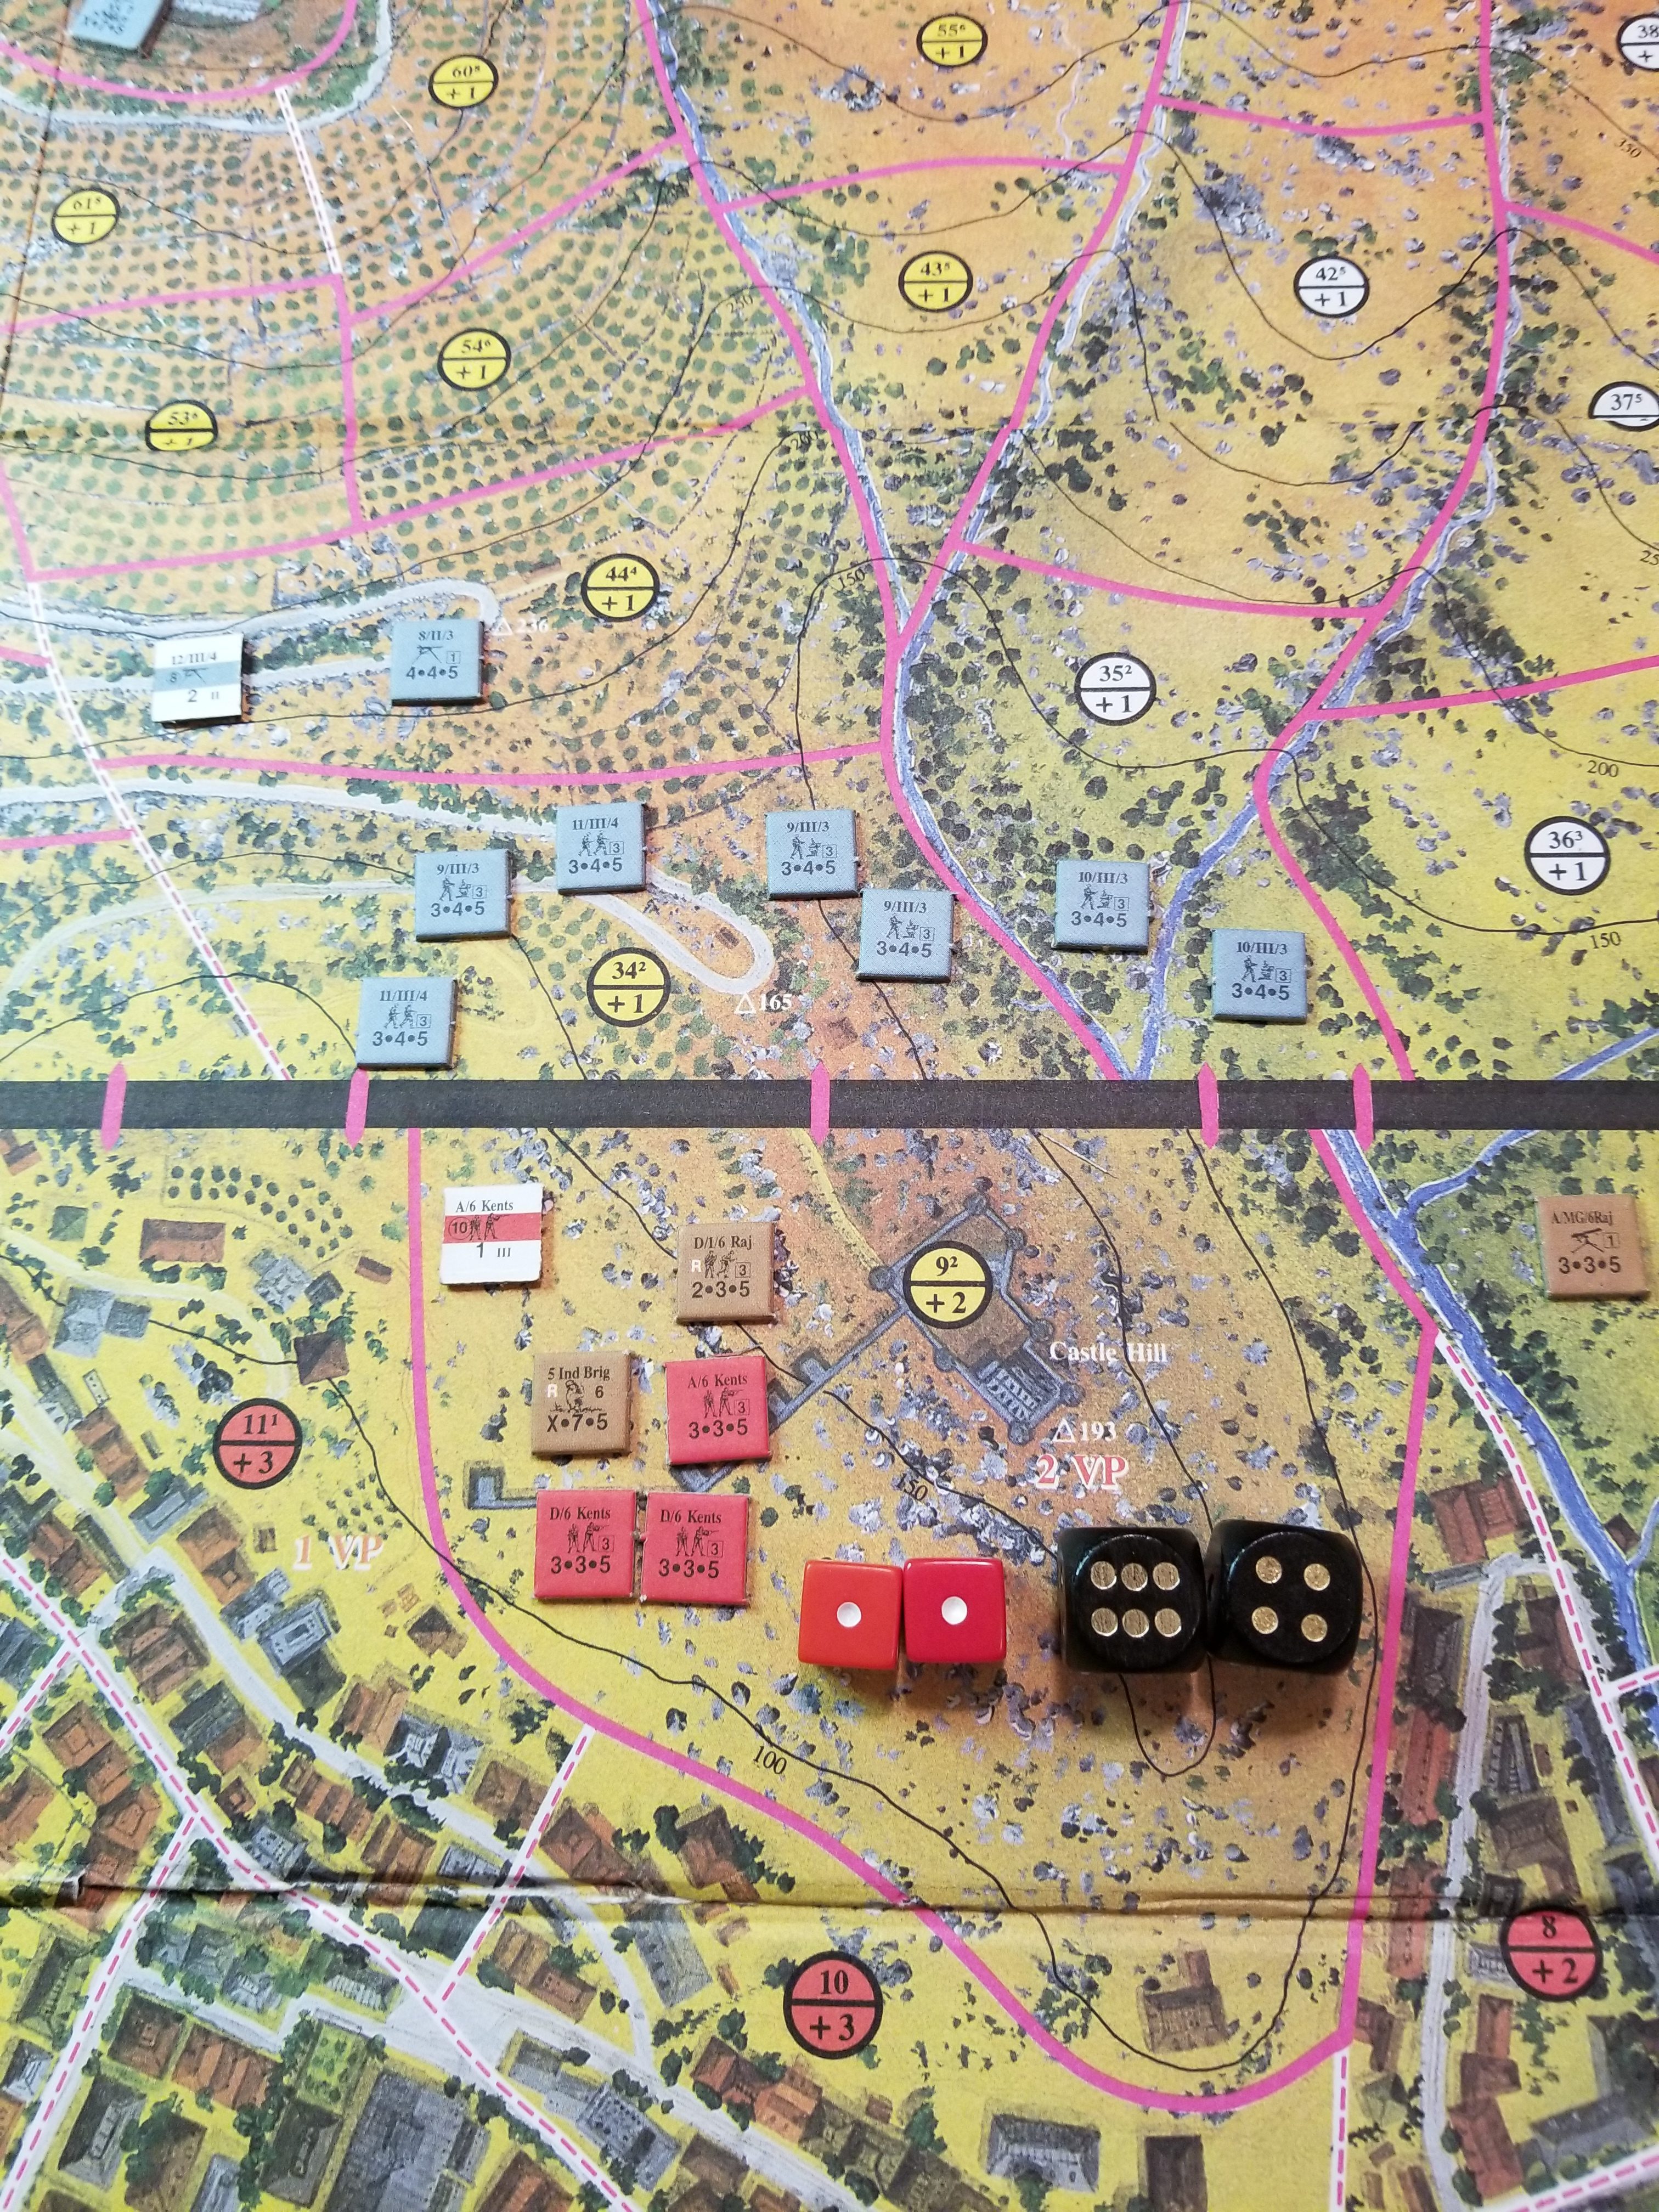
Crockett’s attempt to push out beyond the walls was a foolish.  Now surrounded and locked in , he’ll eventually be killed.  The west wall has been overrun and now all that is left is the time consuming chore of isolating each Texan unit and destroying it.  Reorganized Mexican units are flooding back onto the battlefield, and there seems little chance that the Texans can last another ten turns.

The initial setup is everything.  The Texans have to react quickly to stop any massed Mexican attacks, and the Mexicans, in turn, must be creative to exploit any Texan attempt to reinforce a threatened area by judicious of their reserve units.

It’s a tense contest for the first several turns.  Worth the time to play.

Crockett Surrounded Outside The Church. Church Isolated. North Wall Defenders Surrounded. Plenty of Mexican Replacement Units Ready To Come On Map. Pick It Up.


Fast Attack Boats AAR

During Round One the Israelis aggressively engaged the Egyptian ships, while the Egyptians fired just one missile and turned away . Both tactics seem to work. The Egyptians enjoyed some good luck and sank two of the Israeli boats . The Israelis also sank two vessels and had one boat remaining on the map. By the rules this is a victory for the Israelis. But, give in an asterisk.

Round Two also went to the Israelis . Both sides fired at maximum range and moved off the board. After two rounds the Egyptians have lost three boats and the Israelis have lost two.

The Egyptians changed tactics in Round Three, aggressively pursuing the Israeli boats. This tactic backfired, with three vessels sunk, with only one Israeli boat lost. This loss required rolling cosmic boxcars for a missile on the third leg of its flight. However, the round went to the Egyptians for remaining on the board.

Incoming Missiles. Turned counters are on their third – last – leg of flight.

Both sides husbanded their resources during Round Four. The Israelis sent out only one boat against three opponents. Both sides were cautious. The Egyptians launched only two rounds of missiles before turning away, with the Israelis launching only one round of missiles. Ironically, the sole Egyptian boat remaining on the board was sunk by the last Israeli missile. By RAW, it’s a draw.

Round Five was a a decisive defeat for the Egyptians . They lost four boats to only one Israeli boat. The fifth Egyptian boat suffered significant damage. Once again, the Israeli tactic of staying far away enough to allow Egyptian missiles to hit at maximum range paid off. The Israeli missiles retain their destructive punch even on the third and last leg of flight.

Saturating Targets

Overall, the Israelis were the winners, but the Egyptians still have a operational fleet ready for more.

Time Won’t Let Me

Great song……where is the horn section?

My attempt to combine Konarmiya and Freikorps can now be considered a failure. But, not from a lack of trying, no matter how misguided my obstinance was. In Freikorps, the game begins on the August 1 weekly turn and assumes Warsaw has fallen, with only scattered remnants of the Polish national army still fighting

The problem was Warsaw. Never captured it. The Poles held out, and with only four turns to take Germany, it was just too much. I did advance the Konarmiya Cavalry to the German border, but it wasn’t going to be enough.

There were Spartacist uprisings, and the French forces were withdrawn by a skittish government. A German advance into Poland was forbidden as a condition of Entente involvement. Despite these favorable outcomes, the Soviets just didn’t have the time.

Too many Soviet units were still falling back from the North, and also trying to hold off desperate bypassed Poles trying to get to Warsaw, or just west of it.

Their one excuse is that the Polish units, though out of supply, retained their full defensive factors. There offensive strength was halved. As long as they didn’t attack, remained stacked and were able to skirt Soviet units, the Poles had a good chance of making their way west. With the bulk of the Soviet army surrounding Moscow, the outliers just didn’t have the strength for attacks greater than 2:1, and lacked the number of units to surround and prevent retreats.

Still, an interesting exercise and one that I will try again.

Freikorps Map is the “inset” bottom left. Used Warsaw as common point of entry, along with hexes to the North. Konarmiya units advancing to Posen. Warsaw holds out, and stragglers head West.

More Russo-Polish

Finished up Konarmiya.  Was playing for an intended outcome, because I want to play Freikorps, Konarmiya’s sequel.  Decided to focus on attacking from south, with forces in the northern portion of the map tying down Polish units around Minsk.  Result was a marginal Soviet victory.

Freikorps assumes Warsaw has fallen, and the Soviets invade Germany.  Well, Warsaw didn’t fall, but it is under siege, and that’s a good enough place to start.

The rationale for continuing play is a situation so dire the victorious Entente Powers will ask for German help in stopping the Godless Red Hordes,  and the Soviets have enough troops and material to mount an invasion while besieging Warsaw.  Why Not?

Basic rules are the same for both games, with slightly different chrome.

I have to pay more attention to the reinforcement rules.  I allowed Polish National Army brigades to arrive next to a headquarters.  Wrong, only Polish Legion units can do that.  The former must arrive in cities/towns.  This helped the Poles recover from continuous Soviet attacks.

Also messed up the retreat rules.  Had periodic lapses where retreating units were not disrupted.  Disruption is nasty (cannot attack or move and defend at 1/2 strength), and hard to  shrug off (die roll of 6 with minimal mods).  Again, this oversight benefited the Poles.

Here’s two afterthought photos.

Soviet Offensive Develops Turn 6
Warsaw Besieged. Polish Units In North Pull Back. Northern Soviets Stare Slack-Jawed.

Grinding Pt.3 – Done

Really did set up a longer scenario.  All those counters on an absurdly small play-aide.  Really started playing.  Initial German losses, rubble placement…But it was no use.

Thunder At Cassino just doesn’t work for me as a solo game.  Too much of a shell game.  Wait, Shoot, Move, Wait?  Unless the game has a unique form of compartmentalization (for the lack of a better word – example might be actions that must be performed by one side, etc), you have to be Schizoid or suffering from Alzheimer’s to play two-player games solo.  It can work…..done it all my playing days.  But with this game, everything depends on the other side’s action or anticipated intent.  And, you just can’t hide intent from yourself.

So, down it will come.  Maybe shipped off to E-Bay at some point.  Someone else will enjoy it.  I know Tim won’t.  Not his cup of tea.

But, I really, really did start.  See.

Table Space Monster

Old Business

After a truly abortive first turn of the Thunder At Cassino campaign, decided to regroup by playing a DBA (2.2) game that’s been set up for…well maybe…six months.  Late Swiss vs. Some Mutant Army With Lots of Crossbows and Knights.  Hell….can’t find anything like it in the lists.

Hammered it out Sunday afternoon during boring NFL action.

DBA is what it is.  Simple, Quick and Generic.  I’d like to see some chrome…. like Swiss having an extra bound to simulate their speed/audacity in the attack, or range differentials between bow types.  But, for that, I need to try DBM, or some other system.

For The Quick and Dirty, You Go With The Devil You Know.  Never played it FTF, and that is how it should be played.  Ugh…..cut-throat tournament action….guys with rulers down to the eighth of an inch…..all that facing stuff……Ugh.

It was fun.  I’ll set up again, but with  Cavalry/Light Horse armies to stretch things out.

Here’s a semi-lucid photo summary of the game.

Turn One.  Light units Deploy. Swiss In Foreground.

Mid-Turn 5.  Things Get Interesting.

End Turn 5.  Pikes Struggling Against Bows(?!?)  While Knights’ Attack Develops.

End Game.  Knights Quick Kill Pike, Swiss Left Wing Shattered.


Grinding Pt. 2

Decided to go with the other mini-introductory scenario, Assault on Castle Hill.

Probably missing something, but the tactical options are limited.  After three play-thrus came to the conclusion that the only option for the Germans was to  kill the outpost units using a first impulse artillery attack.  Second impulse then into the outpost units’ area, with the rest of the turn involved taking fire from the adjacent hex.   Turn 2, move-in to Objective Area 9, take the beating and hopefully win the close combat.

Big lesson learned…..one  attack can finish things.  Take a look at this photo of a Artillery Bombardment dice roll.  Yikes.  Game Over….BLAMMO.

The scenario does serve its purpose as valuable learning tool.

Going to continue the grind and now, yes today, set up one of the two longer scenarios.

Grinding

Been working up for a solo play of  Thunder at Cassino.    It’s one of the heirs to Storm Over Arnhem, but with more chrome.

Machine Gun Units and Rubble  impede movement, while terrain regularly effects combat.   The player with Tactical Advantage can designate a Night Turn at any time, using fire and movement modifiers favoring the attacker.

I decided to set-up one of the Introductory (2 Turn) Scenarios – Counterattack At The Roundhouse.  Knowing quite well my excessive problems with a first play-thru, I downloaded the Series Replay from The General Volume 24, Number 6 as a guide to RAW.  These back issues can be found at View From The Trenches.  This is also an ASL site.  Ahhhh…..come on, give ’em a couple of quid.

The positive of all of this programmed stumbling is that one actually learns about the game.  The negative is that it’s not fun by any means (I’d suggest some type of alteration to take the edge off), but it does help you come to grips with RAW, and also offers insights into game play.

Now that this grinding is over, I’ll set up the other introductory scenario and try it on my own.  Grinding is, after all, very appropriate for an Italian Campaign game.

Wrong First Impression?

Mine was, well, OK.  But, I’ve more than come to terms with The Chosin Few’s rules and appearance.

Really, really, really like the game system.  Situation fraught with peril all the time, especially with the shell-game of interdiction to stop ChiCom movement, or hoard for DRM on attacks.  Oh yes, you have to spend the chit before rolling…..took awhile to get that one right.

Well, the other thing I didn’t get right was ChiCom movement priorities.  This was a significant (in that bold and italics mood), error.

I was defaulting to white, as per rules.  Result was hordes of ChiComs stooging around South, far from the battle.  Figured it would get really bad during the Third (Breakout) Mission.  Hell, I made it easily through the first mission (despite not discarding cards!), and was hammering the Godless Red Hordes during the second (Retreat In Another Direction) mission.

Ahhhhhh… but for that buzzkill that is RAW.  Multiple routes out of a space, check the color of the arrows against US positions.  If they match, they will follow.  Default to white only occurs if there is no match.  Well, that changes everything……

Still really, really like this and it has given me some ideas about working on this thread.

Trying To Win

This post is more in the “notes to myself”category for the next time I pick up either Hapsburg Eclipse (HE) or Ottoman Sunset (OS).

  • Use actions to provide resources to other theaters.  Easier to do early in OS as there seems to be less pressure early.  You have to have those victories in other theaters for a chance.
  • Always keep the Hungarians happy.  The die roll for them much easier than Croats or Czechs. (HE only).
  • Husband your stop advance chits (Yilidrim (OS) and Radio Intercepts (HE) ) as long as you can.  This is especially true given the horrific effects of the -1 DRM for weakening of National Will.
  • Likewise with the Mackensen chits.  The higher of two roles should be saved for when disaster truly looms.  And disaster is always looming by the third deck.
  • Don’t close down the Polish front if it will cost you a loss in National Will.  Only try it when you have the luxury of spending the two actions.
  • Oh, yeah…..and roll either real high or real low whenever the occasion demands.